Overview
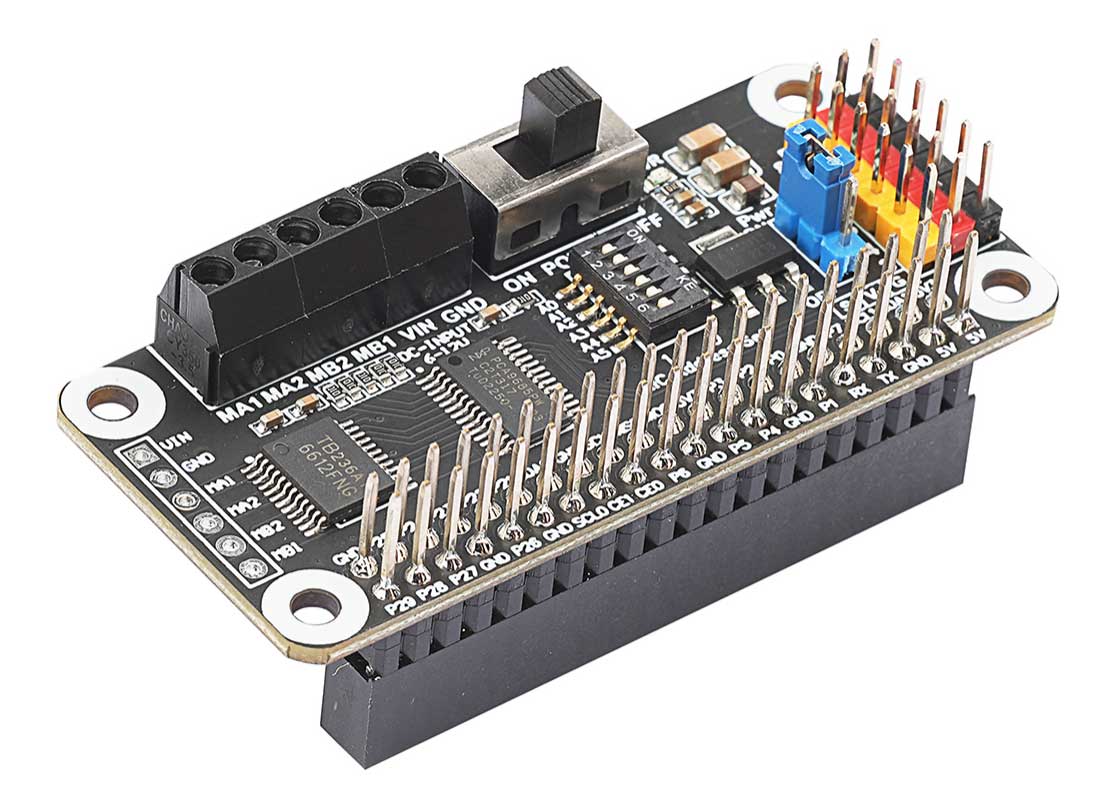
Motor And Servo Driver HAT is an module of DC motor and servo driver specially designed for Raspberry Pi. This module can drive 2 channels of DC motors and 6 channels of servos at the same time. It can make the desired function come true only through the I2C protocol control register
Product Parameters
| Supply Voltage | 6V~12V(VIN terminal or pin) |
| Logic Voltage | 3.3V |
| PWM Driver Chip | PCA9685 |
| Communication Interfaces | I2C |
| Motor Driver Chip | TB6612FNG |
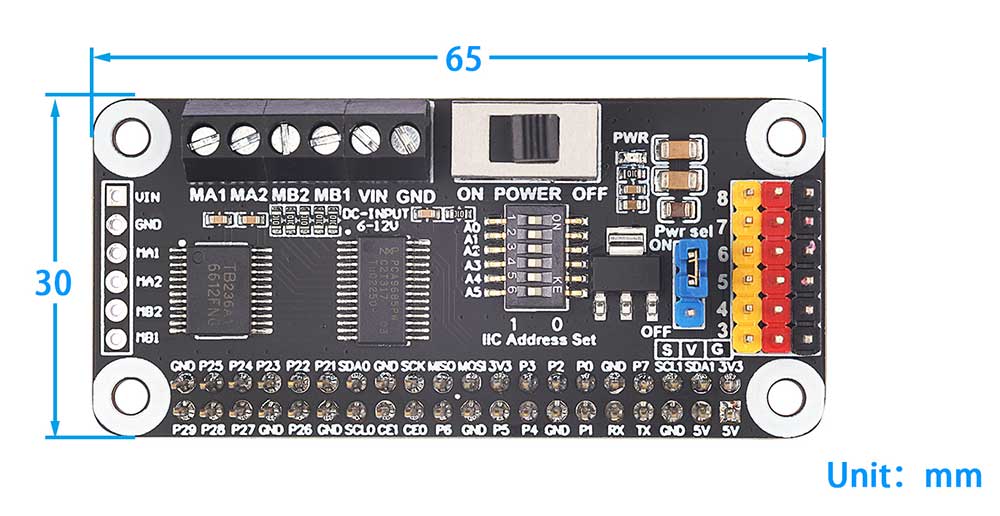
| Dimensions | 65mm(Length) x 30mm(Width) |

Usage
Instructions of Hardware Interface Configuration

Motor And Servo Driver HAT has designed a separate power switch. After power on, the POWER needs to be turned to the ON position. In addition, all the address lines of I2C are led out, and the address can be set by means of the DIP switch. The demo codes we provide are set the address to 0X7F(all the address bits are in "1" position), and the DIP switch settings are as follows:
 * Hardware Connection: Switch
 * A0 -> OFF                  A1 -> OFF
 * A2 -> OFF                  A3 -> OFF
 * A4 -> OFF                  A5 -> OFF
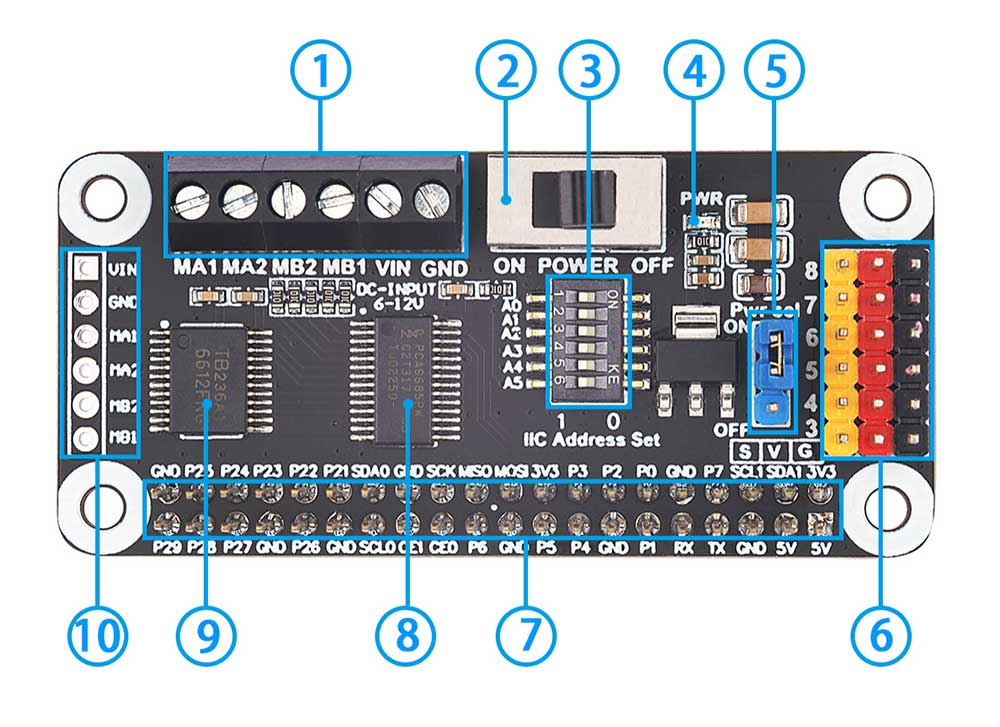
The interface definition is shown in the following figure:

1、Motor A、Motor B and Drive power input terminal block
2、Drive power switch
3、I2C address setting DIP switch: all I2C address lines are led out, and the address can be set through the DIP switch.
4、Power Indicator
5、5V power jumper cap: Select whether the 5V power supply of the module is connected to the 5V from Raspberry Pi
6、6 servos interface header
7、Raspberry Pi 40pin GPIO header
8、PWM driver chip PCA9685
9、Motor driver chip TB6612FNG
10、Motor A、motor B andpower input connector(2.54mm pitch header can be soldered)
Demo Codes
Since the bookworm system no longer supports the wiringpi library, the example program for this system uses the lgpio library, and for the bullseye system, the wiringpi library version of the example program can be used.
Wiringpi library installation
First, use the "gpio -v" command on the terminal to check whether the wiringpi library is installed. If the 2.52 message appears, the installation is successful. You can skip this part, otherwise you need to install it as follows:
sudo apt-get install wiringpiFor Raspberry Pi systems after May 2019 (early systems are exempt), an upgrade might be necessary:
wget https://project-downloads.drogon.net/wiringpi-latest.debFor the Raspberry Pi 4B version upgrade, if your download fails or is too slow, you can download it from the following link and then copy it to the Raspberry Pi board:https://github.com/seengreat/wiringpi-library
After downloading, install using the following command:
sudo dpkg -i wiringpi-latest.deb
gpio -v #
If version 2.52 appears, the installation is successful.
For the Bullseye branch system, please use the following command:
git clone https://github.com/WiringPi/WiringPi
cd WiringPi
. /build
gpio -v
Running "gpio -v" will show version 2.70. If nothing is displayed, it indicates an installation error.
If you got the error message "ImportError: No module named 'wiringpi'" while running the Python version of the example program, please run the following command:
For Python 2.x version:
pip install wiringpiFor Python 3.x version:
pip3 install wiringpiNote: If the installation fails, you can try the following steps for compilation and installation:
git clone --recursive https://github.com/WiringPi/WiringPi-Python.gitNote: The --recursive option will automatically pull submodules; otherwise, you need to download them manually.
Navigate to the downloaded WiringPi Python folder and input the following command to compile and install:
For Python 2.x version:
sudo python setup.py installFor Python 3.x version:
sudo python3 setup.py installIf you got the following error:

In this case, enter the command "sudo apt-get install swig" to install SWIG. Then compile and install using "sudo python3 setup.py install". If you receive messages similar to the following, it indicates successful installation.

Lgpio library installation
For bookworm systems, the sample program uses the lgpio library, and here is the installation command for the library:
wget https://github.com/joan2937/lg/archive/master.zip
unzip master.zip
cd lg-master
make
sudo make install
I2C Configuration of Raspberry Pi
Start the system configuration of Raspberry Pi:
sudo raspi-configEnable I2C Interface:
Interfacing Options -> I2C -> Yes
sudo rebootCheck the enabled I2C devices:
ls /dev/i2c* # at this time it will print:"/dev/i2c-1"
Install the I2C libraries:
sudo apt install i2c-toolsInstall python's smbus:
sudo apt install python-smbusTest the device address mounted on the I2C bus:
sudo i2cdetect -y -a 1Execute the demo codes
Python:
Access the directory of python:
cd /home/pi/Motor And Servo Driver HAT/raspberry pi/pythonExecute:
sudo python3 pca9685.pyC:
Access the directory of C:
cd /home/pi/Motor And Servo Driver HAT/raspberry pi/cExecute:
make clean
make
sudo ./main
Resources
Demo Codes for bullseye systemDemo Codes for bookworm system
Data Sheet
