1.Overview
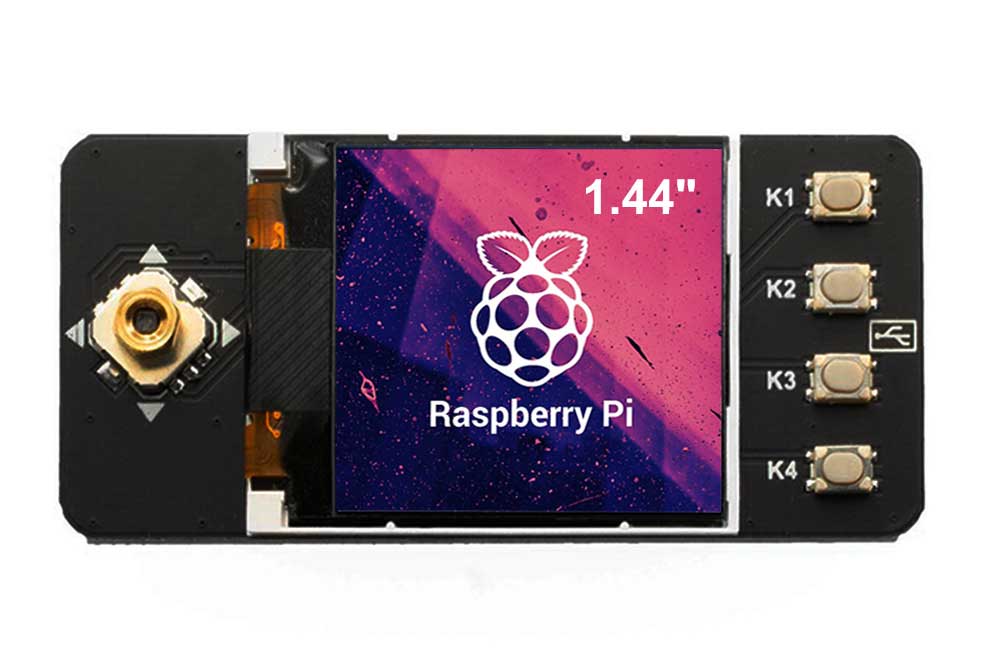
This product is a PICO-1.44 inch LCD display, resolution of 128 x 128, internal ST7735S controller, the control interface is SPI, we provide Raspberry Pi Pico C and python demo codes, which can draw dots, lines, rectangles and circles, and display English number characters
1.2Product Parameters
| Resolution | 128 x 128 |
| Control Chip | ST7735S |
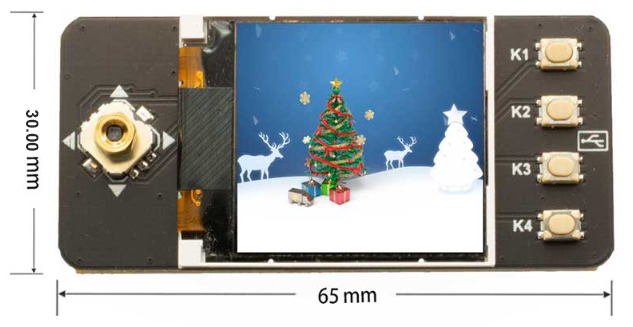
| LCD Display Area | 26.5.mm(W) x 25.5mm(H) |
| Screen Type | TFT |
| Operation Temp | -20 ℃ to +70 ℃ |
| Operating Voltage | 3.3V |
| Communication Interfaces | 4-wire SPI |
| Dimensions | 65mm(Length) x 30.00mm(Width) |
| Weight | 40g |
2.Usages
LCD interface | Pin function | Description |
VCC | VSYS | VDD(3.3V) |
GND | GND | GND |
SDA | GP7 | SPI data input |
SCK | GP6 | SPI clock input |
CS | GP5 | SPI chip selection, active at low level |
BL | GP13 | backlight control |
D/C | GP11 | Data/command control pin (high level represents data, low level represents command) |
RESET | GP12 | External reset pin (low level reset) |
K1 | GP8 | User button K1 |
K2 | GP4 | UserbuttonK2 |
K3 | GP3 | UserbuttonK3 |
K4 | GP2 | UserbuttonK4 |
LEFT | GP16 | joystick's Left button |
DOWN | GP20 | joystick'sDown button |
RIGHT | GP17 | joystick'sRight button |
CENT | GP18 | joystick'sCenter button |
UP | GP19 | joystick'sUp button |
2.2demo codes usage
2.2.1、C version demo codes
2.2.2.1、Raspberry Pico C/C++ Windows Environment setup
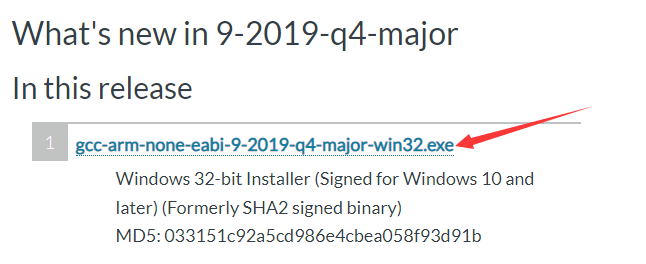
1. Installation arm gcc compiler
browser enters the web address:https://developer.arm.com/downloads/-/gnu-rm
Select the 2019-Q4 version to download and install,
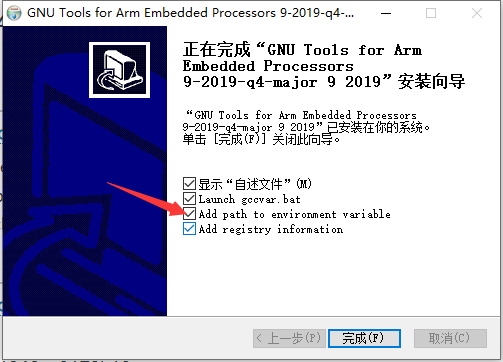
Remember to check it during the installation process
Add path to environment variable
2. Installation Cmake
browser enters the web address: https://cmake.org/download/

Select cmake-3.23.3-windows-x86_64.msi download and install by default
3. Installation Visual Stdio2019(Currently tried the latest 2022 version is also OK)
Need the 2019 version to find the URL to download, official website address:https://visualstudio.microsoft.com/zh-hans/downloads/
Tick during installation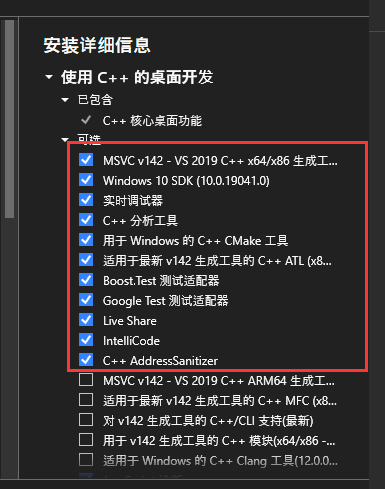
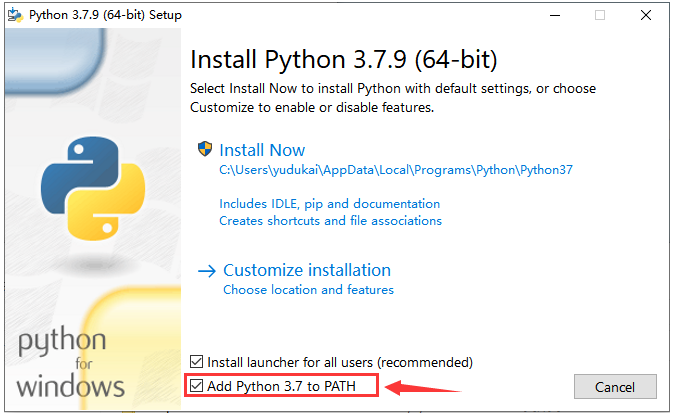
4. Tick during installation Python3.7
browser enters the web address:https://www.python.org/downloads/windows/
seek out Python3.7.9-Aug.17,2020
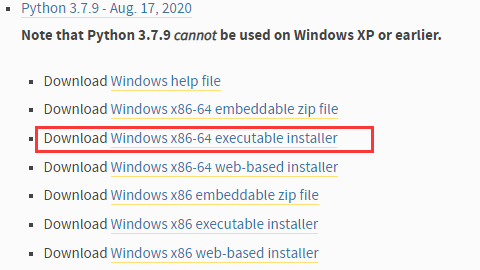
Select this option to install and download, remember to check it during the installation process
Add Python 3.7 to PATH
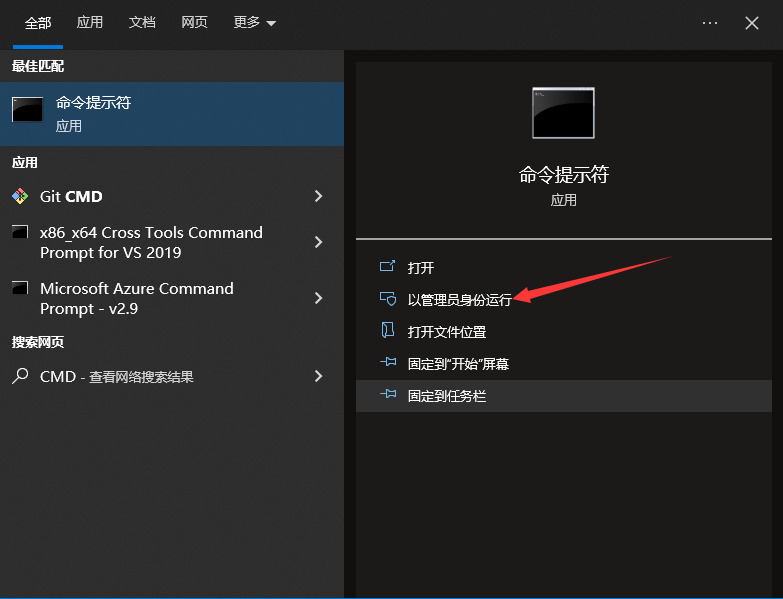
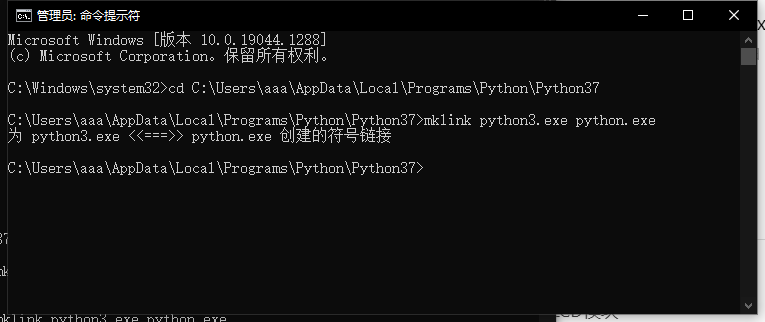
5. Open the start menu and search for cmd, run as administrator
Use the cd command to enter the python37 directory, the default address is:C:\Users\[ username]\AppData\Local\Programs\Python\Python37
run mklink python3.exe python.exe
6. Installation Git
browser enters the web address:https://git-scm.com/download/win
Download it yourself according to your system version
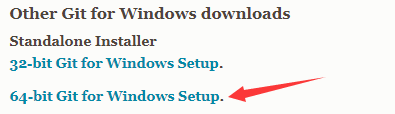
After the download is complete, it is installed by default.
7. Configure PICO-SDK
1) achieve pico-sdk and pico-examples
Greate a directory without a Chinese path, after installing Git, right-click in the blank space in the directory and select Git Bash Here.
Enter the command in the command window (one line at a time):
git clone -b master https://github.com/raspberrypi/pico-sdk.git
git clone -b master https://github.com/raspberrypi/pico-examples.git
2) Initialize
Enter commands (one line at a time):
cd pico-sdk
git submodule update --init
8. Set the pico-sdk path
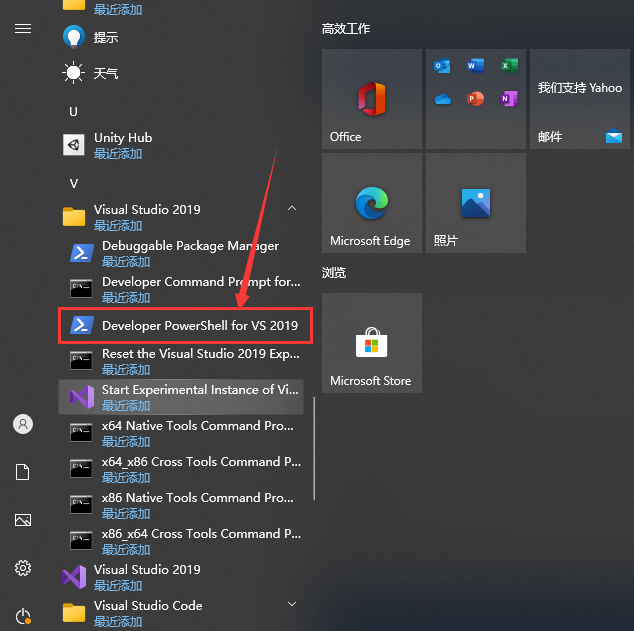
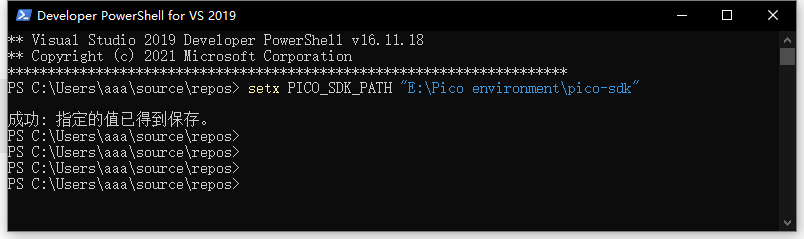
Found in the start menu Developer PowerShell for VS2019 and turn on.
Enter in the command window:setx PICO_SDK_PATH "[ Store the PICO-SDK path]\pico-sdk"
9. Compile the official demo codes
Close the command window and reopen it, using the cd command to navigate to the pico-examples directory.
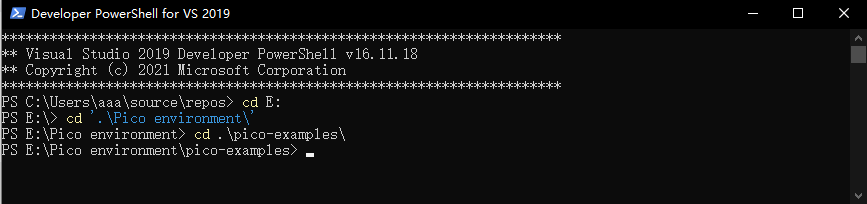
Then enter the following commands in turn:
mkdir build
cd build
cmake -G "NMake Makefiles" ..
nmake
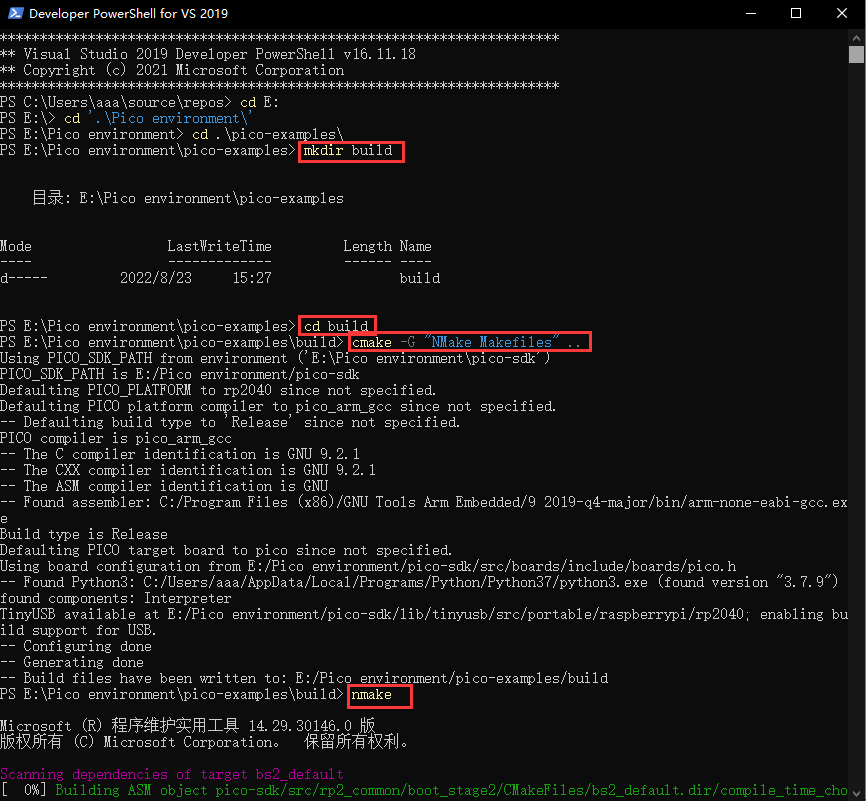
Wait for the compilation to complete,to complete Raspberry Pico C/C++ Windows.
10. Visual Studio Code Development environment setup
1) installation Visual Studio Code
Official website installation: https://visualstudio.microsoft.com/zh-hans/downloads/
2) Install by your choice vscode C Language plugins,the Cmake Tools plugin must be installed.
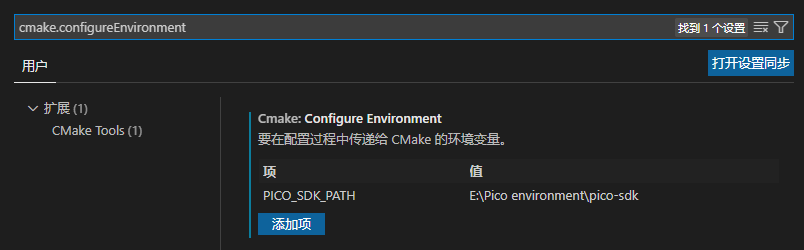
3) Open Settings in the lower right corner of vscode and enter it in the search bar:cmake.configureEnvironment
4) Add item PICO_SDK_PATH, the value is the pico-SDK storage address.
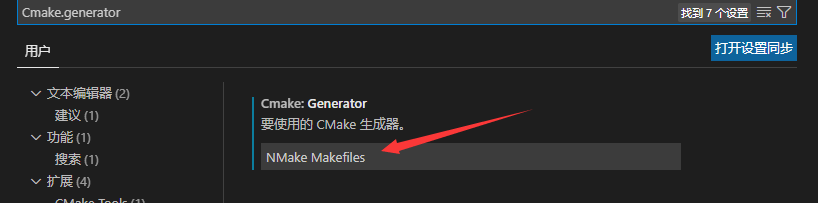
5) Set Cmake.generator, and continue to enter cmake.generator in the setting search column fill in NMake Makefiles.
6) Close vscode.
7) Open Developer PowerShell for VS2019 Enter code to reopen vscode.
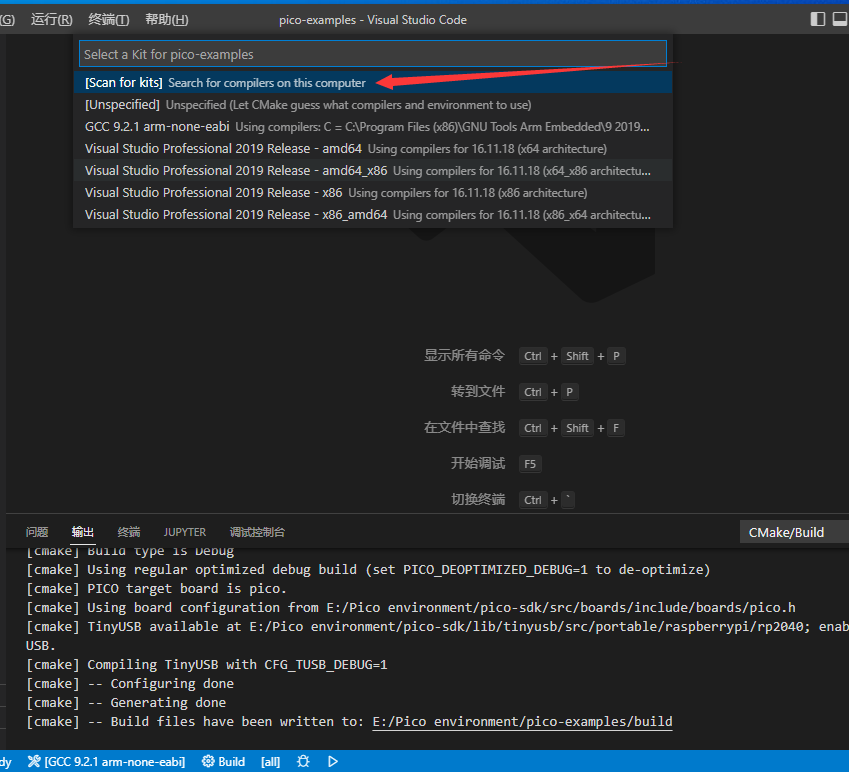
8) Open the pico examples folder in vscode.
9) Vscode Window Bottom.
 ①Compile the tool, select GCC 9.2.1 arm-none-eabi, if there is no option click to select the first item, wait for a little reload to appear GCC 9.2.1 arm-none-eabi.
② Press the build button and click the compile project
③ Select the project to compile
11. Download the USB serial output library
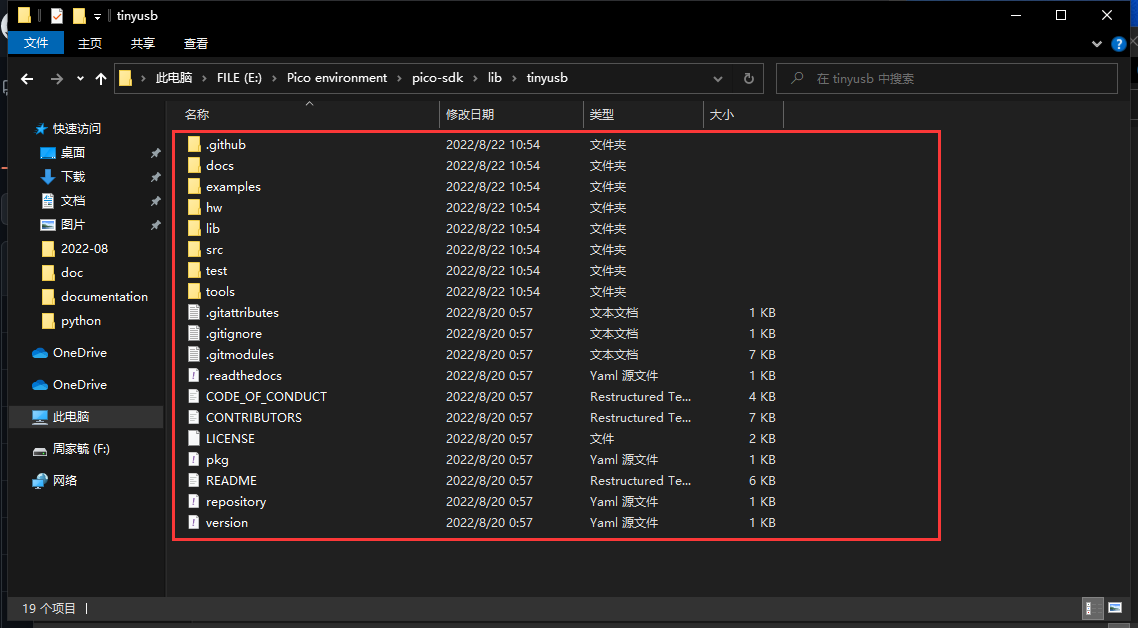
Open the pico-sdk directory, open the lib\tinyusb directory, right-click in the blank space and select Git Bash Here to enter the git clone https://github.com/hathach/tinyusb in the command window. If the kula fetch time is too long, you can directly open the URL https://github.com/hathach/tinyusb, download it from the web page, and copy all the files under the folder to the pico-sdk\lib\tinyusb directory.
2.2.1.2、Open the project, compile, and burn
1. Store the LCD_1INCH4 E-Paper Display folder in a non-Chinese directory, empty all files in the demo codes\c\ LCD_1INCH44\build folder, and create a new folder named build if there is no build folder.
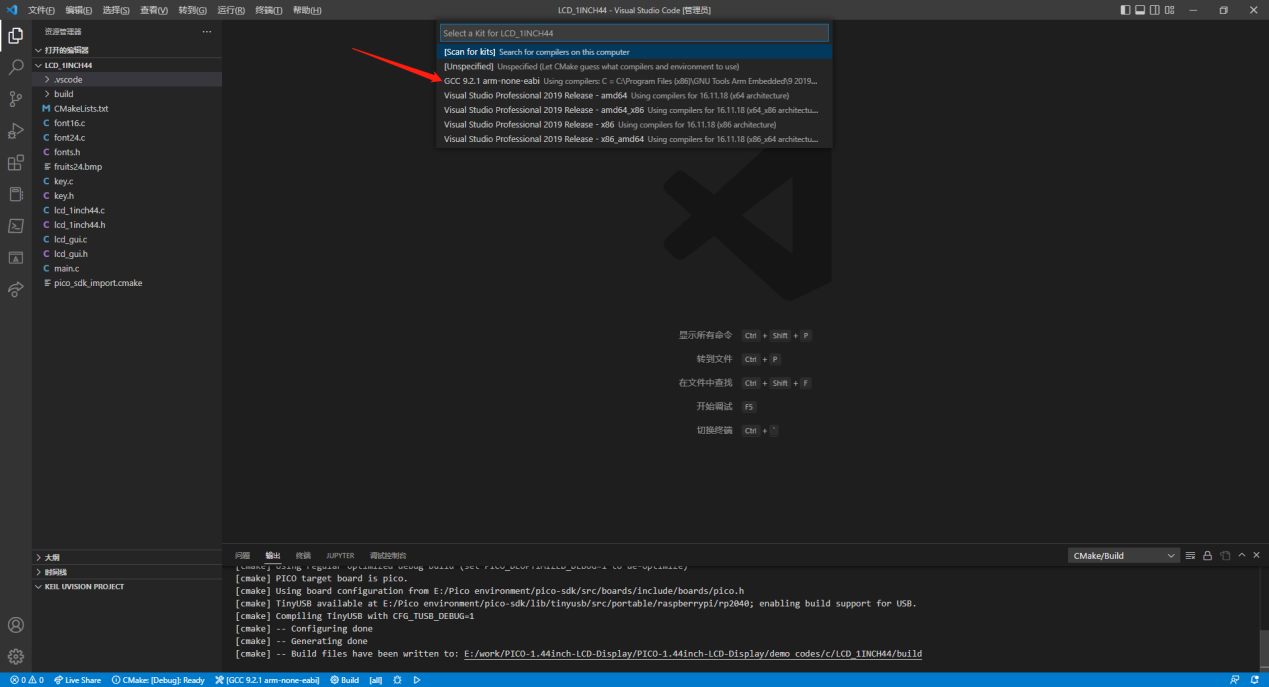
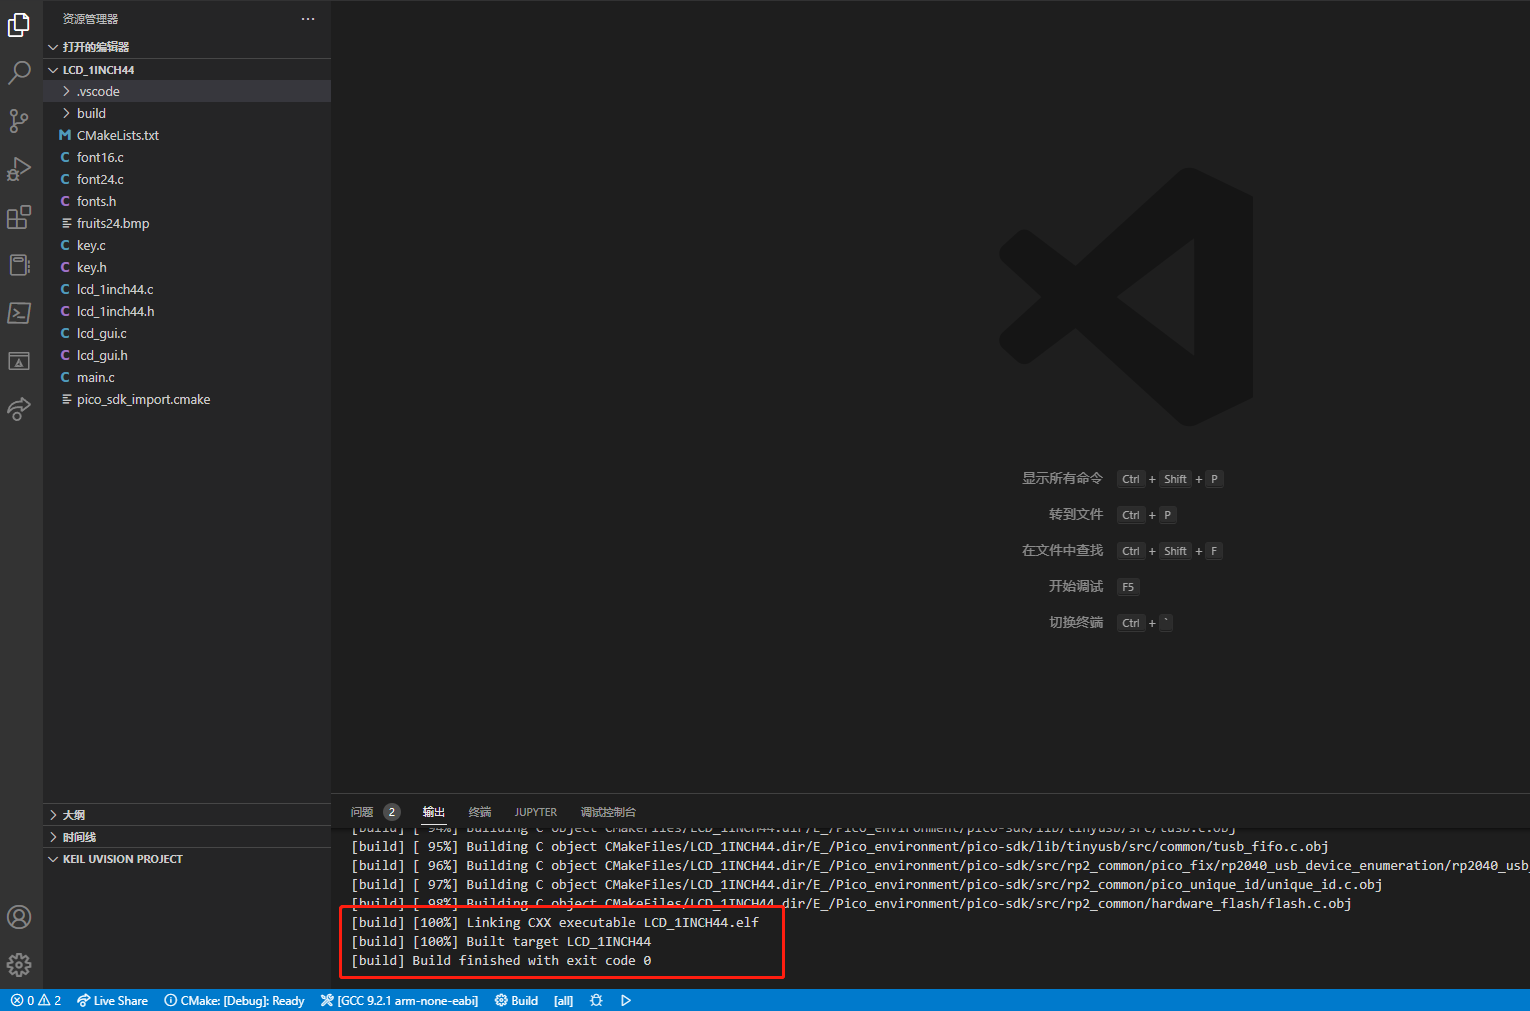
2. Open VSCODE using the method described in 10.(7) above to open VSCODE, open the demo codes\c\LCD_1INCH44 folder in the project directory in VSCODE, select Compile Project as LCD_1INCH44, and select GCC 9.2.1 arm-none-eabi in the pop-up options, as shown in the following figure.
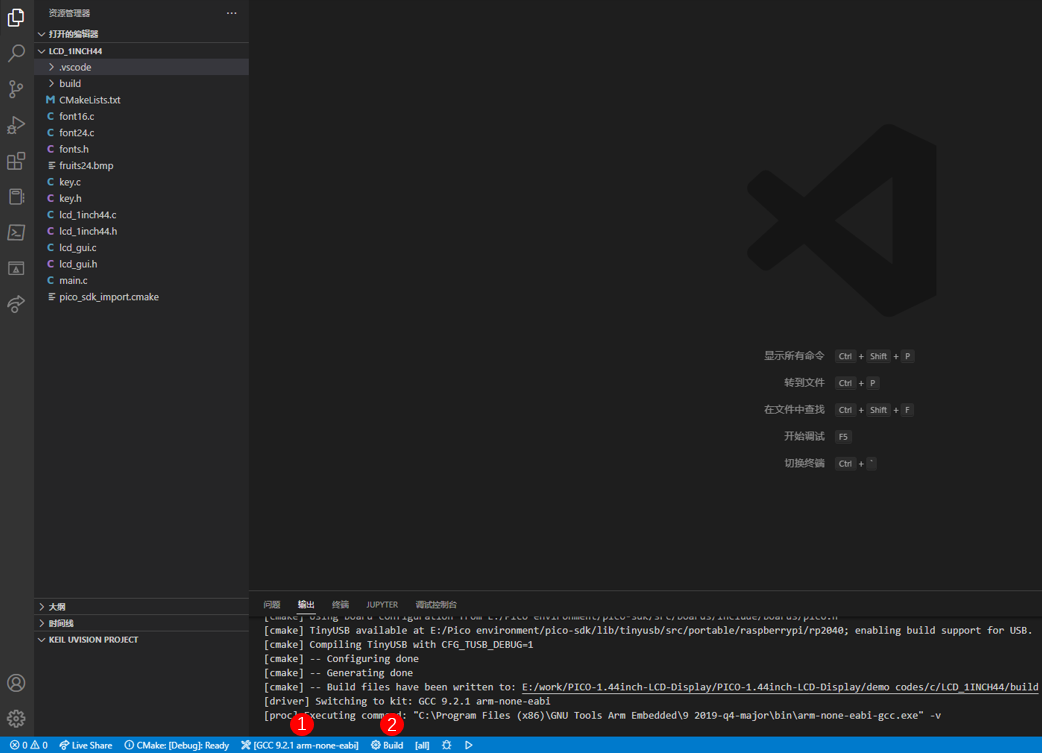
After completing the above operation, the ① marked in the figure below is the selected compiler, click ② Build to start compiling.
Complete the compilation as shown below.
3. Open the demo codes\c\ LCD_1INCH44\build contents and then find out LCD_1INCH44.uf2.
4. Press and hold the BOOTSEL button on Pico when the power is off, connect the computer with a USB cable and release the button, at this time pop up an RPI-RP2 disk directory, drag the LCD_1INCH44.uf2 file into the disk directory, and complete the burning.
5. Press the button and observe the change of the LCD display.
2.2.2 Python version demo codes
1. Installation Thonny
Thonny download:https://thonny.org
2. After installing Thonny, hold down the BOOTSEL button on Pico when the power is off, connect the computer with a USB cable and release the button, at this time pop up an RPI-RP2 disk directory, drag rp2-pico-20220618-v1.19.1.uf2 in the demo codes\python directory into the RPI-RP2 disk.
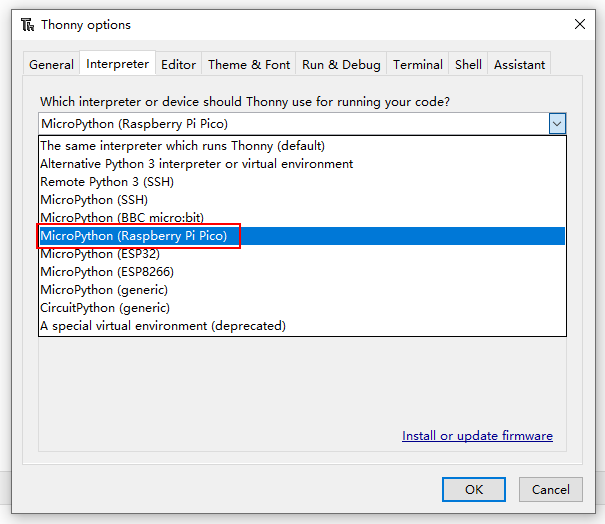
3. Right click the pico-lcd-1inch44.py in the demo codes demo codes\python directory, open with Thonny, click Tools - Settings, select MicroPython (Raspberry Pi Pico) as the interpreter in the interpreter bar, and set the Raspberry Pi Pico port (COMx: the port number x of the computer may be different), and then click OK.
4.Click the "Run current script" button or press F5 to run the current script and observe the LCD display. When the screen enters the button display interface, you can press the button on the board to view the screen change.