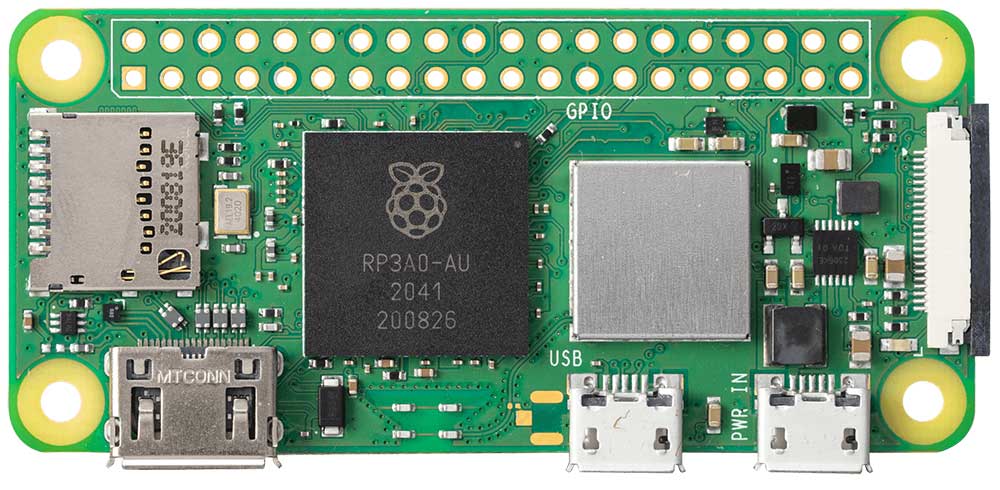
Product Overview
The Raspberry Pi Zero 2 W is a powerful miniature computer known for its compact and lightweight design, high performance, support for multiple operating systems, low power consumption, wireless connectivity, and Bluetooth capabilities. Compared to the Raspberry Pi 4B, it boasts a smaller and more portable form factor, making it suitable for a wider range of integration scenarios into various projects. While it may not match the raw power of the Raspberry Pi 4B, its capabilities are more than sufficient to handle a diverse set of development and application needs.
Product Specifications
| SOC | Broadcom BCM2710A1 |
| CPU | 1GHz Arm Cortex-A53 Quad-Core 1GHz |
| GPU | VideoCore IV GPU,OpenGL ES 1.1, 2.0 |
| Memory | 512 MB LPDDR2 SDRAM |
| USB | Micro USB On-The-Go (OTG) Interface, supports USB HUB expansion |
| HDMI | Mini HDMI Interface, supports HDMI (1.3 and 1.4) |
| Bluetooth | Bluetooth 4.2, BLE , onboard antenna |
| WIFI | 2.4GHz IEEE 802.11b/g/n |
| Power Input | 5V, via Micro USB or GPIO pins |
| Camera | CSI-2 Interface |
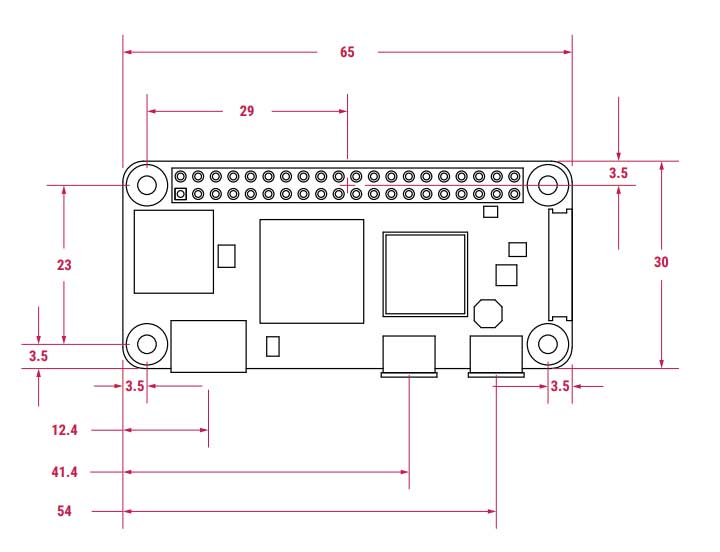
| Dimensions | 30 mm x 65 mm |
| Weight | 46.9 g |
Product Dimensions
Interface definition
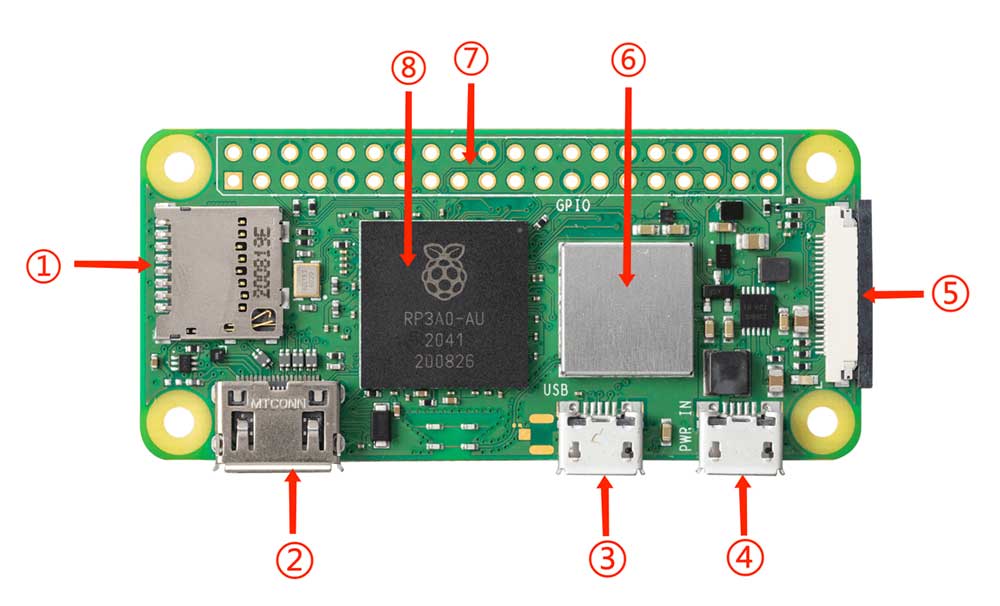
- 1 Micro SD Card Slot
- 2 Mini HDMI Interface
- 3 USB 2.0 OTG Port
- 4 Power Port
- 5 CSI-2 Camera Interface
- 6 2.4GHz Dual-Band Wi-Fi Bluetooth 4.2
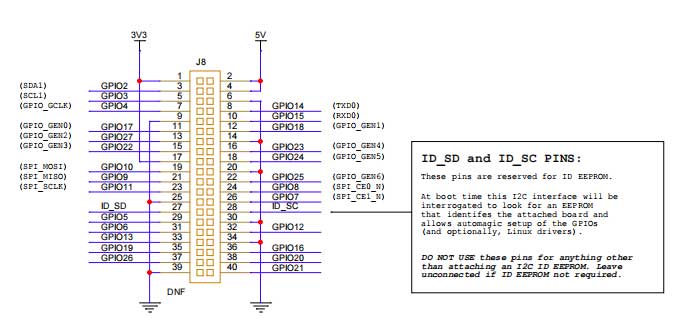
- 7 40-Pin GPIO Interface
- 8 BCM2710A1
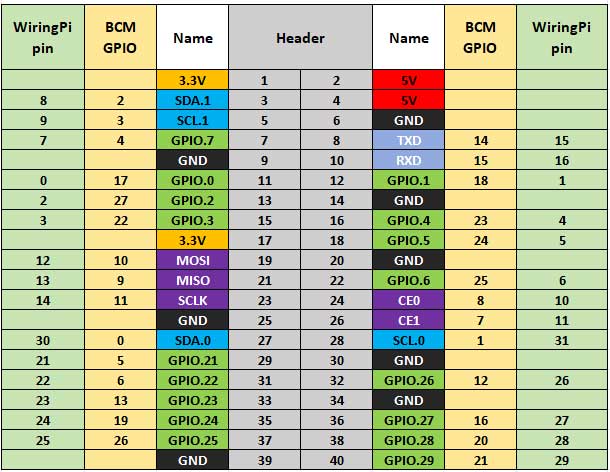
Usage Instructions
Prepare Your Items:Prepare a 16GB microSD card, a card reader, and your peripherals.
Install the System on Your Raspberry Pi
Method One (Recommended): Install Raspberry Pi OS directly to the microSD (TF) card using the official image writer.
1 Download Link: https://www.raspberrypi.org/software/
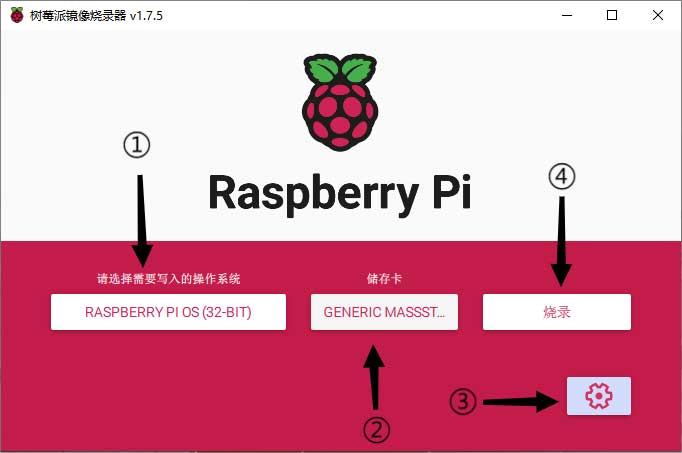
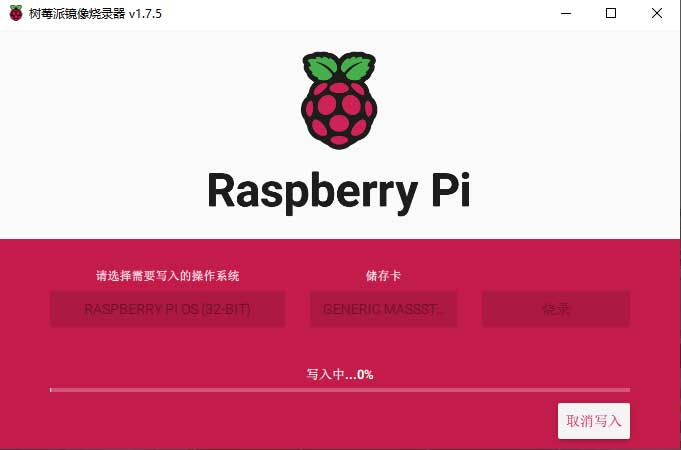
2 Run the image writer: Double-click the downloaded imager.exe file, then select the desired system, choose the TF card, and configure options such as hostname, enable SSH service, set the password for the 'pi' user, configure Wi-Fi, language, timezone, etc. Finally, click "Write" to burn the system onto the TF card.
Wait for the writing process to complete before proceeding to the next step.
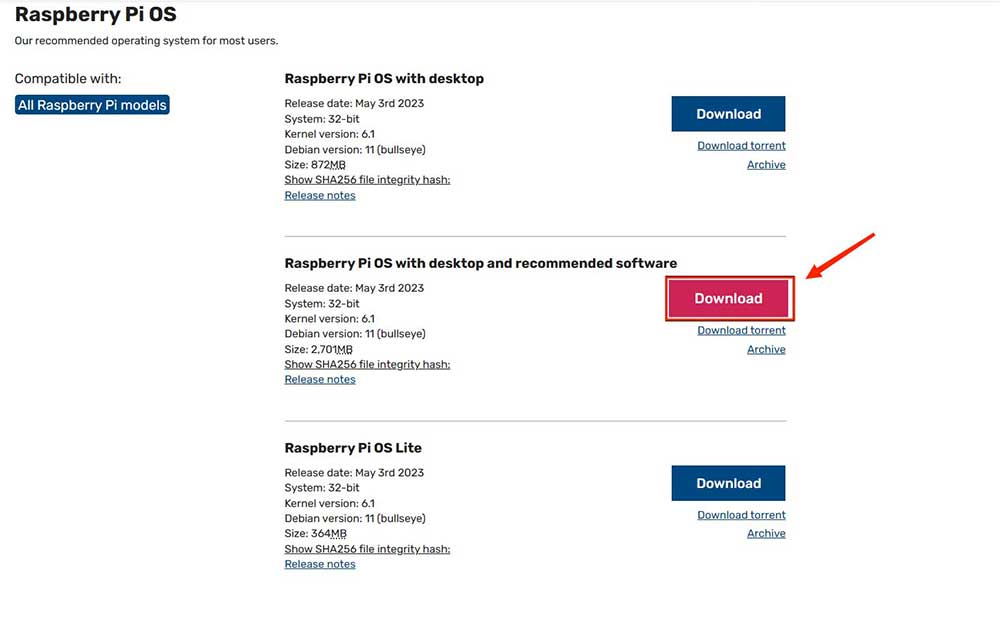
Method Two: Download the required system for Raspberry Pi 4 from the official website. If you are a beginner, it is recommended to download the "Raspbian Buster with desktop and recommended software" version. You can find the link here: https://www.raspberrypi.com/software/operating-systems/
This method involves downloading the system image separately and then writing it to the microSD card for use with your Raspberry Pi.
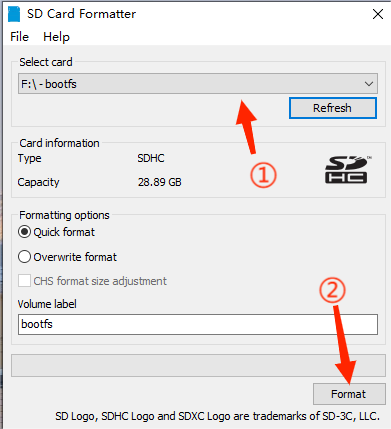
1.Format Your microSD Card
Insert the microSD card with a card reader into your computer.
Use SDFormatter (or other formatting software of your choice) to format your microSD card.
Open the software, select your microSD card, and click the "Format" option in the bottom-right corner to complete the formatting process.
2.Write the Downloaded Image to the microSD Card
Extract the downloaded image file.
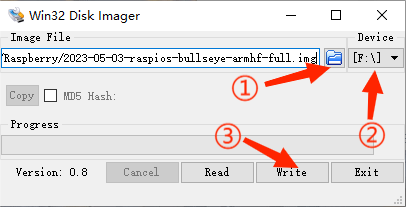
In this guide, we'll use Win32 Disk Imager for writing the image file, but you can choose another software if you prefer.
Open Win32 Disk Imager and select the extracted image file.
Choose your microSD card as the target device.
Click the "Write" button to begin writing the image file to the microSD card.
Add ssh and wpa_supplicant.conf Files
After the system installation process is complete, do not immediately remove the card reader. Instead, access the root directory of the microSD card and create two files: "ssh" (with no file extension) and "wpa_supplicant.conf". The "ssh" file enables automatic SSH service on Raspberry Pi startup for remote access. In the "wpa_supplicant.conf" file, add the following text to make the Raspberry Pi automatically connect to a specified Wi-Fi network:
country=your_country_code
ctrl_interface=DIR=/var/run/wpa_supplicant GROUP=netdev
update_config=1

network={
    ssid="Your_Wi-Fi_SSID"
    psk="Your_Wi-Fi_Password"
    key_mgmt=WPA-PSK
    priority=1
}
Insert the microSD Card and Connect Power
Insert the microSD card into the Raspberry Pi and connect a 5V 3A Type-C power supply to power up the Raspberry Pi. At this point, you should see the Raspberry Pi's power indicator LED stay solid red, and the ACT (activity) LED will blink.
Connect Peripherals
Use the Raspberry Pi's interfaces, such as the Micro HDMI and USB ports, to connect your peripherals like a mouse, keyboard, and monitor to operate your Raspberry Pi.
Resources
Related Links
Documentation, Including Hardware and Configuration:https://www.raspberrypi.com/documentation/
Getting Started Tutorials:https://www.raspberrypi.com/documentation/computers/getting-started.html
Notes
- Do not plug or unplug the module while it is powered!
- Please adhere to all warnings and instructions marked on the product.
- Keep this product dry. If accidentally splashed or soaked with any liquid, immediately disconnect the power and allow thorough drying.
- Pay attention to ventilation and heat dissipation in the usage environment to prevent component damage due to excessive temperatures.
- Do not use or store this product in dusty or unclean environments.
- Avoid using this product in environments with alternating hot and cold conditions to prevent condensation that could damage components on the product.
- Handle this product with care; dropping, knocking, or vigorous shaking may damage circuits and components.
- Do not clean this product with organic solvents or corrosive liquids.
- Do not attempt to repair or disassemble this product. In case of a malfunction, please contact our company promptly for repair. Unauthorized repairs may damage the product, and resulting damage will not be covered under warranty.
