Overview
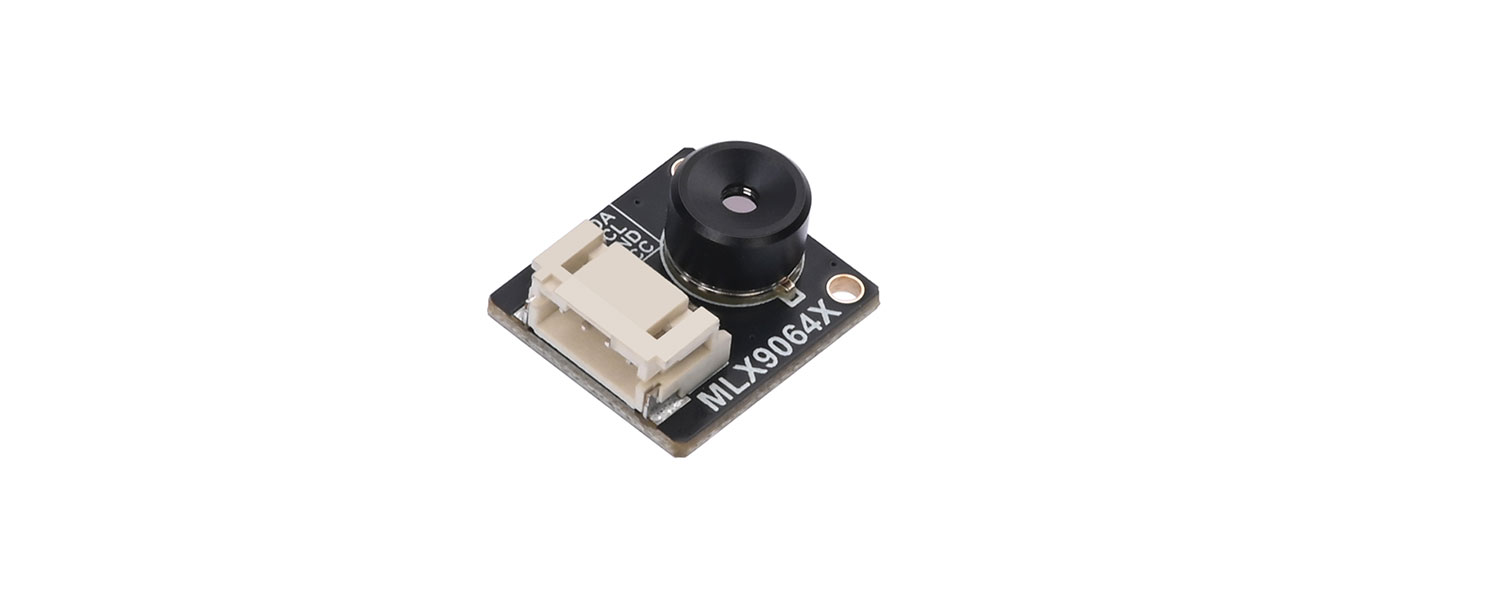
Thermal Camera MLX90640-D110 is a far-infrared thermal sensor array designed with Melexis MLX90640. With a resolution of 32*24, it provides great performance for applications that do not require high-resolution images or high frame rate, and provides a cost-effective alternative to more expensive high-end infrared thermal camera. Typical applications for the MLX90640 include fire protection systems, intelligent buildings, Intelligent lighting, IP/surveillance cameras, HVAC equipment and vehicle seat occupancy detection.
This product provides demo codes based on Raspberry Pi platform. The demo codes is divided into C and python versions, both of which include thermal image display function.
Specifications
- The working voltage is 3.3v/5v
- I2C interface communication, the highest speed can reach 1MHz
- Noise Equivalent Temperature
- Difference (NETD) is 0.1K RMS @ 1Hz refresh rate
- Support 0.5Hz~64Hz refresh rate
- The field of view is 110 ° × 75°
- The temperature measuring range is -40 ℃ ~ 300 ℃, and the absolute accuracy is ± 2 ℃
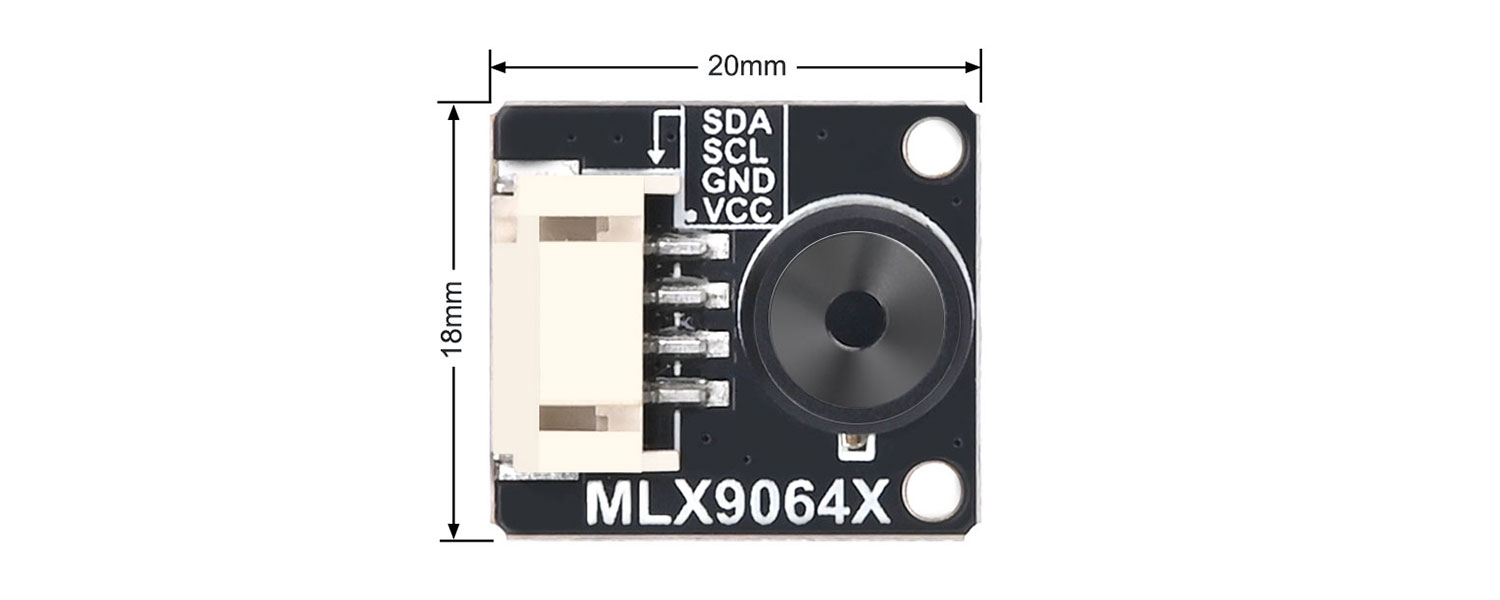
- Dimensions: 20mm(length) x 18mm(width)
MLX90640
I2C Communication:The communication method of MLX90640 sensor is I2C bus, the default address of the device is 0X33, and the highest speed of its I2C interface can reach 1MHz.
Bad Pixels: The original manufacturer of the sensor allows less than 4 bad pixels when the sensor leaves the factory, so the module may have a certain probability of having bad pixels, but each bad pixel is marked in the EEPROM table. For this, the original manufacturer's suggestion is to use the average value of adjacent pixels instead.
Frame Distribution:MLX90640 has a total of 768 measurement pixels, half of which is measured in each frame of data, that is, 384 pixels. To complete the measurement of 768 pixels, it needs to measure 2 frames. There are two modes of pixel distribution of each frame data, which are called TV mode and Chess mode in the data sheet. TV mode is in line units, and each frame only measures odd or even lines. Chess mode is in pixel units, and each time the pixels are interleaved measure 384 pixels. We also call the above two modes "line interleaved mode" and "pixel interleaved mode". The device is calibrated in Chess mode when leaving the factory. The theory is that the accuracy of this mode is relatively high, so it is recommended to select the Chess mode.
Measurement Rate: That is, how many frames of data are measured per second, call the MLX90640_SetRefreshRate function to modify the measurement rate to 0.5Hz, 1Hz, 2Hz, 4Hz, 8H, 16Hz, 32Hz and 64Hz. When it is set to 64Hz, the noise is relatively loud, the image display is chaotic, and the image quality is low. When it is set to less than 16Hz, the image display will not be smooth enough and affect the viewing effect, so it is not recommended to set it to a rate of 8Hz or less. Since the refresh rate of ordinary cameras is basically around 15Hz, it is recommended to set the measurement rate to 16Hz.
Usage
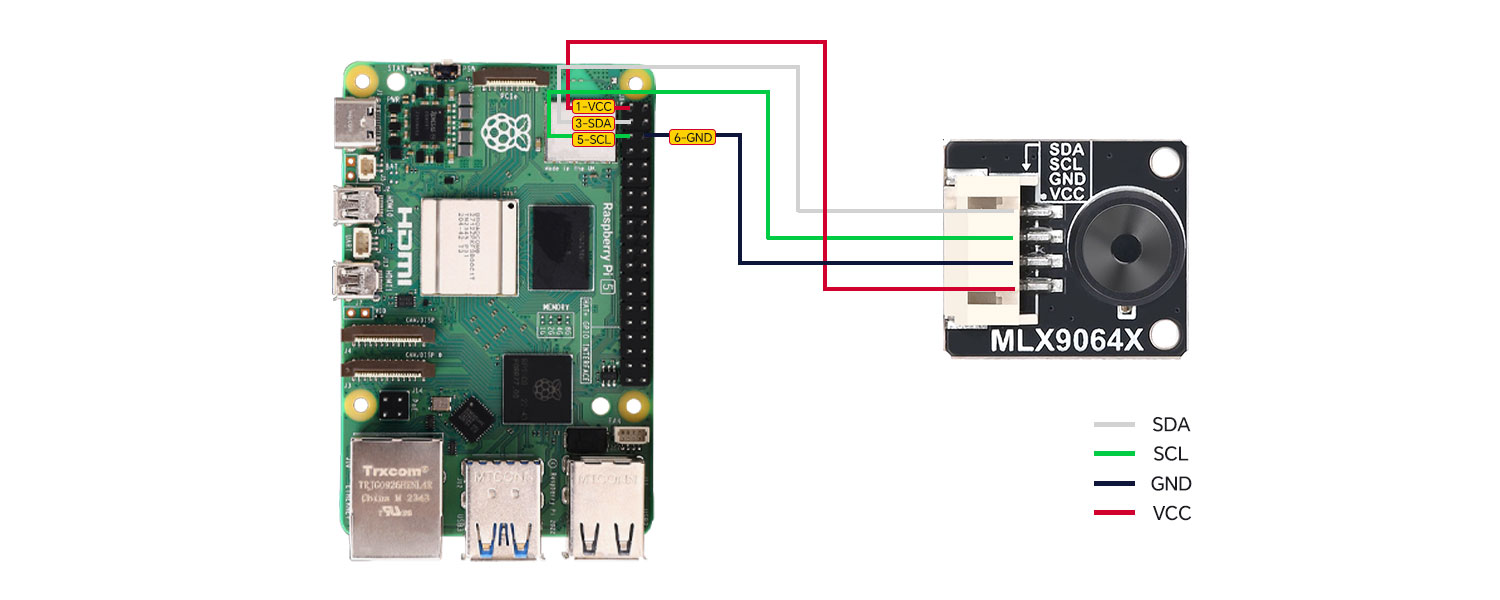
Module and Raspberry Pi Connection Instructions
Notice:
1. Please check the power supply before power on to prevent reverse connection, and do not plug and unplug with power while working
2. Do not touch the core components with both hands directly when the product is working, and do a good job in electrostatic protection
3. It is recommended not to use too long cables to connect the module, otherwise it will easily lead to EEPROM write error and failure
| Module Pins | Raspberry Pi BOARD Number | Function Name | Wiring Instructions |
|---|---|---|---|
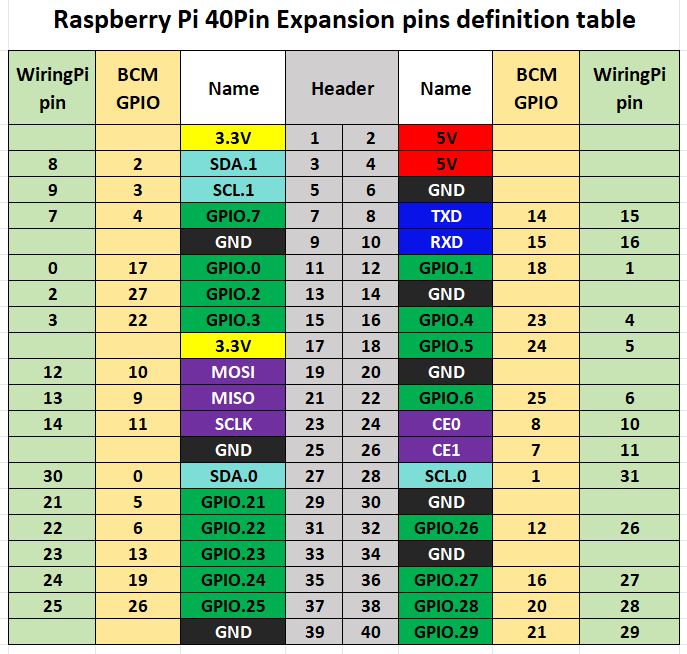
| GND | 6 | GND | GND |
| VCC | 1 | 3.3V | VCC |
| SDA | 3 | SDA.1 | I2C Data |
| SCL | 5 | SCL.1 | I2C Clock |
Demo Codes
This product provides demo codes based on Raspberry Pi mainboard, which is divided into two programming languages: C++ and python. For the convenience of users, Melexis provides a C++ driver library. The underlying I2C driver in the code is implemented by the I2C Driver related functions in the library, and the acquisition of temperature data is also implemented by the API related functions in the library. The C++ version code uses the CImg image processing library for image processing and display, while the python version code uses the PIL (Python Image Library) library and the Tkinter module.
IMLX90640 Driver Library
The library is provided by Melexis and is divided into two parts: I2C driver and API function. When using the project normally, the code should contain the following 4 files:
MLX90640_I2C_Driver.h–header file that contains I2C related function definitions
MLX90640_I2C_Driver.cpp or MLX90640_SWI2C_Driver.cpp–file that contains I2C related functions
MLX90640_API.h–header file that contains MLX90640 specific function definitions
MLX90640_API.cpp – file that contains MLX90640 specific functions
MLX90640_I2C_Driver.cpp is hardware I2C, MLX90640_SWI2C_Driver.cpp is software analog I2C. Users only need to use one of them according to the actual situation, this product uses hardware I2C. MLX90640_API.cpp is based on the I2C driver. Users can read and write MLX90640 by calling the API, and should not modify the definitions of these functions.
Raspberry Pi I2C Configuration
Start the Raspberry Pi system configuration:
sudo raspi-config
Enable I2C interface:
Interfacing Options -> I2C -> Yes
Modify I2C communication baud rate (recommended to be set to 500000 or above):
sudo nano /boot/config.txt(for bullseye system)
or
sudo nano /boot/firmware/config.txt(for bookworm system)
dtparam=i2c1_baudrate=800000
save and exit
sudo reboot
Check enabled I2C devices:
ls /dev/i2c* # at this time, it will print out: "/dev/i2c-1"
Install the I2C bus tools:
sudo apt install i2c-tools
Detect the device address mounted on the I2C bus:
sudo i2cdetect -y -a 1
Execute the C++ Demo Codes
Enter the C++ directory (here users can modify the path according to their actual project location):
cd /home/pi/mlx90640/cpp
sudo make clean
sudo make
sudo ./main
Note:If the error message "x11/xlib. h nosuch file or directory" appears when executing "sudo make", install X11 first. The command is:
sudo apt -get install libx11-dev
If the problem has not been solved, enter the command to check which components have not been installed: apt-cache search x11-dev, and then install them in sequence. For example, after entering this command, the following contents appear:
libgl1-mesa-swx11-dev - A free implementation of the OpenGL API -- development files
libghc6-x11-dev - Haskell X11 binding for GHC
libgtkglextmm-x11-dev - C++ wrapper for the OpenGL Extension to GTK (development files)
libx11-dev - X11 client-side library (development headers)
Then use the following commands to install in turns:
sudo apt-get install libx11-dev
sudo apt-get install libgtkglextmm-x11-dev
sudo apt-get install libghc6-x11-dev
sudo apt-get install libgl1-mesa-swx11-dev
Execute the python Demo Codes
Firstly, install the python library:
sudo apt-get update
sudo apt-get install python3-pip
sudo apt-get install python3-pil python3-pil.imagetk
sudo apt-get install python3-numpy
Enter the python directory (here users can modify the path according to their actual project location):
cd /home/pi/mlx90640/python
cd lib
sudo make clean
sudo make
cd ..
sudo python3 mlx90640.py
The files in the lib folder are used to generate the dynamic library mlx90640. so that can be called by the python environment, MiSans-Light.ttf is the font file used for temperature display characters, and usr_api.cpp, usr_api.h are built in the MLX90640 driver library on the application layer file. The user can directly call the function definition in the usr_api.cpp file to realize the initialization of the MLX90640 device and the acquisition of temperature data.
Resources
Data Sheet