Overview
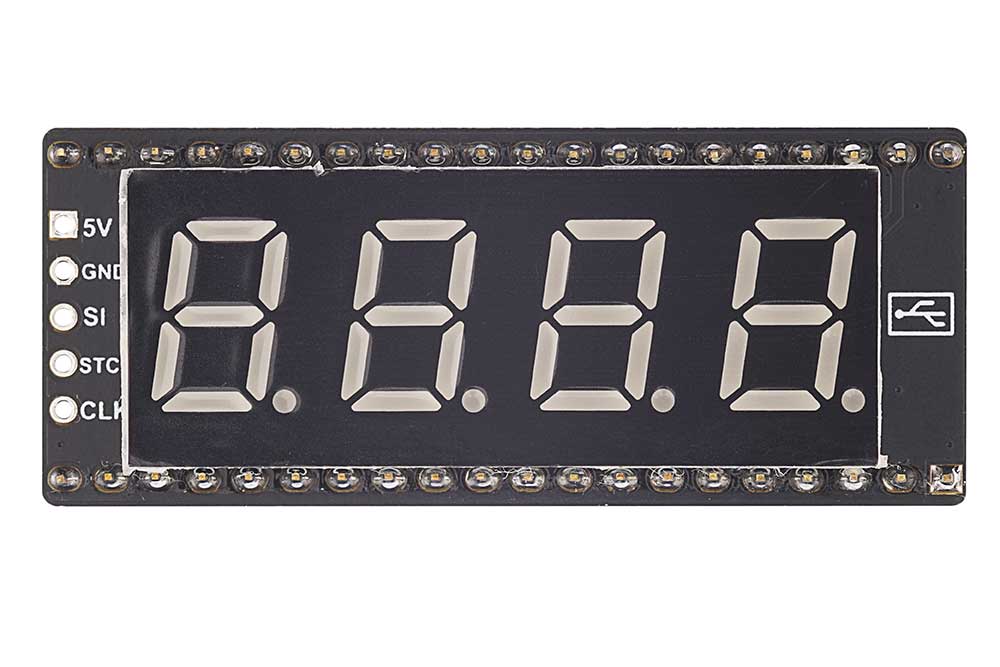
This product features an 8-segment 4-digit red LED display with a compatible SPI interface. It comes with an onboard Raspberry Pi Pico header socket, allowing users to easily connect a Raspberry Pi Pico. Additionally, there are reserved 5-pin 2.54mm spaced pin headers for soldering, enabling users to connect to other development boards. We provide C and Python example programs based on the Raspberry Pi Pico.
Features
- SPI compatible interface
- Reserved control interface (5-pin 2.54mm spaced pin headers)
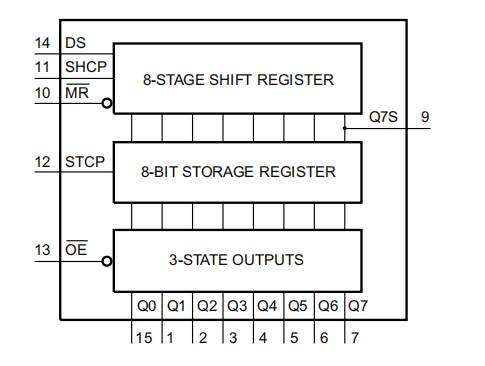
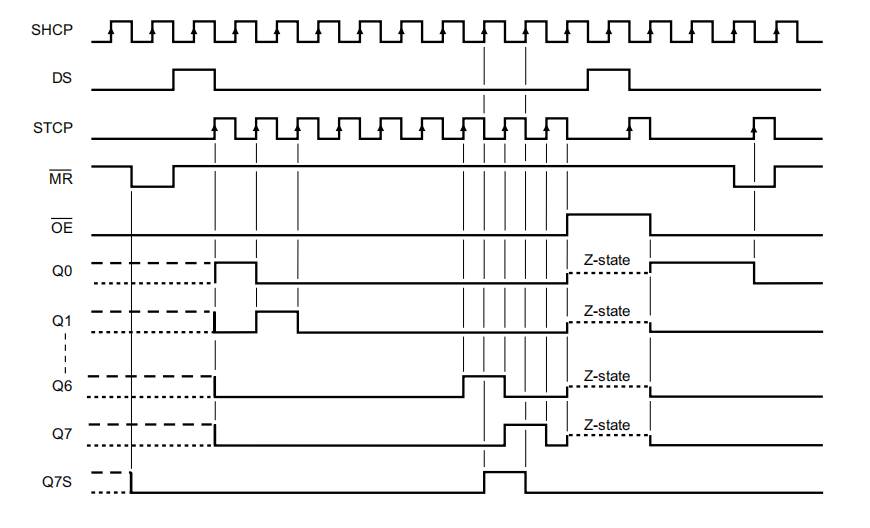
- 74HC595 driver chip
- Raspberry Pi Pico expansion capability
- C and Python example programs based on Raspberry Pi Pico
Product Parameters
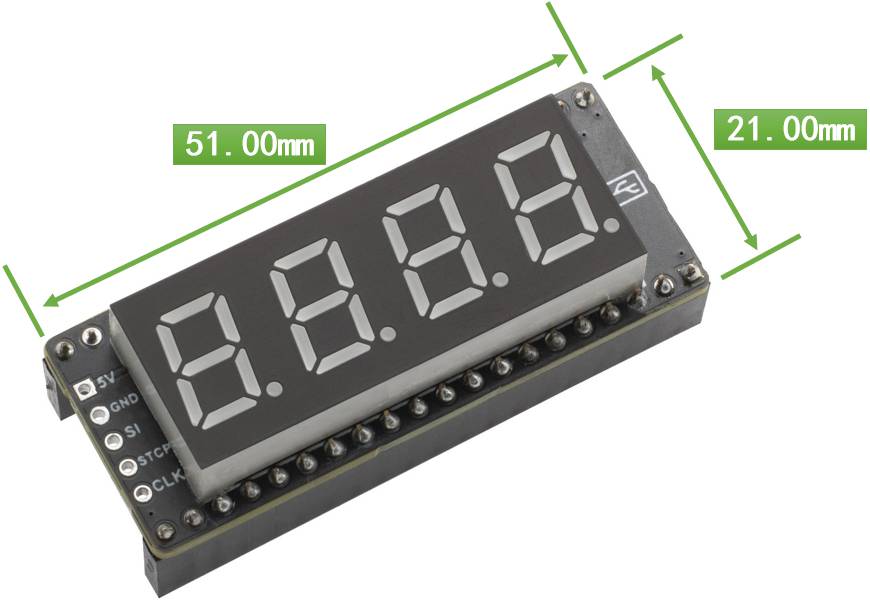
| Dimensions | 51mm (length) x 21mm (width) |
| LED Display Size | 0.4 inches |
| LED Display Specifications | 8-segment 4-digit red |
| LED Display Polarity | Common cathode |
| Control Chip | 74HC595 |
| Communication Interfaces | SPI compatible |
| Supply Voltage | 5V |
Usage
Hardware Interface Configuration Instructions
Module Wiring Pin Definitions for Raspberry Pi Pico:
| Interface | Pin Number | Function |
|---|---|---|
| 5V | VSYS | 5V Power Supply |
| GND | GND | Power Ground |
| SI | GP11(SPI1_TX) | Serial Data Input |
| STCP | GP4 | Storage Register Clock Input |
| CLK | GP10(SPI1_SCK) | Shift Register Clock Input |
Example Usage
As configuring the C/C++ environment can be complex, we generally recommend using the examples in a Python environment. However, we still provide C/C++ examples for which you would need to set up the corresponding environment on your own.
C Program
Setting Up Raspberry Pi Pico C/C++ Environment on Windows
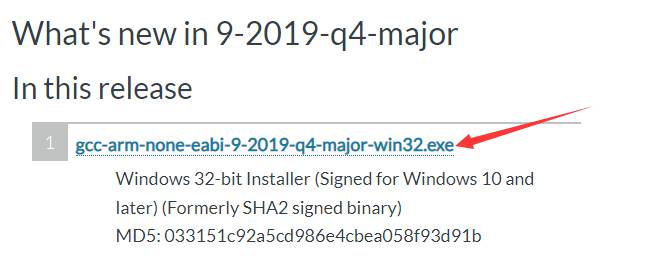
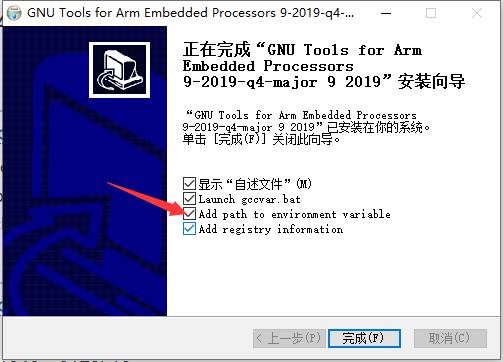
1. Install the ARM GCC compiler.
Open a browser and go to the following URL:https://developer.arm.com/downloads/-/gnu-rm
Download and install the 2019-q4 version.
During the installation, make sure to select "Add path to environment variable."
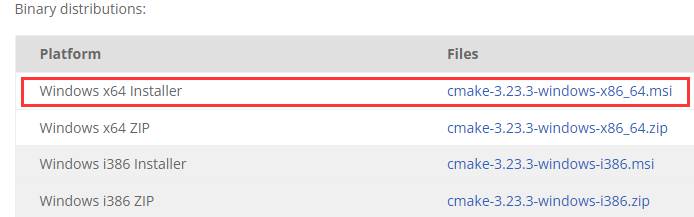
2.Install CMake
Open your browser and navigate to the following URL: https://cmake.org/download/. Download the cmake-3.23.3-windows-x86_64.msi file and install it using the default settings.
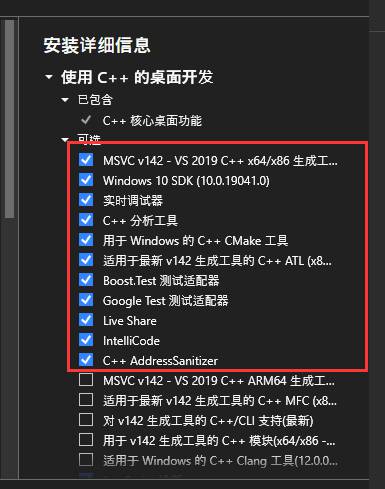
3.Install Visual Studio 2019 (or 2022)
You need the 2019 version of Visual Studio. If you prefer, you can also use the latest 2022 version. To download Visual Studio, visit the official website:
https://visualstudio.microsoft.com/zh-hans/downloads/ During the installation, make sure to select appropriate options.
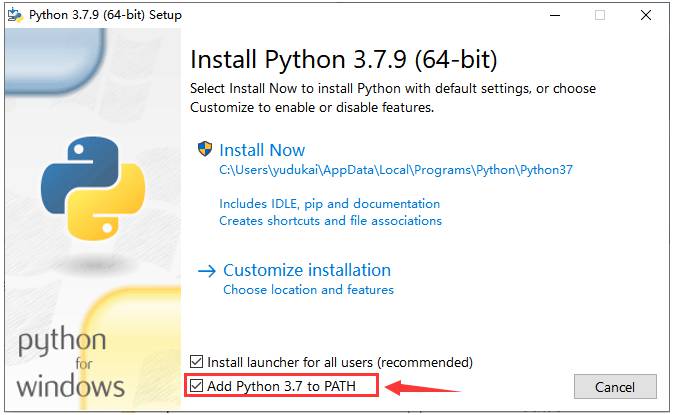
4.Install Python 3.7
Open your browser and go to the following URL:
https://www.python.org/downloads/windows/. Find the version labeled "Python 3.7.9 - Aug. 17, 2020". Select this version for download and installation.
During the installation, remember to check the option "Add Python 3.7 to PATH."

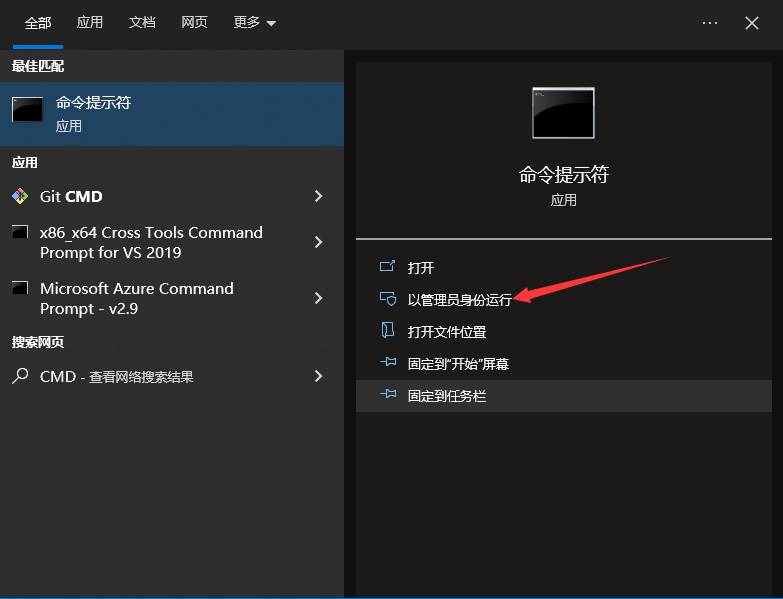
5. Open the Start Menu and search for 'cmd', then run it as an administrator.
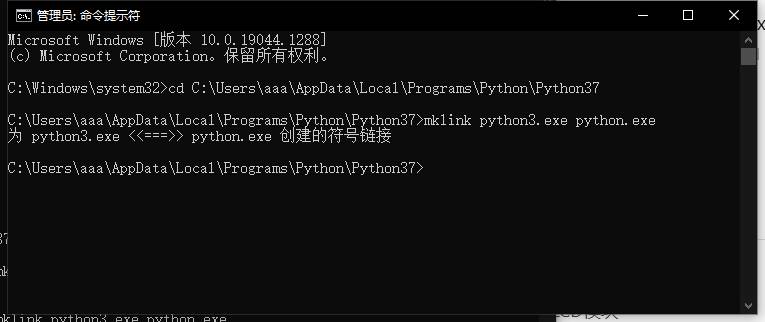
Use the 'cd' command to navigate to the python37 directory. The default path is: C:\Users[YourUsername]\AppData\Local\Programs\Python\Python37 Execute the command 'mklink python3.exe python.exe'.
6.Install Git
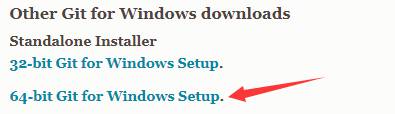
Open your web browser and go to the following website: https://git-scm.com/download/win Download the version of Git that matches your operating system.
Once the download is complete, proceed with the default installation.
7. Configure PICO-SDK
1) Obtain pico-sdk and pico-examples
Create a directory without any Chinese characters in the path. After installing Git, right-click on a blank space in that directory and select 'Git Bash Here.' In the command window, input the following commands (enter one line at a time):
git clone -b master https://github.com/raspberrypi/pico-sdk.git
git clone -b master https://github.com/raspberrypi/pico-examples.git
2) Initialization
Input the following commands (enter one line at a time):
cd pico-sdk
git submodule update --init
8. Set pico-sdk path
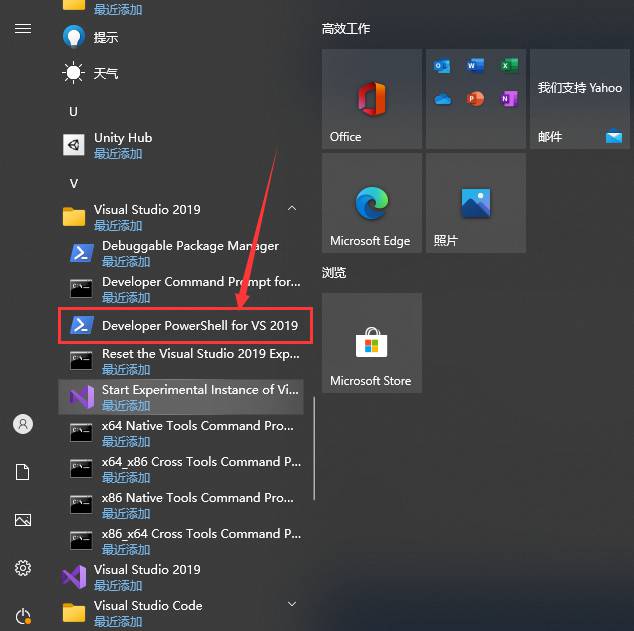
Locate and open 'Developer PowerShell for VS2019' from the Start Menu.
In the command window, enter:
setx PICO_SDK_PATH "[path_to_PICO_SDK]\pico-sdk"
9. Compile Official Examples
Close the command window and reopen it. Use the 'cd' command to navigate to the pico-examples directory.
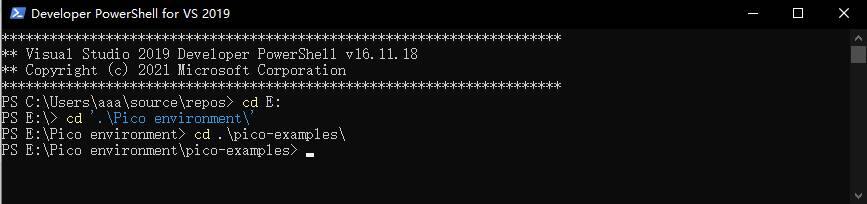
Then, input the following commands one by one:
mkdir build
cd build
cmake -G "NMake Makefiles" ..
nmake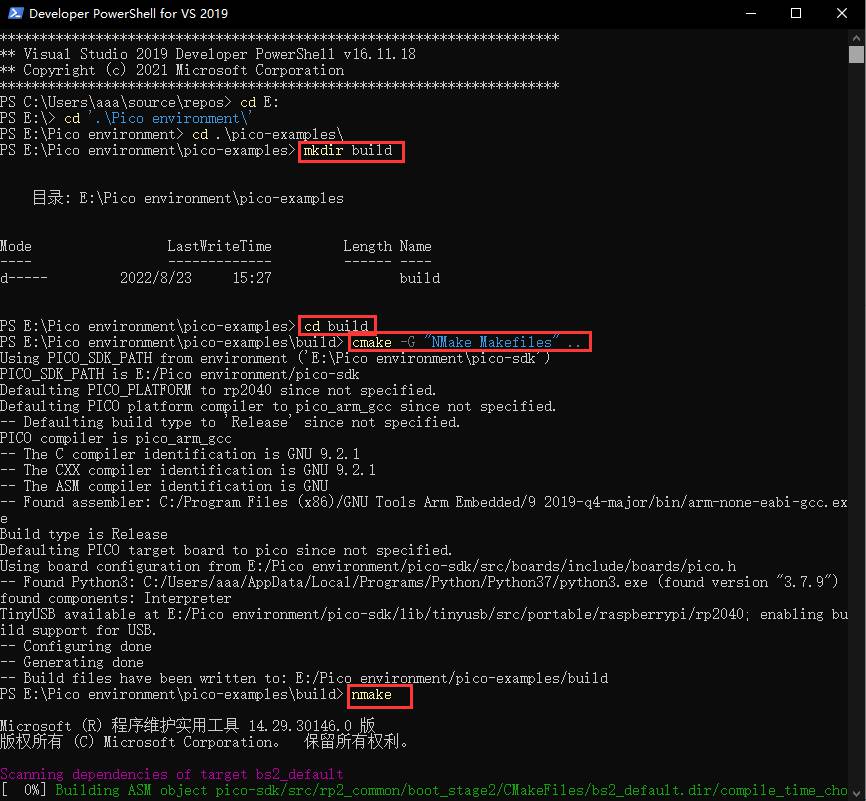
Wait for the compilation to complete, and you will have successfully set up the Raspberry Pico C/C++ development environment on Windows.
8. Setting up the Visual Studio Code Development Environment
1) Install Visual Studio Code from the official website:https://code.visualstudio.com/
2) Install the VS Code C/C++ extension of your choice. It's mandatory to also install the CMake Tools extension.
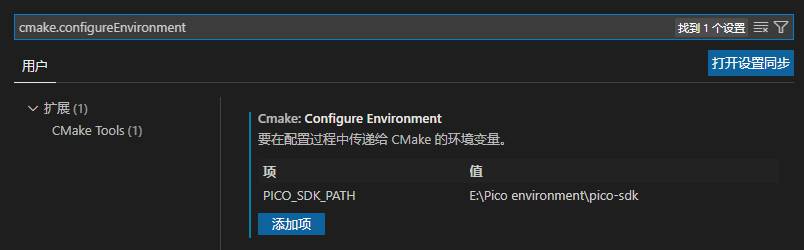
3) Open settings in the bottom-right corner of Visual Studio Code. In the search bar, type:
cmake.configureEnvironment
4) Add an entry named `PICO_SDK_PATH` with the value being the path where you've stored the pico-sdk.
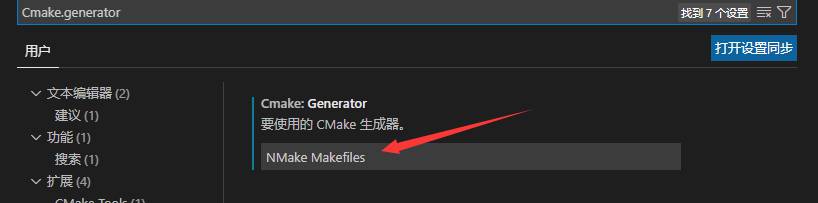
5) Set CMake.generator. Continuing in the settings, search for cmake.generator. Fill in the value with NMake Makefiles.
6) Close VS Code
7) Open Developer PowerShell for VS2019, type 'code' and press Enter to reopen VS Code.
8) Open the 'pico-examples' folder in VS Code.
9) At the bottom of the VS Code window,

① Compile Tool Selection: Choose 'GCC 9.2.1 arm-none-eabi' as the compilation tool. If this option isn't available, click on the first option and wait for the reloading to see 'GCC 9.2.1 arm-none-eabi'.

② Build Button: Click the 'build' button to initiate the project compilation.
③ Project Selection: Choose the desired project you want to compile.
11.Downloading USB Serial Output Library
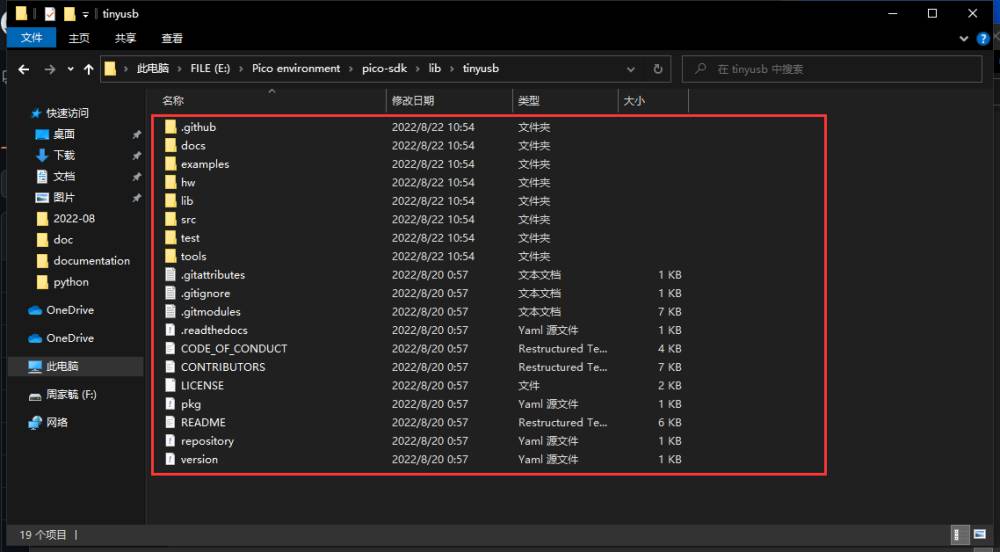
Open the 'pico-sdk' directory, then navigate to 'lib\tinyusb'. Right-click in an empty space and choose 'Git Bash Here'. In the command window, input:
git clone https://github.com/hathach/tinyusb
If the library cloning process takes too long, you can directly open the URL https://github.com/hathach/tinyusb in a web browser, download the files from the webpage, and copy all the files from the downloaded folder to the 'pico-sdk\lib\tinyusb' directory.
Open SEG Project, Compile, and Flash
1. Place the 'SEG' folder in a directory without any Chinese characters. Clear all files in the 'code\c\SEG\build' folder. If there's no 'build' folder, create one.
2. Open VS Code using the method mentioned in step 10.(7). Inside VS Code, open the project located in the 'code\c\SEG' folder. Choose the 'SEG' project for compilation. In the pop-up options, select 'GCC 9.2.1 arm-none-eabi' as shown in the image below.
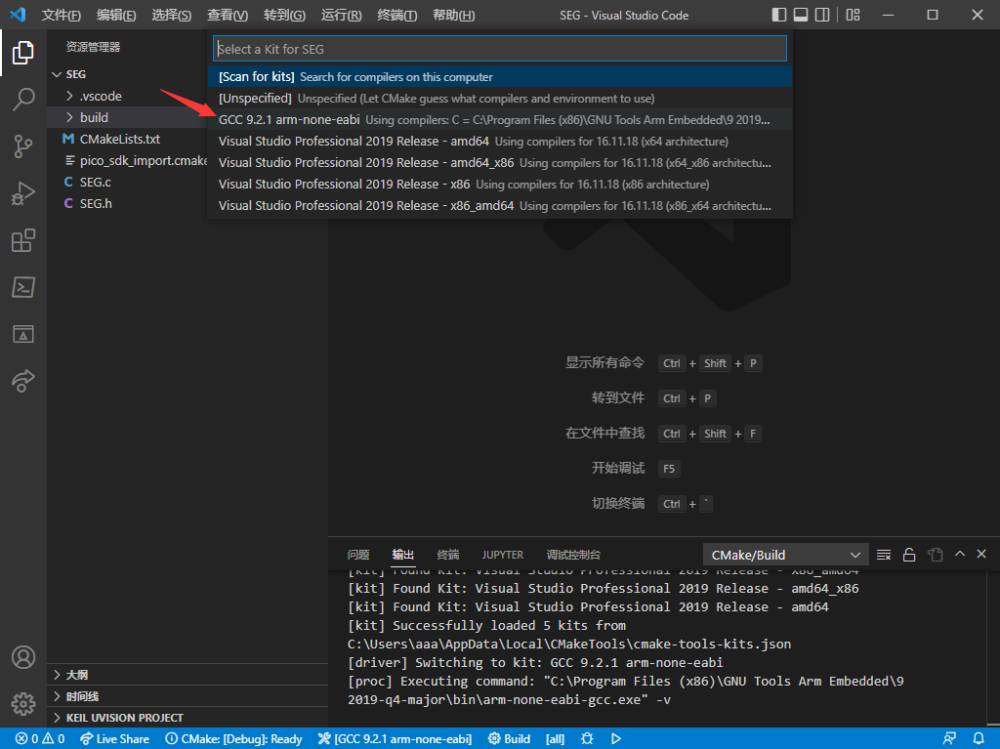
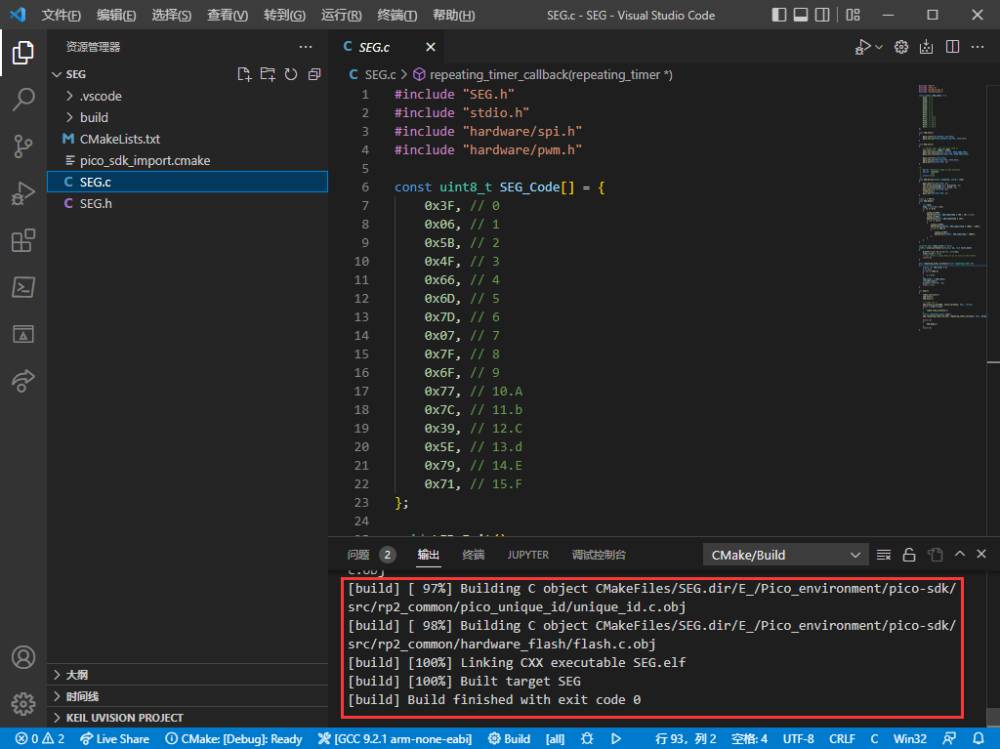
After completing the above steps, in the image below, marked as ① is the selected compiler. Click on ② Build to initiate the compilation.

Compilation completed.
3. Open the directory demo codes\c\SEG\build where the SEG.uf2 file is located.
While the Pico is powered off, hold down the BOOTSEL button on the Pico, connect it to your computer using a USB cable, and then release the button. A 'RPI-RP2' disk directory will appear. Drag and drop the 'SEG.uf2' file into this disk directory to complete the flashing.
4. Observe the display on the 7-segment display.
Python Program
1.Install Thonny
Download Thonny from:https://thonny.org
2.After Thonny Installation With the Pico powered off, hold down the BOOTSEL button on the Pico, connect it to your computer using a USB cable, and then release the button. A 'RPI-RP2' disk directory will appear. Drag and drop the 'rp2-pico-20210418-v1.15.uf2' file from the 'demo codes\python' directory into the 'RPI-RP2' disk.
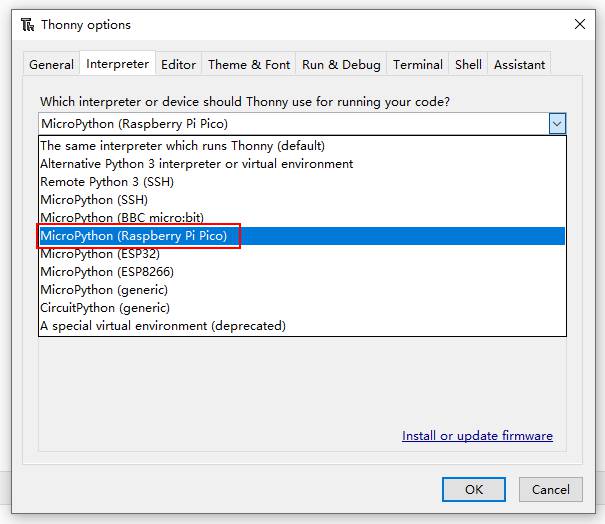
3.Open SEG.py in Thonny Right-click on the 'SEG.py' file in the 'demo codes\python' directory and open it with Thonny. Click on 'Tools' > 'Options'. In the 'Interpreter' field, select "MicroPython (Raspberry Pi Pico)" and set the Raspberry Pi Pico port (COMx: the port number might vary depending on your computer). Click 'OK' to confirm.
Click the "Run current script" button or press the F5 key to execute the current script. Observe the display on the 7-segment display.
Resources
Data Sheet