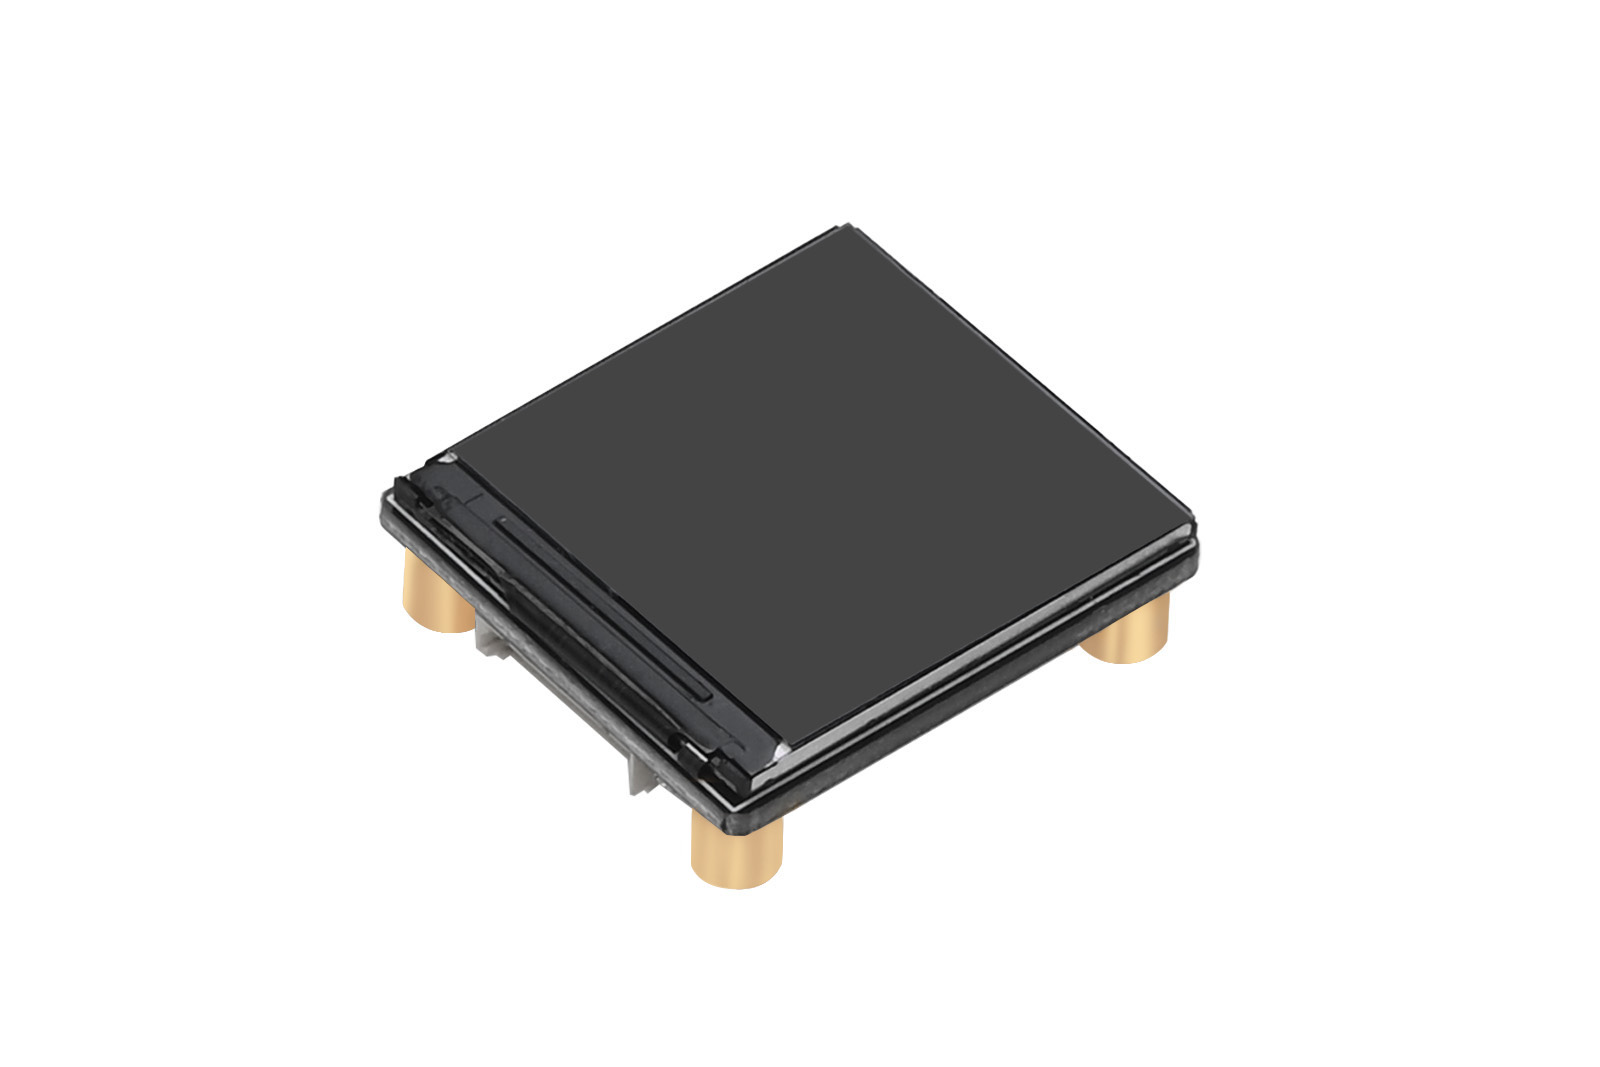
The 1.3inch LCD Display Module is a compact and high-quality screen designed for versatile DIY projects. Featuring an 8-pin SPI interface and a 240 × 240 resolution, this display is powered by the ST7789 controller, ensuring smooth and efficient performance. Pre-soldered with nut copper pillars, it offers easy installation and stability. Provides demo code for platforms such as Raspberry Pi and Arduino. It can draw dots, lines, rectangles, and circles, as well as display images and text in both English and other languages. Offers greater playability and DIY potential.
1. Product Features
- Built-in ST7789 controller
- 240 × 240 resolution
- Uses SPI interface, requiring fewer pins
- Ultra-compact size with pre-soldered nuts for easy installation
- Provides example programs for Raspberry Pi and Arduino development boards
2. Interface Definition
Please refer to the table below for module specifications and details:
| Specification | Details |
|---|---|
| Model | 1.3INCH LCD HAT B |
| Chip | ST7789 |
| Operating Voltage | 3.3V |
| Color Display | RGB 65K colors |
| Resolution | 240 × 240 |
| Communication Interface | 4-wire SPI |
| Mounting Holes | 2.5mm diameter |
| LCD Display Area | 23.4mm (L) × 23.4mm (W) |
| Dimensions | 29mm (L) × 26mm (W) |
3. Usage
Since the Bookworm system no longer supports the WiringPi library, the sample code for that platform uses the lgpio library instead. For Bullseye systems, the WiringPi-based examples still apply.
3.1 Hardware Interface Configuration Instructions
3.1.1 Raspberry Pi Hardware Connection
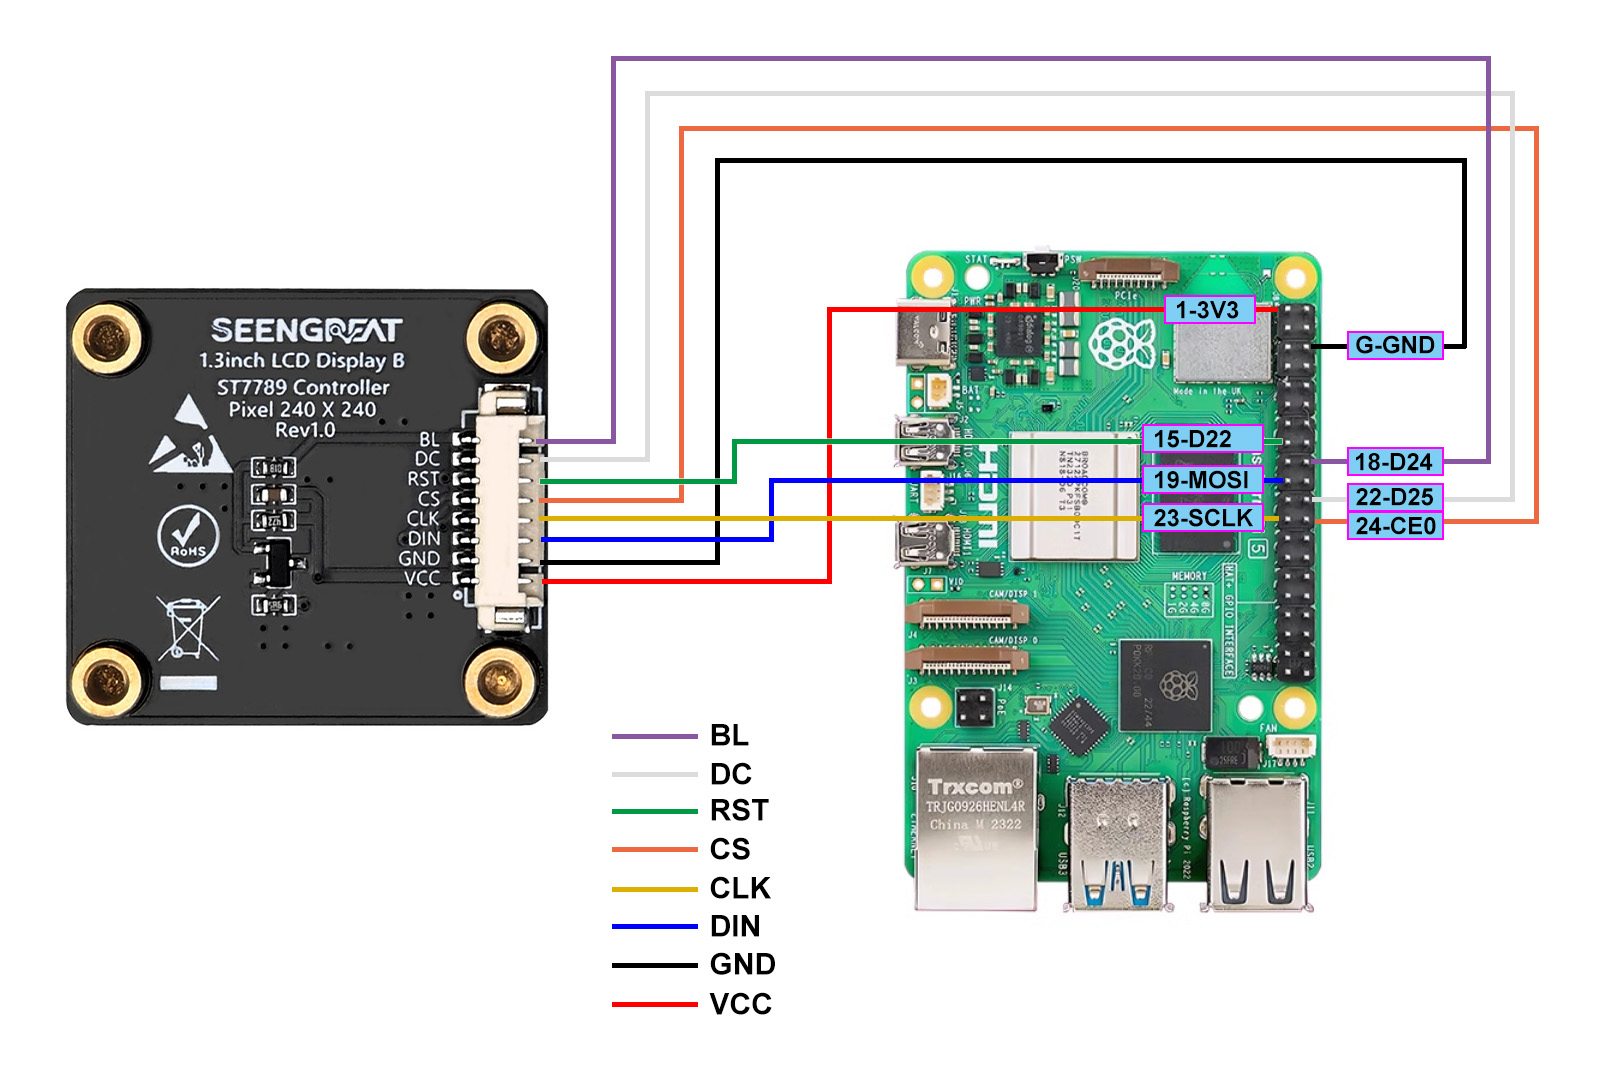
The following table shows the pin connections between the LCD module and Raspberry Pi:
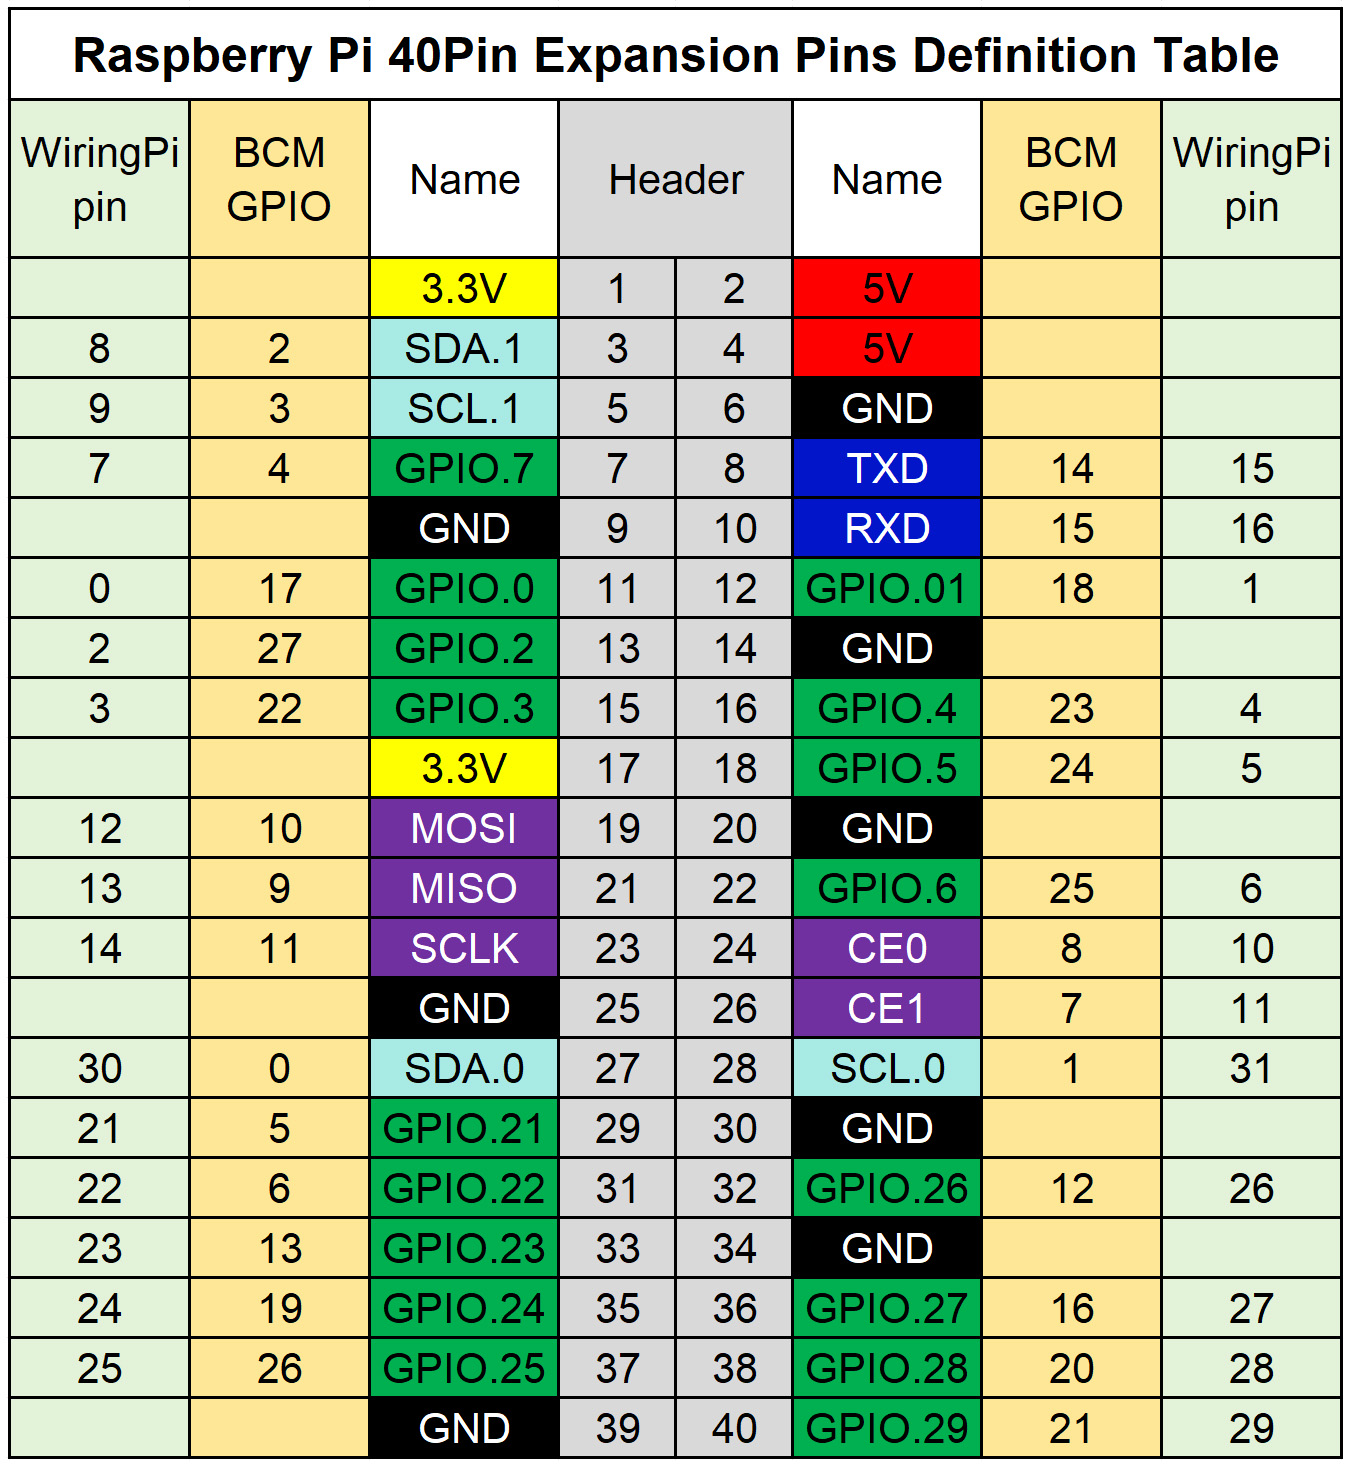
| LCD Interface | Pin Function | BCM Number | WiringPi Number |
|---|---|---|---|
| VCC | 3.3V | — | — |
| GND | GND | — | — |
| DIN | MOSI | GPIO10 | 14 |
| CLK | SCLK | GPIO11 | 12 |
| CS | CE0 | GPIO8 | 10 |
| RST | P2 | GPIO27 | 2 |
| DC | P6 | GPIO25 | 6 |
| BL | P5 | GPIO24 | 5 |
The wiring diagram for the connection between the Raspberry Pi and the LCD display is shown below:
3.1.2 Arduino Hardware Connection
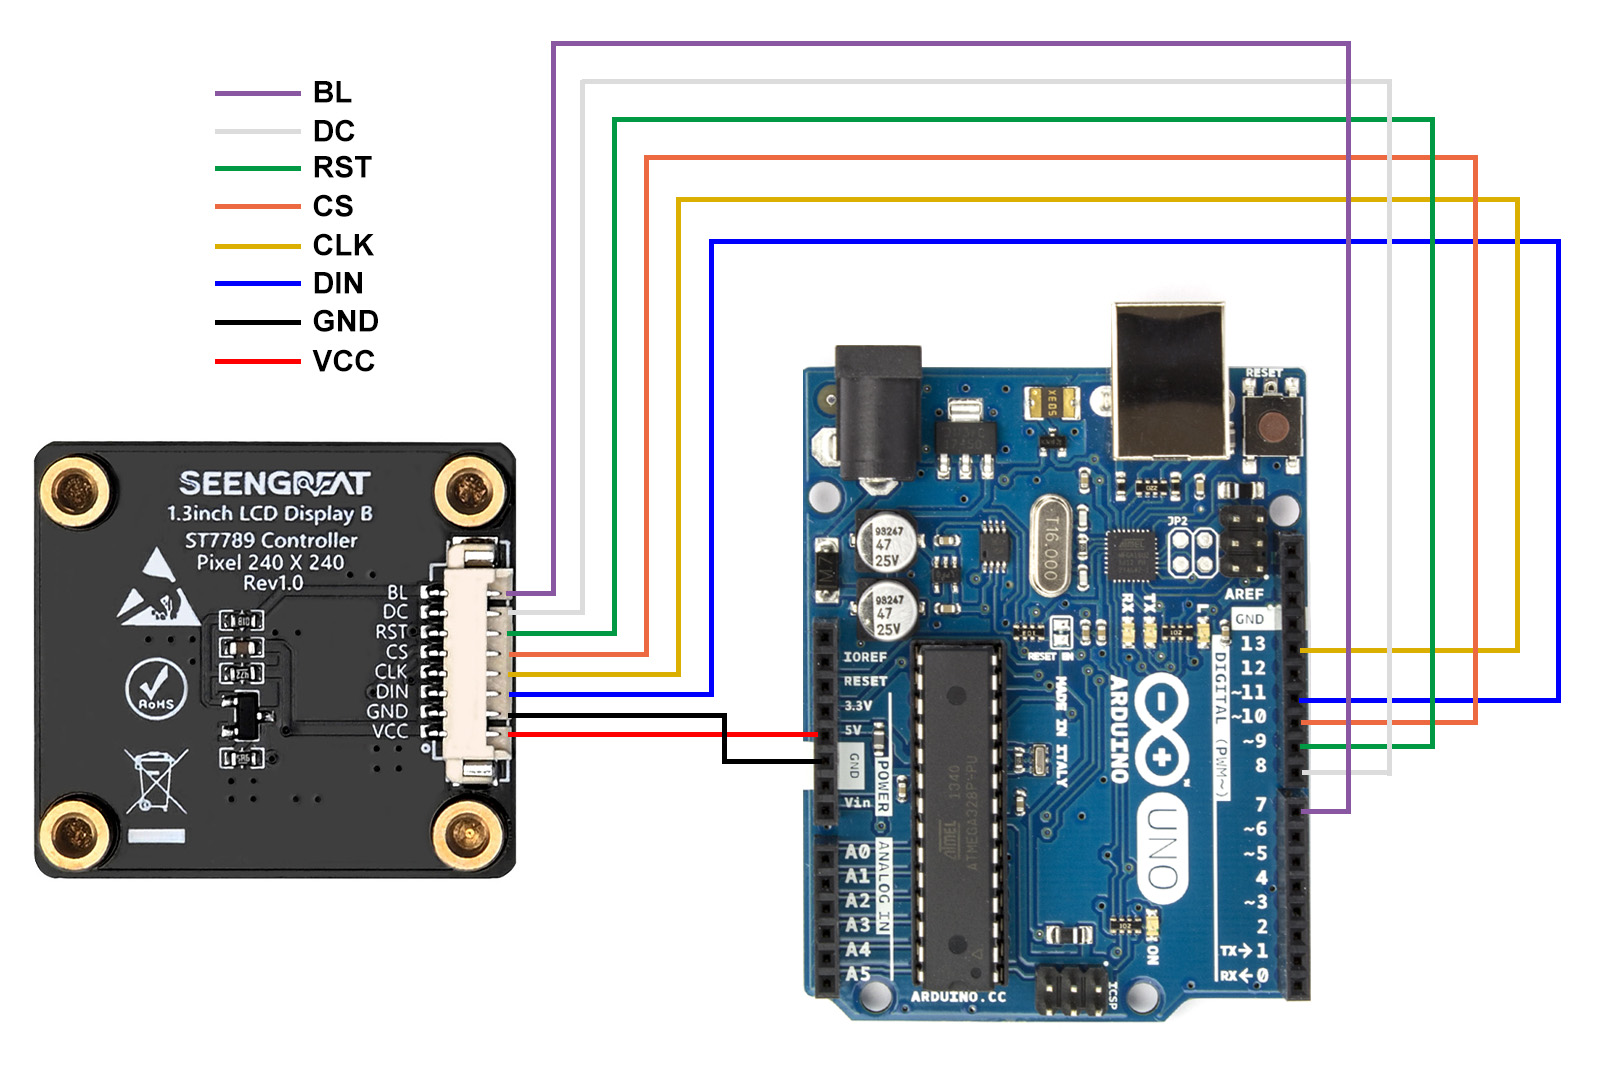
The following table shows the pin connections between the LCD module and Arduino UNO:
| LCD Interface | Arduino UNO |
|---|---|
| VCC | 5V |
| GND | GND |
| DIN | D11 |
| SCK | D13 |
| CS | D10 |
| RST | D9 |
| DC | D8 |
| BL | D7 |
The wiring diagram for the connection between the Arduino and the LCD display is shown below:
3.2 Demonstration Code
3.2.1 Installing the WiringPi Library
On the Raspberry Pi, run the following commands to install WiringPi:
sudo raspi-config
sudo apt-get install wiringpi
wget https://project-downloads.drogon.net/wiringpi-latest.deb
sudo dpkg -i wiringpi-latest.deb
gpio -v    # If version 2.52 appears, installation succeeded
For Bullseye systems, use:
git clone https://github.com/WiringPi/WiringPi
cd WiringPi
./build
gpio -v    # If version 2.70 appears, installation succeeded
If you see ImportError: No module named 'wiringpi' when running Python examples, install:
Python 2.x:
pip install wiringpi
Python 3.x:
pip3 install wiringpi
To build manually:
 git clone --recursive https://github.com/WiringPi/WiringPi-Python.git
cd WiringPi-Python
sudo python setup.py install    # For Python 2.x
sudo python3 setup.py install  # For Python 3.x
If SWIG errors occur, install SWIG first:
sudo apt install swig
3.2.2 Installing the LGPIO Library
On Bookworm systems, the example programs use the lgpio library. Install via:
 wget https://github.com/joan2937/lg/archive/master.zip
unzip master.zip
cd lg-master
make
sudo make install
3.2.3 Demonstration Program
Enable and test the SPI interface:
 sudo raspi-config
# Select: Interfacing Options → SPI → Yes
ls /dev/spi*  # Should list /dev/spidev0.0 and /dev/spidev0.1
Installing Python Libraries
For Python 3 environment, install PIL, numpy, and spidev:
 sudo apt-get install python3-pil
sudo apt-get install python3-numpy
sudo apt-get install python3-pip
sudo pip3 install spidev
C Example Program
The C demo is divided into two layers:
- Lower Layer: Contains
lcd_1.3inch.candlcd_1.3inch.h, handling GPIO initialization and LCD control. - Application Layer: Contains
lcd_gui.candlcd_gui.h, responsible for drawing shapes, images, and text.
Font files (named "font*") provide character data; details are in fonts.h. Raspberry Pi demos use ".bmp" images. Arduino UNO demos omit ".bmp" due to memory constraints; images are embedded in image.cpp.
To run the C demo:
 cd 1.3inch_lcd/c
sudo make clean
sudo make
sudo ./main
Python Example Program
Python demo (Raspberry Pi only) leverages PIL, reducing code complexity. Run with:
 cd 1.3inch_lcd/python
python3 gui_demo.py
4. Resources
Demo codes for bullseye system