Product Overview
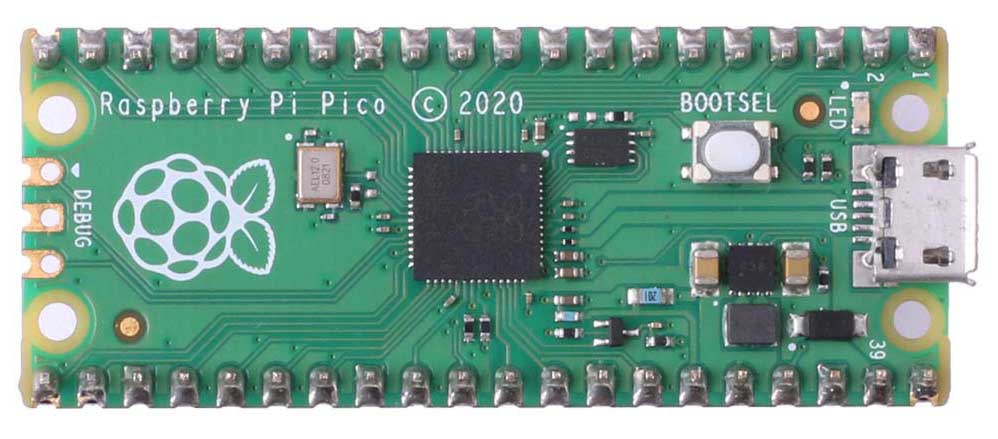
Raspberry Pi Pico is a microcomputer designed by the Raspberry Pi Foundation in the UK, based on the RP2040 microcontroller. It features a dual-core Arm Cortex-M0+ processor with a high frequency of 133MHz and flexible clock settings. The Pico is equipped with SRAM and QSPI flash, providing storage capabilities. Additionally, it has 26 multifunctional GPIO pins and multiple controllers, suitable for various peripheral connections and control applications. The Pico also supports low-power sleep and deep-sleep modes, along with precise on-chip clocks and a temperature sensor. In summary, the Raspberry Pi Pico is a comprehensive, user-friendly, and easily programmable microcontroller suitable for embedded systems and IoT applications.
Product Parameters
| Microcontroller Chip | RP2040 |
| CPU | Dual-core Arm Cortex-M0+, 133MHz |
| Memory | Built-in 264 KB SRAM and 2MB on-chip flash memory |
| USB | USB 1.1 host and device support |
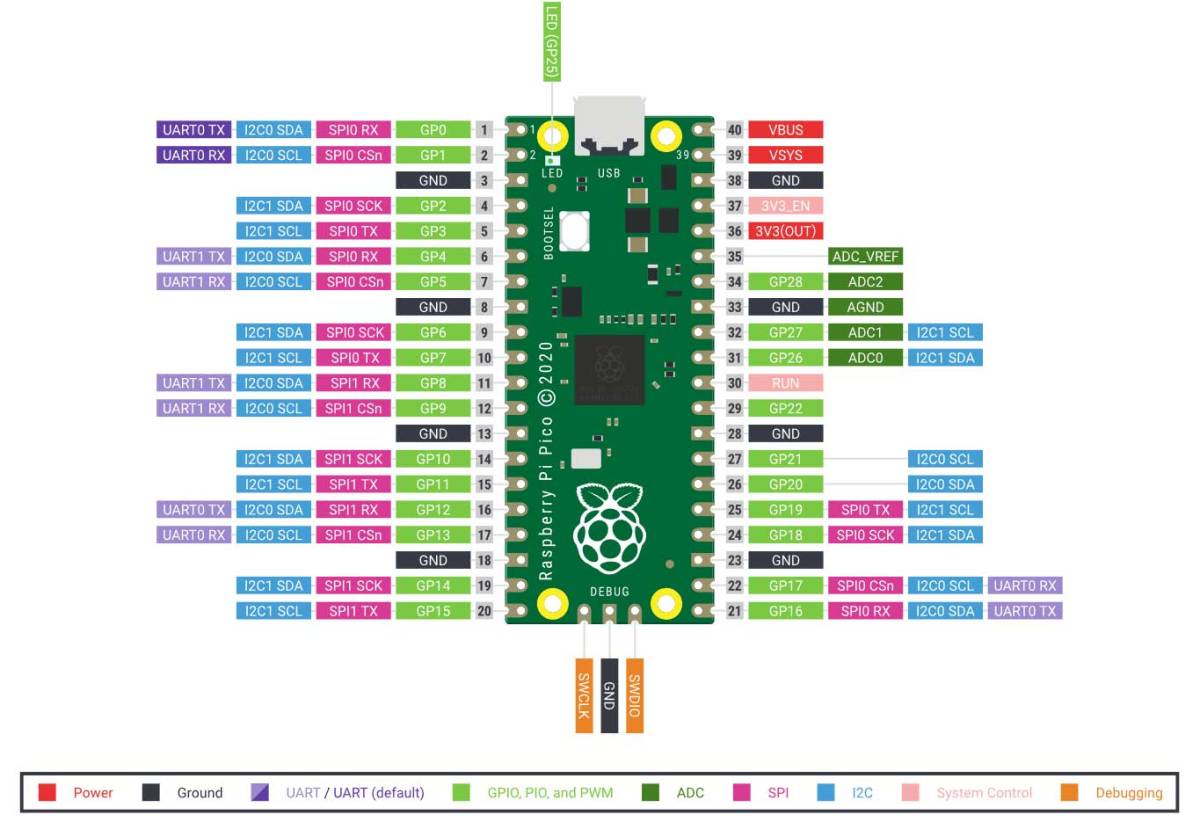
| On-Chip Resources | 26 multifunctional GPIO 2 SPI, 2 I2C, 2 UART interfaces 3 twelve-bit ADCs 16 controllable PWM channels Precise on-chip clock and timers Temperature sensor On-chip accelerated floating-point library 8 programmable I/O state machines |
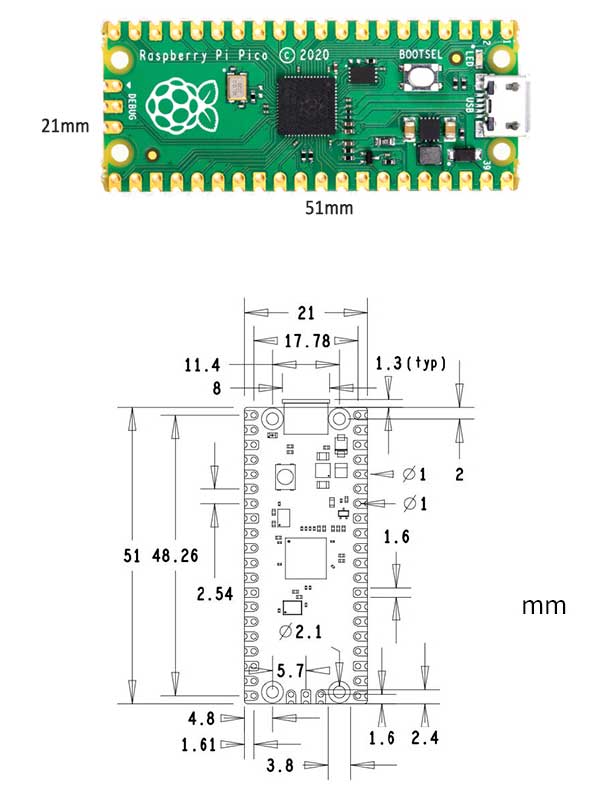
| Dimensions | 21mm x 51mm |
| Weight | 4g |
Pin Definitions
Usage
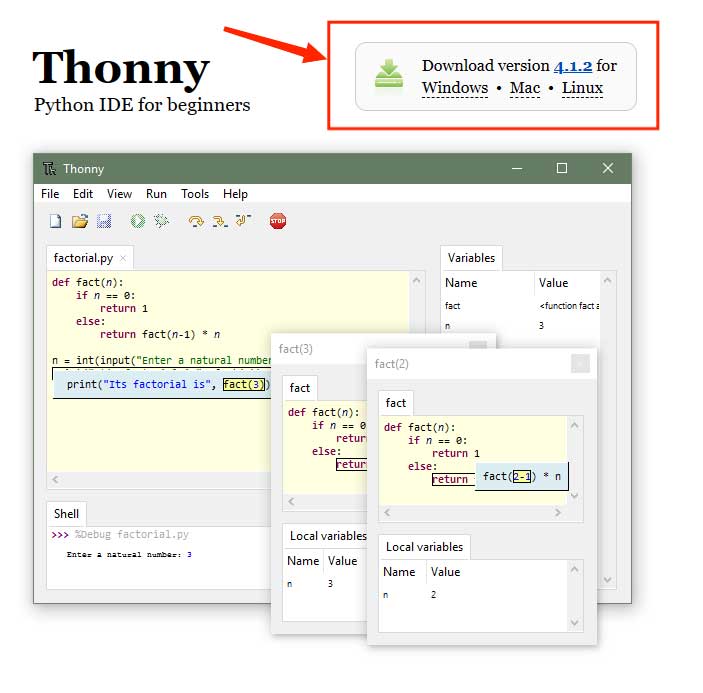
Download Thonny IDE
If you are a beginner, it is recommended to download Thonny IDE for experimenting with the development board. Thonny IDE official website: https://thonny.org/ (Download the appropriate version as needed)
Configure Interpreter and Port
After installation, it is necessary to configure the language and board environment. Since we are using the Raspberry Pi Pico, we select the board environment as Raspberry Pi Pico.
Click on Tools - Preferences, as shown in the figure below, choose the interpreter as MicroPython (Raspberry Pi Pico) in the interpreter field, and set the port (COMx: the port number x may vary on different computers), then click OK.
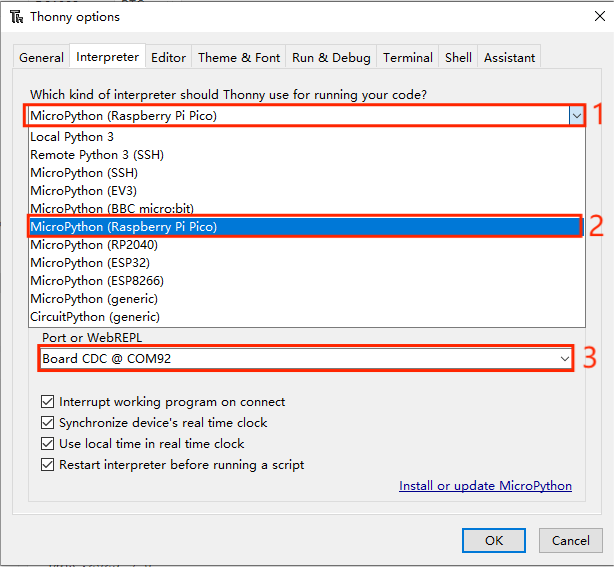
- Click here
- Select MicroPython (Raspberry Pi Pico)
- Set the corresponding port here, and finally click OK
Download the uf2 file and develop with Raspberry Pi Pico
Download the uf2 file from the official website, the link is as follows: https://www.raspberrypi.com/documentation/microcontrollers/micropython.html
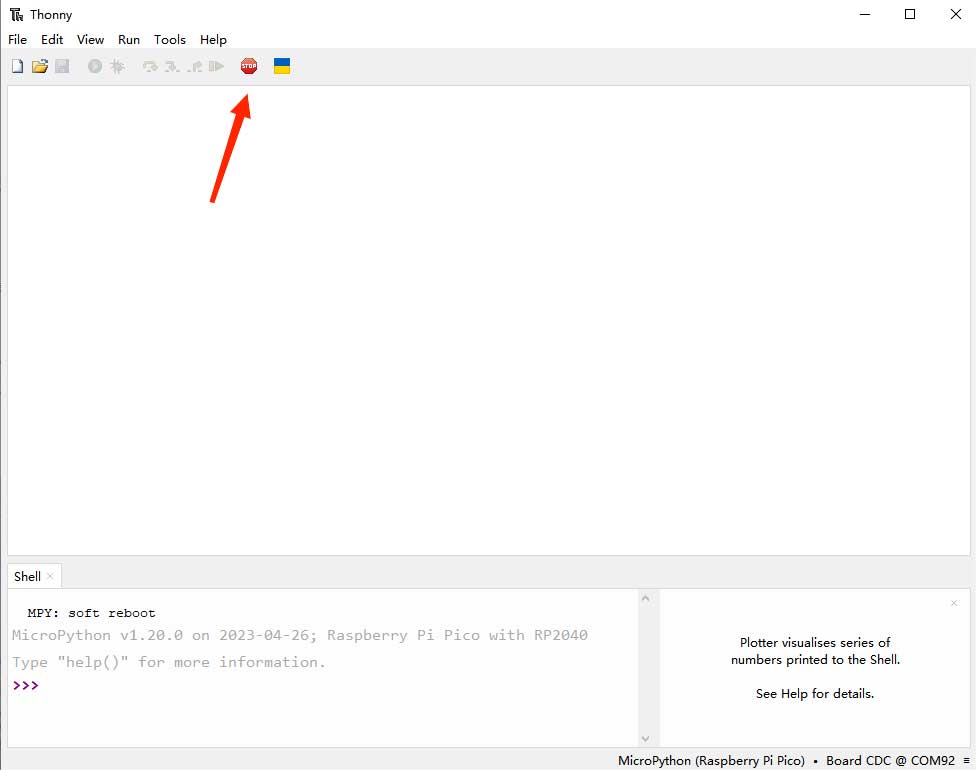
After downloading, hold down the boot button on the Raspberry Pi Pico and connect it to the computer. At this time, a removable disk will appear on the computer. Drag the downloaded uf2 file into the disk. Open Thonny IDE and click Stop to start using the Raspberry Pi Pico.
Official MicroPython open-source example program link: https://github.com/raspberrypi/pico-micropython-examples
Resources
Raspberry Pi Pico Getting Started Guide
Raspberry Pi Pico C SDK User Manual
Raspberry Pi Pico python SDK User Manual
Raspberry Pi Pico Frequently Asked Questions