Use the product in connection with the Jetson Nano
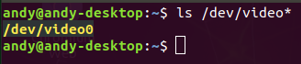
After connecting the USB end of the camera module to the USB connector of the Jetson Nano, power on the Jetson Nano (the input voltage of the Jetson Nano is 5V)Open the terminal (Ctrl+Alt+T) and enter the following command
ls /dev/video*video0 indicates successful mount recognition
App cheese installation
sudo apt-get install cheeseAfter the installation is complete, enter the following command to turn on the camera
cheeseUse the product in connection with the Raspberry Pi
Connect the USB end of the Camera module to the Raspberry Pi USB connector and check whether the device is successfully mounted.
ls /dev/video*If video0 appears, the identity is successfully attached.

Opencv Library installation:
sudo apt-get install python3-opencv -yTest after no errors:
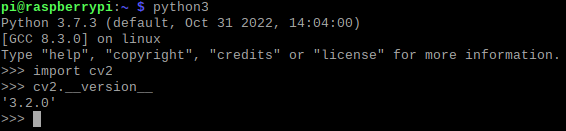
python3
import cv2
cv2.__version__
In this case, if there is no error and the version is printed, the installation is successful.
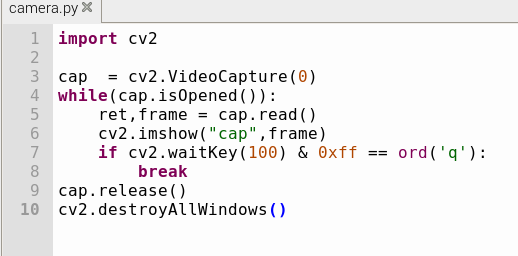
Open the Thonny program in the Raspberry Pi, enter the following code, and click Run to see the real-time picture captured by the module.
The product is connected and used on Windows 10
Connect the USB end of the Camera module with the computer USB connector, first click the start menu in the lower left corner of the computer, and then slowly pull down the application list that pops up on the left to find the "camera" function to open, which is the camera application that comes with the computer. Or directly click the search box next to the start menu, enter "camera" search to open the application to take photos and videos.