Overview
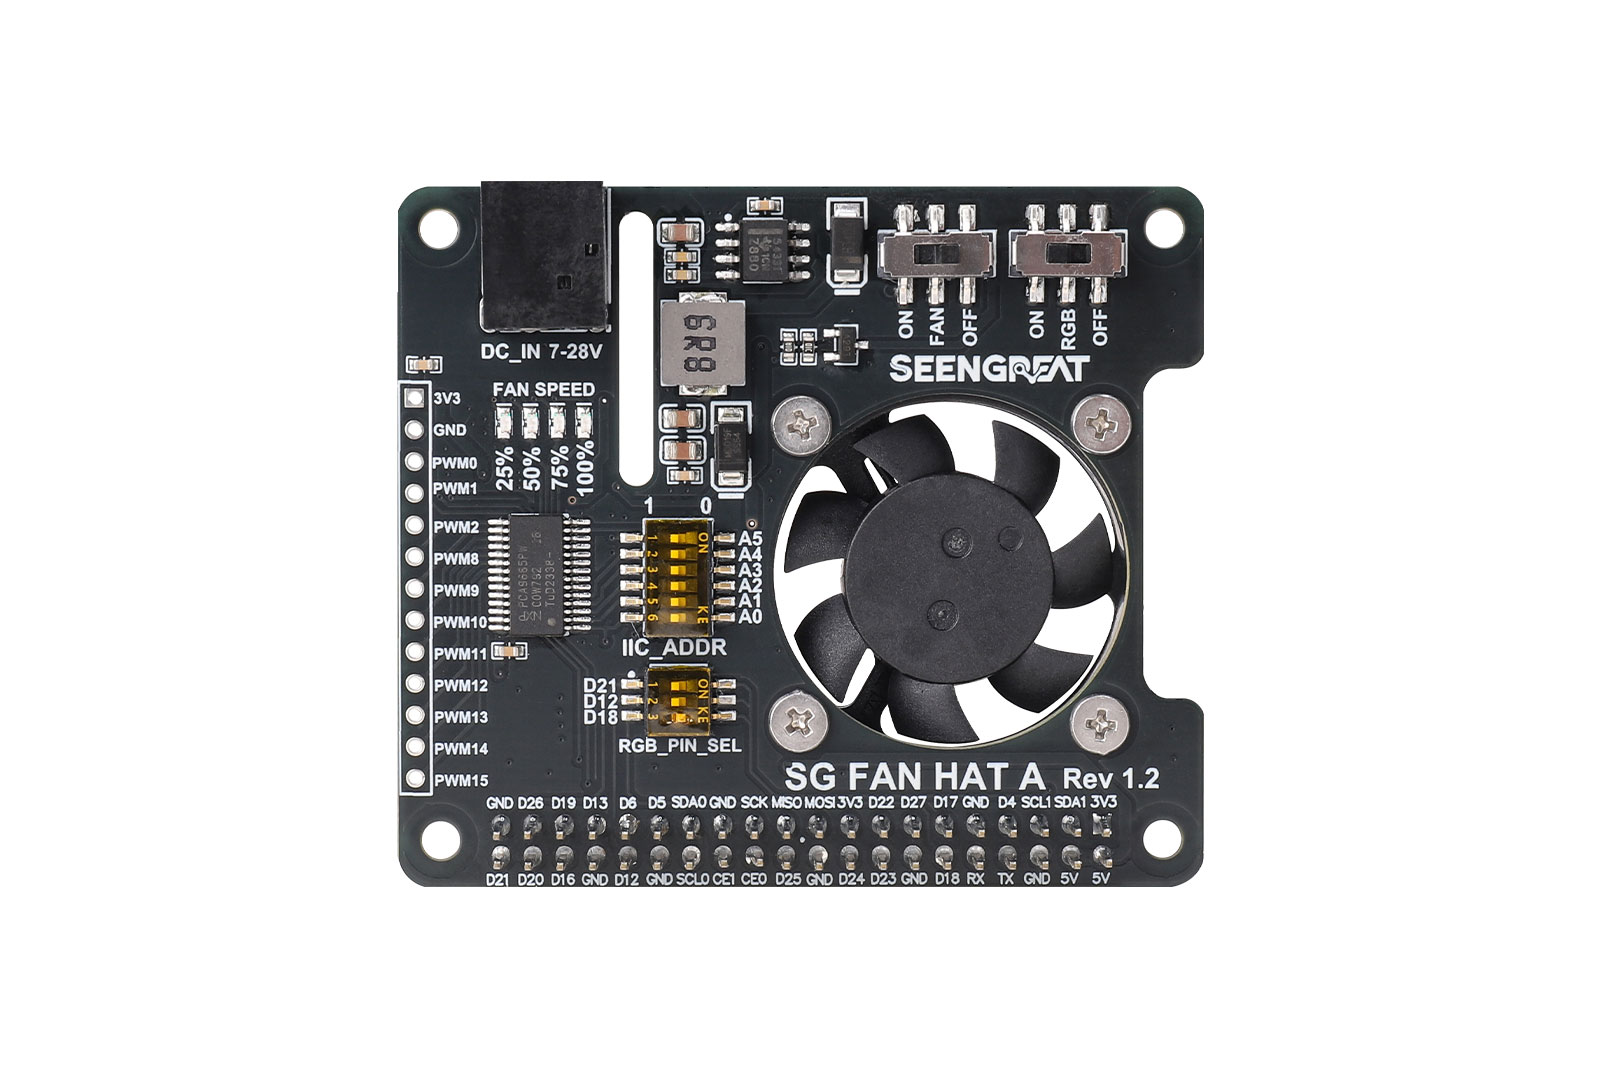
The Raspberry Pi cooling fan is a dedicated cooling solution designed for the Raspberry Pi. The Raspberry Pi is a powerful little computer, but it can generate some heat when running under heavy load. The cooling fan is designed to provide effective cooling performance and keep the Raspberry Pi running within a reasonable temperature range. It consists of PWM output chip PCA9685, 6 Full-color RGB LEDs WS2812, DC power conversion circuit TPS54331, fan speed indicator LED and other circuits, and can be perfectly connected with the Raspberry Pi 40PIN GPIO header.
Parameters
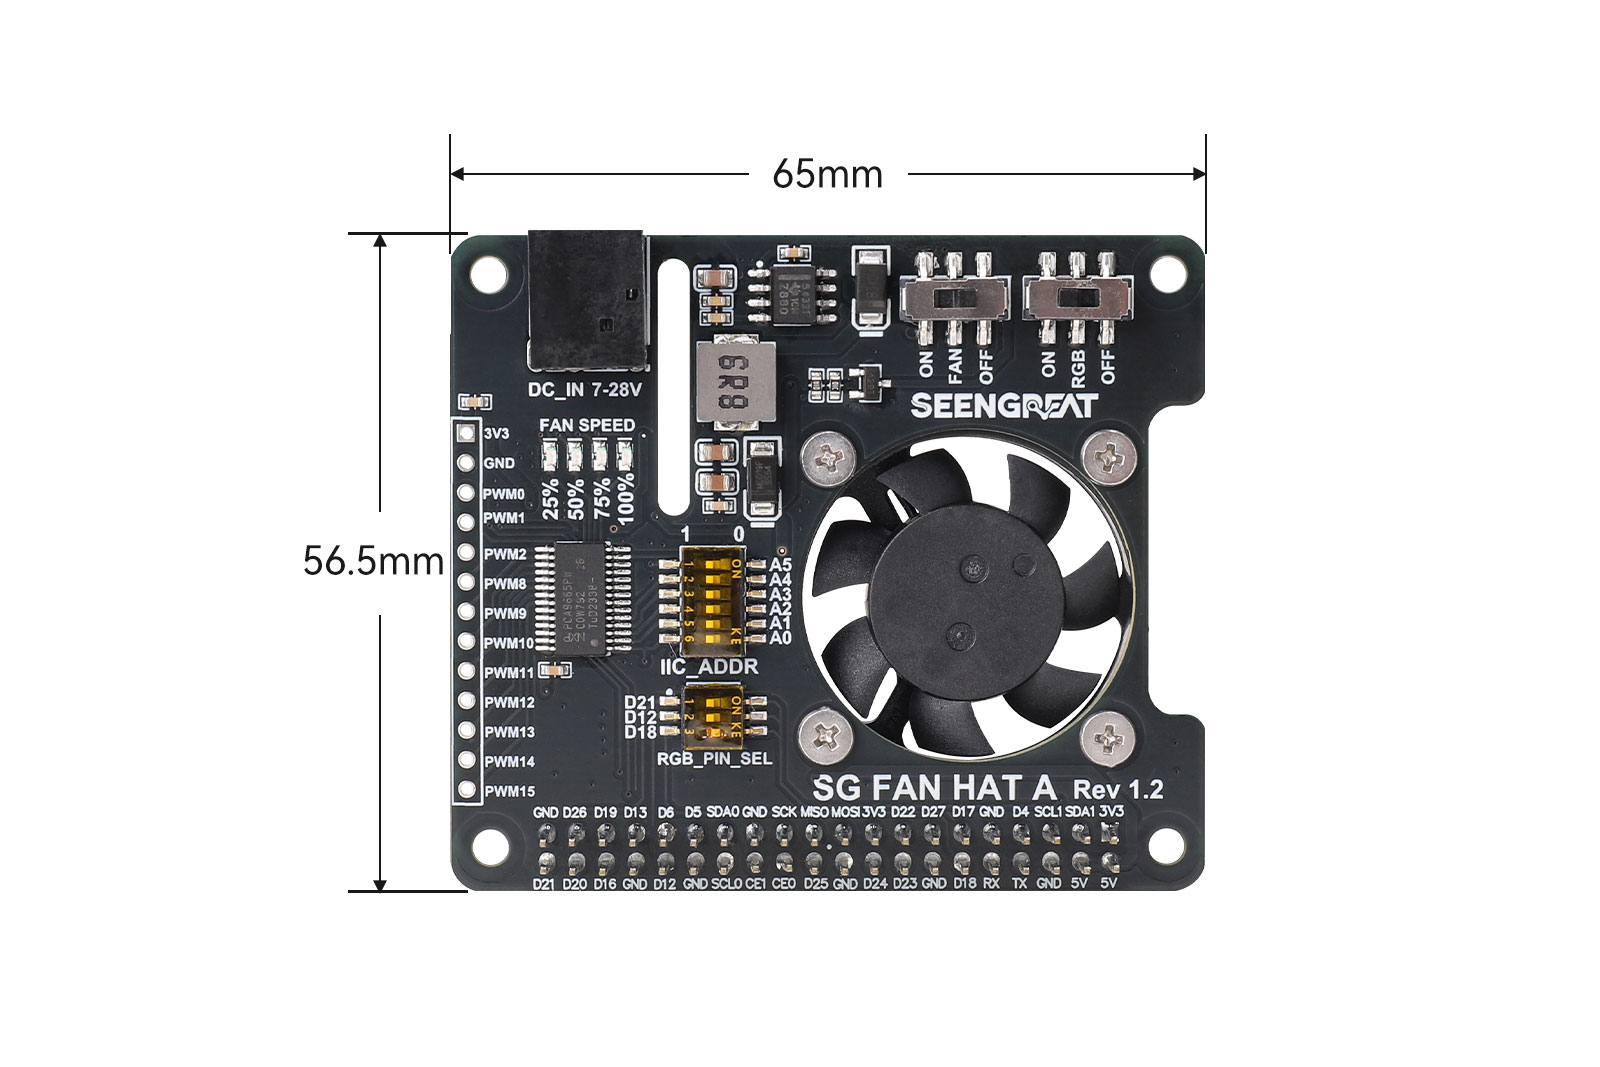
| Size | 65mm(L) x 56.5mm(V) |
| Supply voltage | 5V |
| Logic voltage | 3.3V |
| Fan Driver | PCA9685 |
| Fan PWM Driver Dutty Cycle | ≥25% |
| Fan Speed(MAX) | 8500rpm |
| Dimensions | 65mm(Length) x 56.5mm(width) |
| Weight | 28g |
Usage
Note:
Currently, this example codes does not support the bookworm system, but only supports the bullseye system.The fan can work properly only if the "FAN" switch is turned to "ON" and the demo codes are run on the Raspberry Pi mainboard. The demo codes can be downloaded from the link at the bottom of this page. The RGB LEDs at the bottom of the board need to be turned to "ON" by turning the D18 position in the "RGB_PIN_SEL" DIP switch and keeping the other two positions "OFF". Similarly, these RGB LEDs also need to run the demo codes to work properly.
Resource Profile
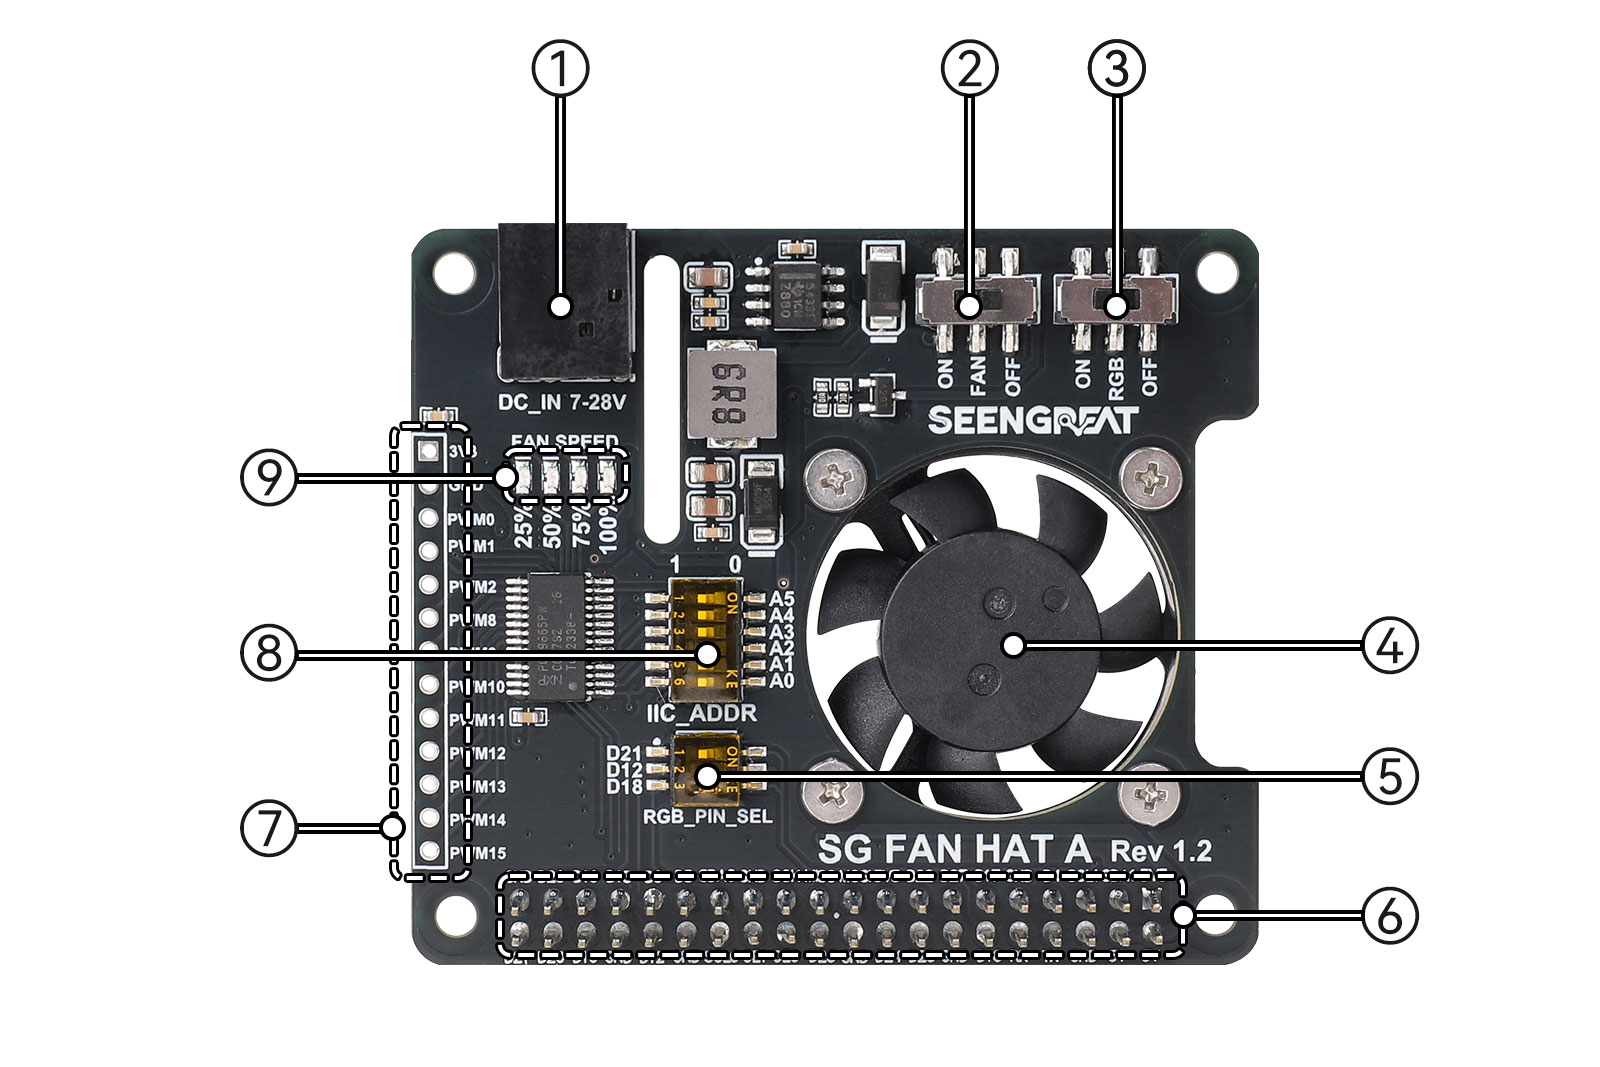
 Botton view
① DC-044 power input jack, the input voltage is DC7-28V
② Fan switch
③ RGB LED WS2812 switch
④ Fan
⑤ RGB LED WS2812 data input pin selection DIP switch
⑥ Raspberry Pi 40PIN GPIO header
⑦ 11-way PWM leading out of PCA9685
⑧ PCA9685 I2C address setting DIP switch
⑨ Fan speed LED
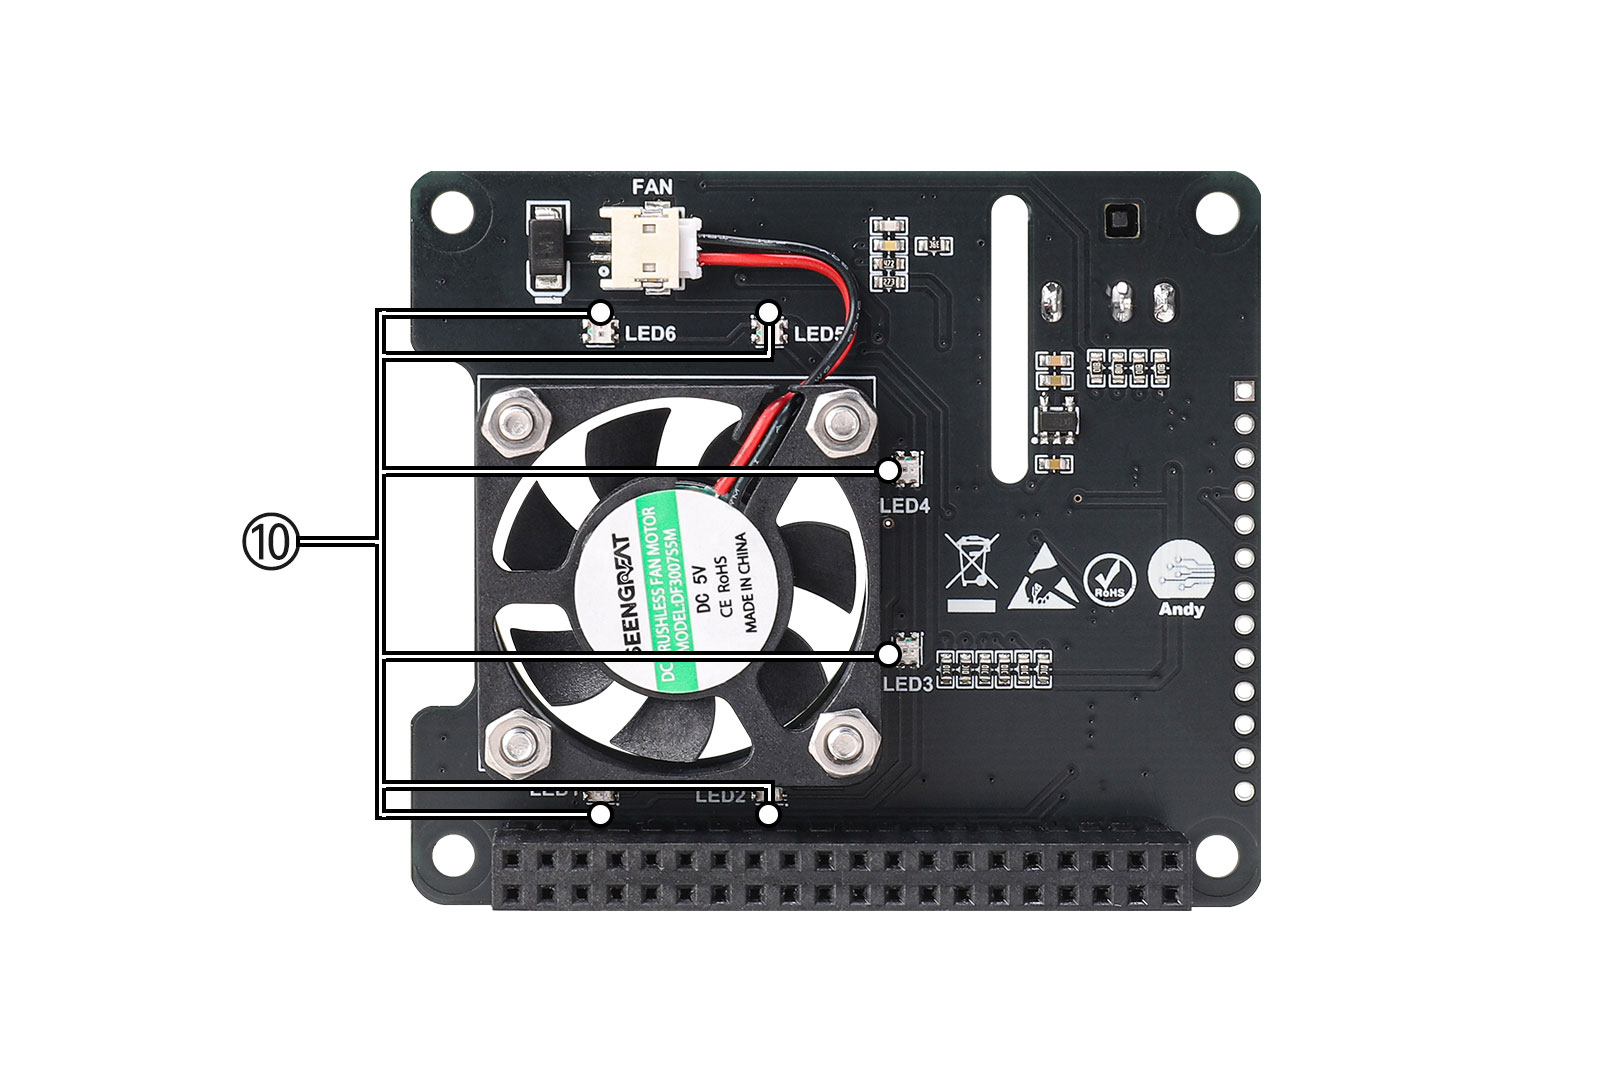
⑩ 6 RGB LEDs WS2812

Wiringpi Library Installation
sudo apt-get install wiringpi
wget https://project-downloads.drogon.net/wiringpi-latest.deb #Version 4B upgrade of Raspberry Pi
sudo dpkg -i wiringpi-latest.deb
gpio -v #
If version 2.52 appears, the installation is successful
For the Bullseye branch system, use the following command:
git clone https://github.com/WiringPi/WiringPi
cd WiringPi
./build
gpio -v
Running "gpio - v" will result in version 2.70. If it does not appear, it indicates an installation error.
If the error prompt "ImportError: No module named 'wiringpi'" appears when running the python version of the demo code, run the following command
For Python 2. x version
pip install wiringpiFor Python 3. x version
pip3 install wiringpiNote: If the installation fails, you can try the following compilation and installation:
git clone --recursive https://github.com/WiringPi/WiringPi-Python.gitNote: The -- recursive option can automatically pull the submodule, otherwise you need to download it manually.
Enter the WiringPi Python folder you just downloaded, enter the following command, compile and install:
For Python 2. x version
sudo python setup.py installFor Python 3. x version
sudo python3 setup.py installIf the following error occurs:

At this time, enter the command "sudo apt install swig" to install swig. After that, compile and install "sudo python3 setup.py install". If a message similar to the following appears, the installation is successful.

Python Library Installation
#python3sudo apt-get update
sudo apt-get install python3-pip
sudo apt-get install python3-pil
sudo apt-get install python3-numpy
sudo pip3 install spidev
sudo pip3 install rpi-ws281xThe routine uses the python3 environment, and you need to install smbus to run the python demo code:
sudo apt-get install -y python-smbusConfigure the I2C interface
sudo raspi-configEnable I2C interface
Interfacing Options -> I2C -> Yes
Install the i2c-tools tool to confirm
sudo apt-get install i2c-toolsView connected I2C devices
i2cdetect -y 1
Check the address and indicate that the connection between the fan board and the Raspberry Pi is successful, the DIP switch is connected to a high level by default (A0~A5 are all OFF), and the displayed address is 0X7F;
Run the demo code
1) Install the SG-FAN-HAT-A on the Raspberry Pi correctly and power on the Raspberry Pi, make sure the fan switch and the RGB LED switch are in the "ON" state.
2) Run the python program:
Enter the python path of demo_codes according to its own path:
cd xxx/fan-hat/python # xxx Represented as its own Raspberry Pi pathRun the program:
sudo python3 fan-hat.py3) Run the C program:
Enter the c path of demo_codes according to its own path:
cd xxx/fan-hat/c # xxx Represented as its own Raspberry Pi path
Run the program:
sudo make clean
sudo make
sudo ./main
The program prints out the current CPU temperature and fan speed every 1 second. The fan speed is automatically adjusted according to the CPU temperature. The 4 fan speed LEDs on the board and the 6 RGB LEDs at the bottom display different states, temperature values and their corresponding values according to the CPU temperature. The status is shown in Table 1 below:
| CPU Temperature:T | Fan speed (percentage) | Fan Speed LED Indicators | RGB LED effect (RGB encoding) |
|---|---|---|---|
| T<40℃ | 40% | From the left, LED 1 is fully on, LED 2 is dimly on, LED 3 and 4 are off | Color coded randomly generated |
| 40℃ =< T < 50℃ | 50% | From the left, LED 1 and 2 are all on, LED 3 and 4 are off | (0,127,255)Light BLUE |
| 50℃ =< T < 55℃ | 75% | From the left, LED 1, 2, and 3 are all on, and LED 4 is off | (0,255,0)GREEN |
| 55℃ =< T < 60℃ | 90% | From the left, the LED 1, 2, and 3 are all on, and the LED 4 is dimly on | (255,127,0)YELLOW |
| 60℃ =< T | 100% | 4 LEDs all on | (255,0,0)RED |
Table 1
4) Switch function
Turn the switch of the fan and RGB LED from "ON" to "OFF" and check whether the fan and the 6 RGB LEDs have been turned off. If they are not turned off, it is abnormal.
5) Temperature control test
Install sysbench:
sudo apt install sysbenchStart the thread scheduling test:
sysbench --test=threads --num-threads=4 --thread-yields=10000 runTurn the fan switch to "OFF" and the RGB LED switch to "ON",
Then observe whether the 4 LEDs and RGB LEDs are displayed according to the status in Table 1.
Then turn the fan switch to "ON", at this time the CPU temperature will slowly drop, and then observe whether the 4 LEDs and 6 RGB LEDs are displayed according to the status in Table 1.
6) Boot self-starting test
Create a service file:
sudo nano /etc/systemd/system/fan-control.serviceEnter the following content(Please make the modifications according to your path):
[Unit]Description=Fan Control Service
After=multi-user.target graphical.target
Wants=multi-user.target
[Service]
Type=simple
ExecStartPre=/bin/sleep 5
ExecStart=/home/pi/Documents/FAN/c/main #This is the path in C
WorkingDirectory=/home/pi/Documents/FAN/c
#ExecStart=/usr/bin/python3 /home/pi/Documents/FAN/python/fan-hat.py #This is the path in python
#WorkingDirectory=/home/pi/Documents/FAN/python
Restart=always
RestartSec=5
User=root
Environment=PYTHONUNBUFFERED=1
[Install]
WantedBy=multi-user.targetSave it.Start and enable it:
sudo systemctl daemon-reload
sudo systemctl enable fan-control.service
sudo systemctl start fan-control.service
Reboot the Raspberry Pi,and check whether the demo code is running normally after restarting.
Note: c and python code cannot be run at the same time, you should comment out "ExecStart=/usr/bin/python3 /home/pi/Documents/FAN/python/fan-hat.py " and "WorkingDirectory=/home/pi/Documents/FAN/python" when you need to start up and run C code, and if you need to start up to run python code ,"ExecStart=/home/pi/Documents/FAN/c/main" and "WorkingDirectory=/home/pi/Documents/FAN/c" should be commented out.
Resources
Data Sheet