
Overview
This product is the Raspberry Pi Pico UPS Uninterruptible Power Supply expansion board, designed to work with 18650 lithium batteries. It utilizes different LED indicators to distinguish the operational status of the UPS board, including "Charging Mode," "Discharging Mode," and "Battery Reverse Connection Warning Mode." This UPS board also features an independent power supply, allowing simultaneous charging and discharging or exclusive charging. The board incorporates battery detection functionality, with an Alarm warning LED lighting up when the battery is reverse connected, causing the UPS board to halt operation. We offer example programs in both C and Python languages, enabling voltage, current, power, and battery level monitoring.
Product Features
- Support for high-capacity 18650 batteries
- I2C interface, requiring minimal pin usage
- Utilizes the INA219 chip with I2C interface for zero-drift bidirectional current and power monitoring
- Provides open-source example programs for use with Raspberry Pi Pico development board
Specifications
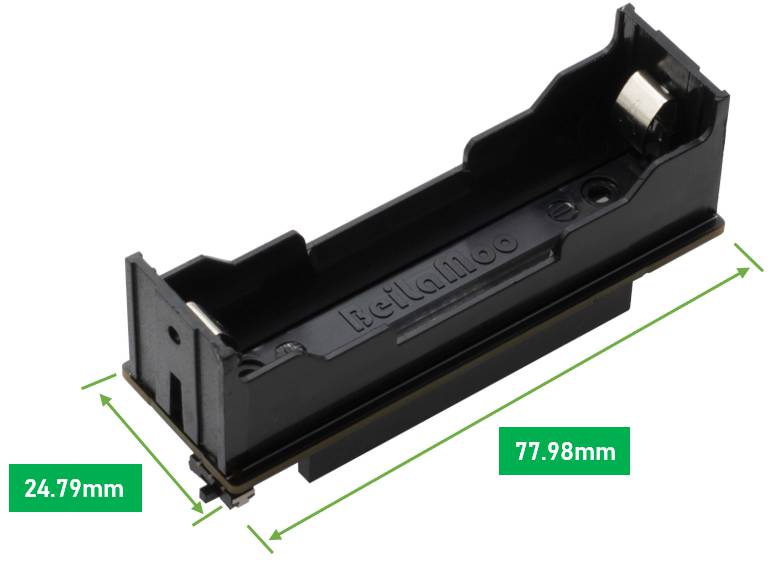
| Dimensions | 77.98mm (Length) x 24.79mm (Width) |
| Data Interface | I2C |
| Battery Holder | 18650 Lithium Battery Holder |
| Power Supply Voltage | 5V |
Interface Definitions
| Interface | Pin Number | Function |
|---|---|---|
| VCC | VSYS | Power Positive (5V) |
| GND | GND | Power Ground |
| SDA | GP2 | SDA Pin of Voltage/Current Detection Chip |
| SCL | GP3 | SCL Pin of Voltage/Current Detection Chip |
Resources definition


- 1 18650 Battery Holder
- 2 & 7 Raspberry Pi Pico female header
- 3 Battery Charging Indicator LED
- 4 Battery Reverse Connection Warning Indicator LED
- 5 Battery Output Switch Indicator LED
- 6 Battery Output Switch
- 8 Battery Output Activation Button
Example Usage
C Program
Setting Up the Raspberry Pi Pico C/C++ Environment on Windows
1. Install the ARM GCC Compiler
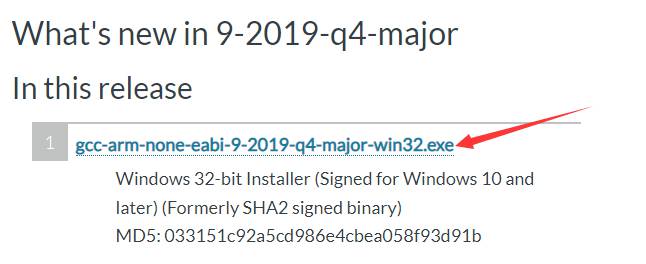
Open a web browser and navigate to the following URL: https://developer.arm.com/downloads/-/gnu-rm
Choose the 2019-q4 version for downloading and installation
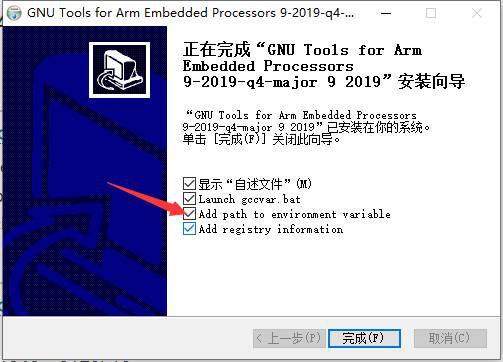
Remember to check the options below during the installation process.
Add path to environment variable
2.Install Cmake
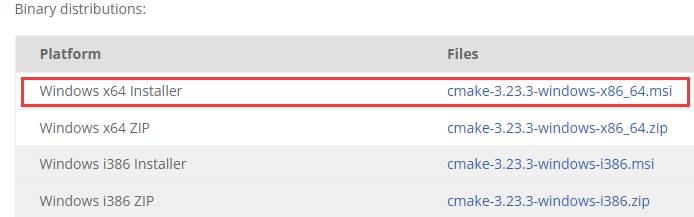
Open your web browser and navigate to the following URL: https://cmake.org/download/
Choose to download cmake-3.23.3-windows-x86_64.msi and install it with the default settings.
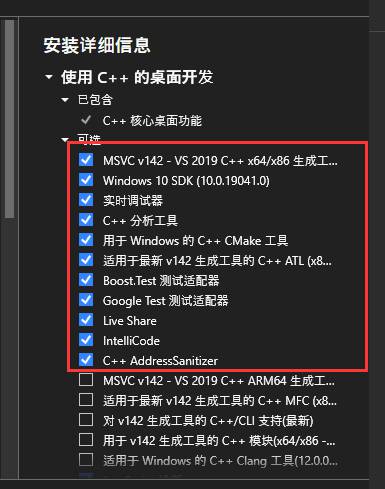
3.Install Visual Studio 2019 (or the latest 2022 version also works at the moment). If you need the 2019 version, find the download link on the official website: https://visualstudio.microsoft.com/zh-hans/downloads/. During the installation process, ensure you select the required options.
4.Install Python3.7
Open your web browser and visit the following URL:
https://www.python.org/downloads/windows/
Find Python3.7.9-Aug.17,2020
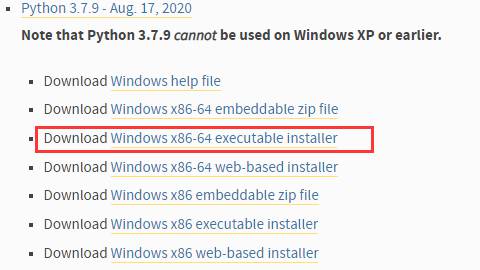
Select this option for downloading and installation. Remember to check the appropriate options during the installation process
Add Python 3.7 to PATH

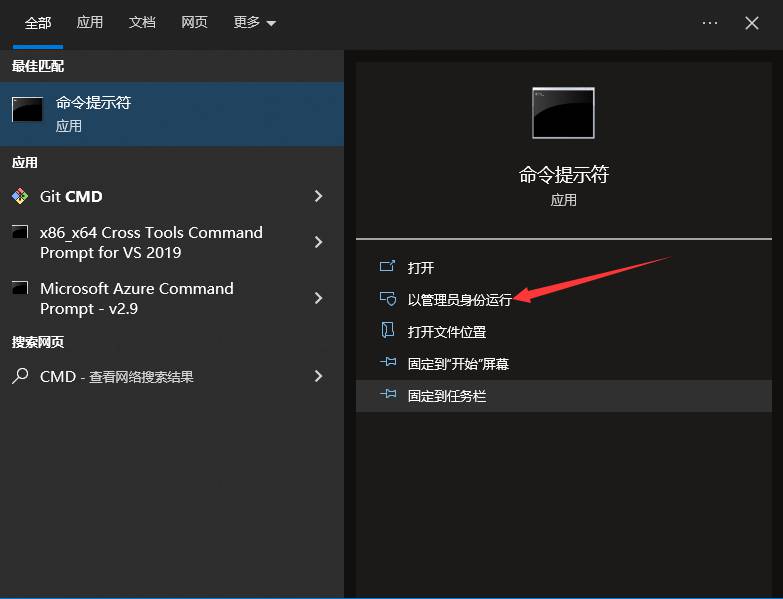
5.Open the Start menu, search for "cmd," and run it as an administrator.
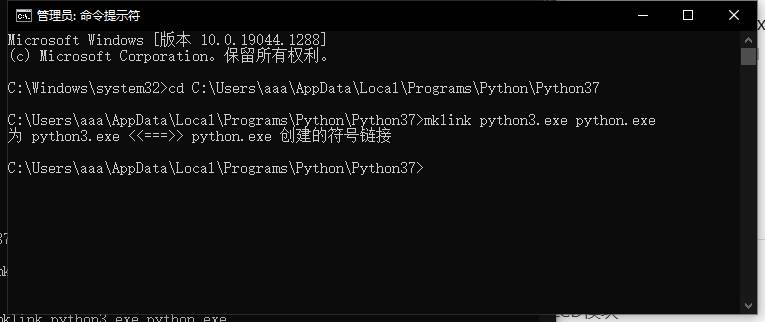
Use the "cd" command to navigate to the Python 3.7 directory. The default path is usually:
C:\Users\[YourUsername]\AppData\Local\Programs\Python\Python37
Run mklink python3.exe python.exe
6.Install Git
Go to the url:https://git-scm.com/download/win
Download the appropriate version based on your system's specifications.
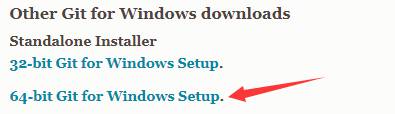
After downloading, proceed with the default installation.
7.Configure PICO-SDK
1) Obtain pico-sdk and pico-examples
Create a directory without any Chinese characters in its path. Once Git is installed, right-click on an empty area within that directory and select "Git Bash Here." In the command window, enter the following commands (input one line at a time):
git clone -b master https://github.com/raspberrypi/pico-sdk.git
git clone -b master https://github.com/raspberrypi/pico-examples.git
2) Initialize
Input the following command:
cd pico-sdk
git submodule update --init
8.Set the pico-sdk Path
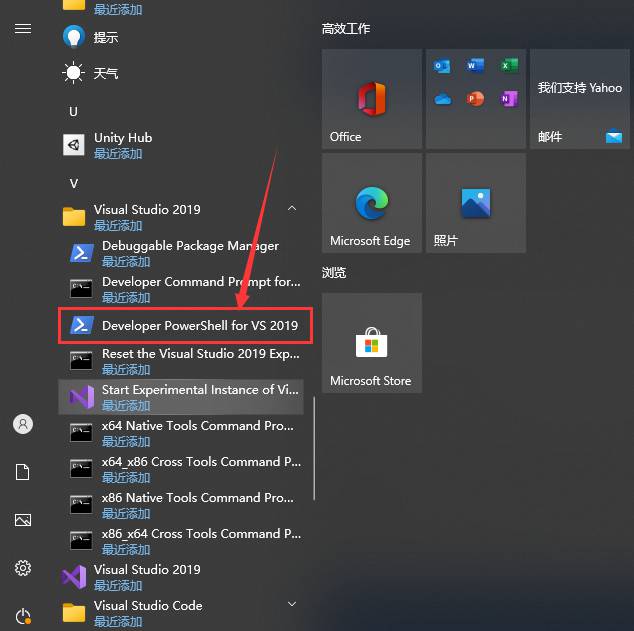
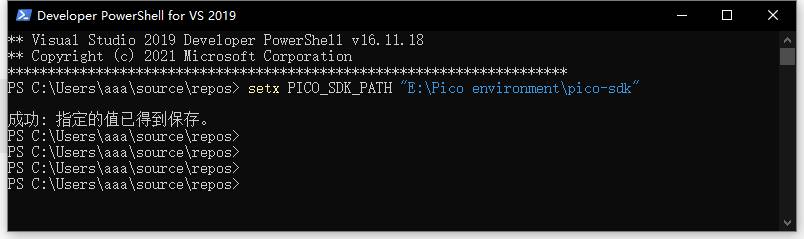
Locate "Developer PowerShell for VS2019" in the Start menu and open it.
In the command window, input the following command:setx PICO_SDK_PATH "[Path to the PICO-SDK]\pico-sdk"
9.Compile Official Examples
Close the command window and reopen it. Use the "cd" command to navigate to the "pico-examples" directory.
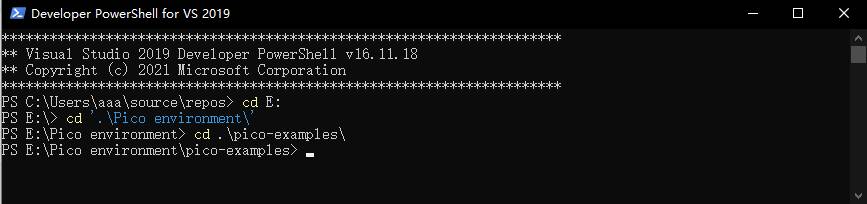
Then enter the following commands one by one:
mkdir build
cd build
cmake -G "NMake Makefiles" ..
nmake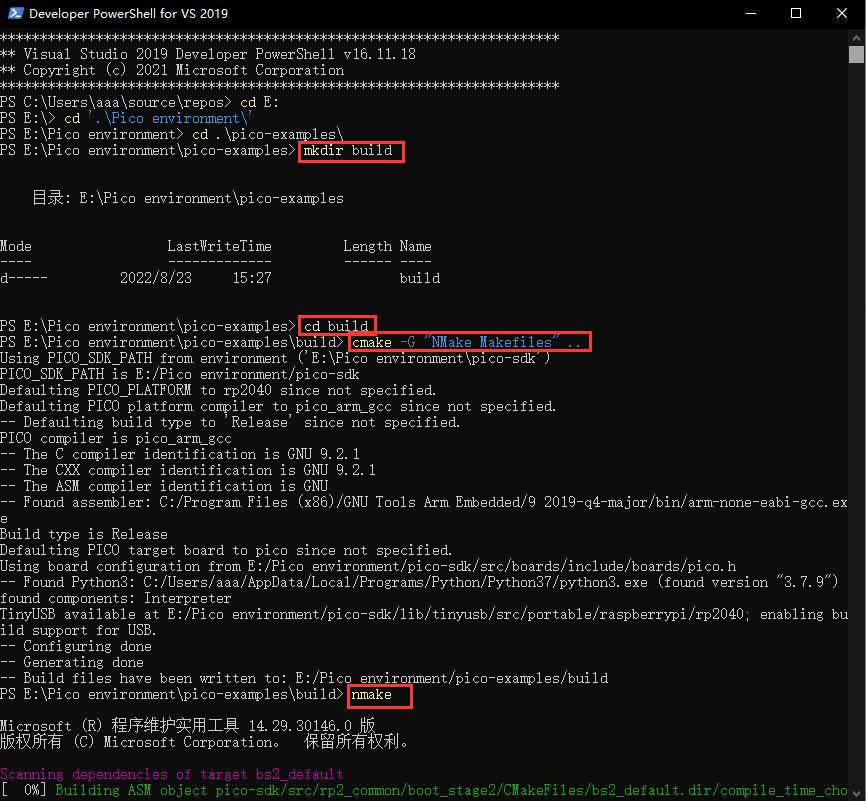
Wait for the compilation to complete. Once done, the setup for the Raspberry Pico C/C++ Windows development environment will be finished.
10.Setting Up Visual Studio Code Development Environment
1)Install Visual Studio Code
Install it from the official website: https://visualstudio.microsoft.com/zh-hans/downloads/
2) Choose and install the Visual Studio Code C/C++ plugin. It is essential to install the Cmake Tools plugin.
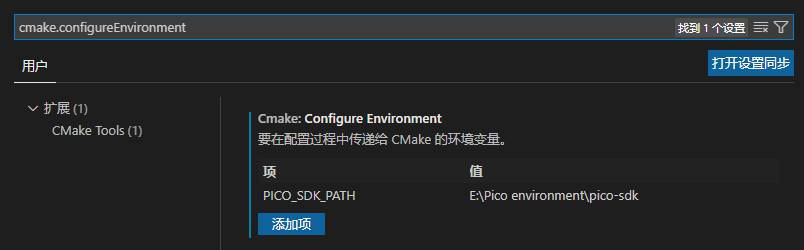
3) Open settings in the bottom right corner of Visual Studio Code, then enter the following in the search bar:
cmake.configureEnvironment
4) Add an entry called PICO_SDK_PATH with the value being the location where you have stored the PICO-SDK.
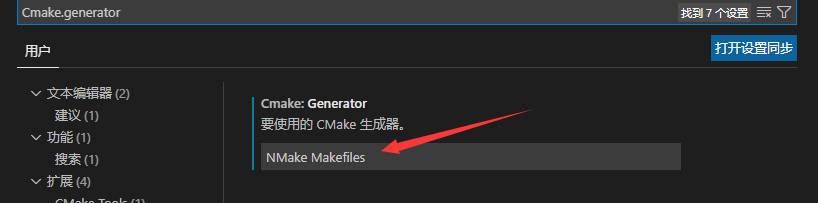
Configure Cmake.generator,Proceed by typing "cmake.generator" in the settings search bar and input "NMake Makefiles."
5) Close Visual Studio Code
6) Open Developer PowerShell for VS2019 and enter "code" to reopen Visual Studio Code
7) Open the "pico-examples" folder in Visual Studio Code
8) At the bottom of the Visual Studio Code window

① Choose "GCC 9.2.1 arm-none-eabi" as the compilation tool. If this option is not initially available, click on the first item, and wait for it to reload. The option "GCC 9.2.1 arm-none-eabi" should appear.
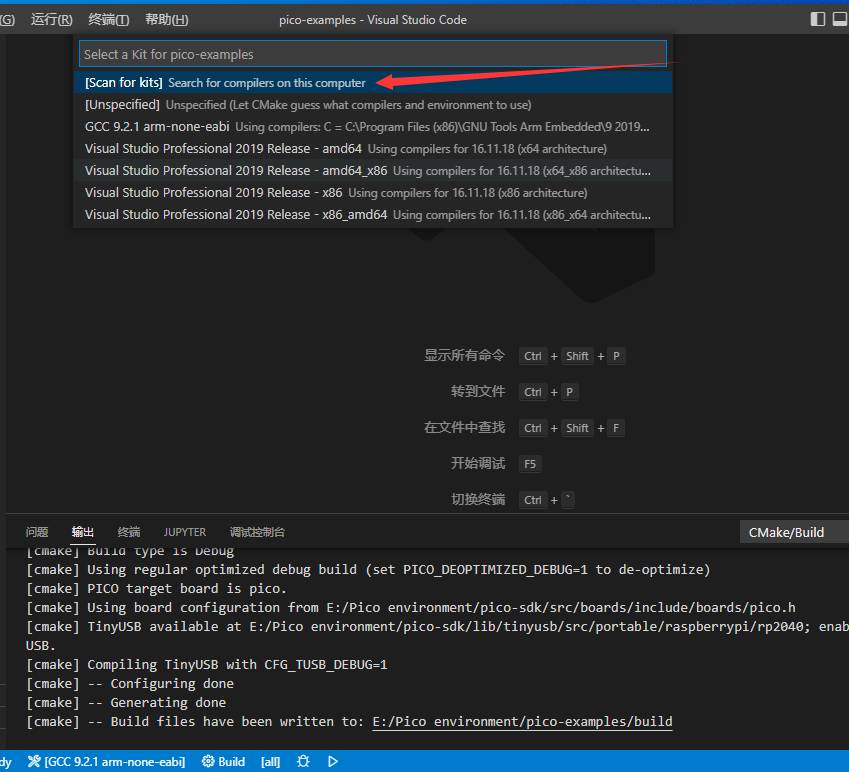
② Click on the 'Build' button to compile the project.
③ Select the desired project to compile
11.Download the USB Serial Output Library
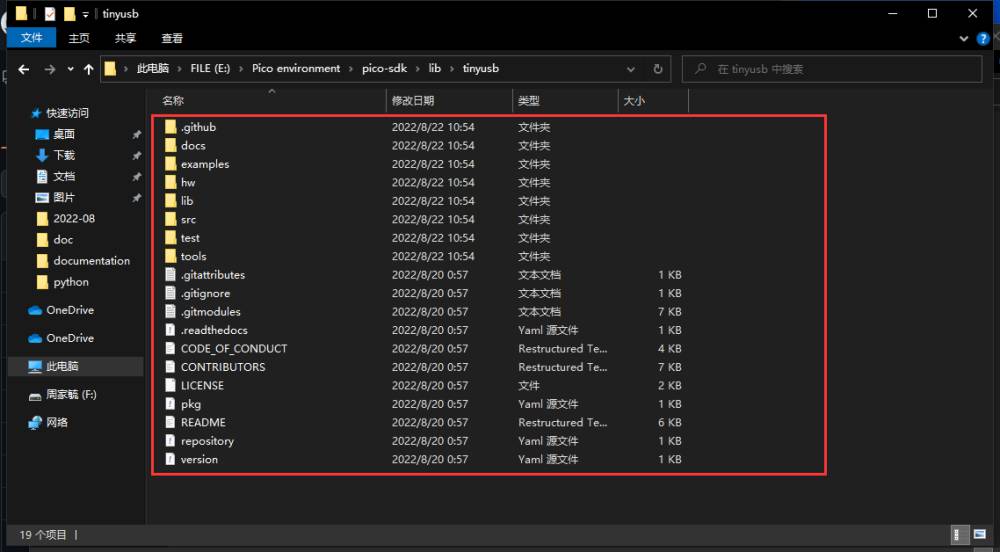
Open the pico-sdk directory, navigate to the lib\tinyusb directory, and right-click on an empty space. Choose "Git Bash Here."
In the command window, input the following command:
git clone https://github.com/hathach/tinyusb。
If it takes too long to pull the library, you can directly open the website https://github.com/hathach/tinyusb, download all the files from the webpage, and copy them to the pico-sdk\lib\tinyusb directory.
Open INA219 Project, Compile, and Flash
1.Place the INA219 folder in a directory without Chinese characters. Empty all files in the demo codes\INA219\c\build folder. If the build folder doesn't exist, create one.
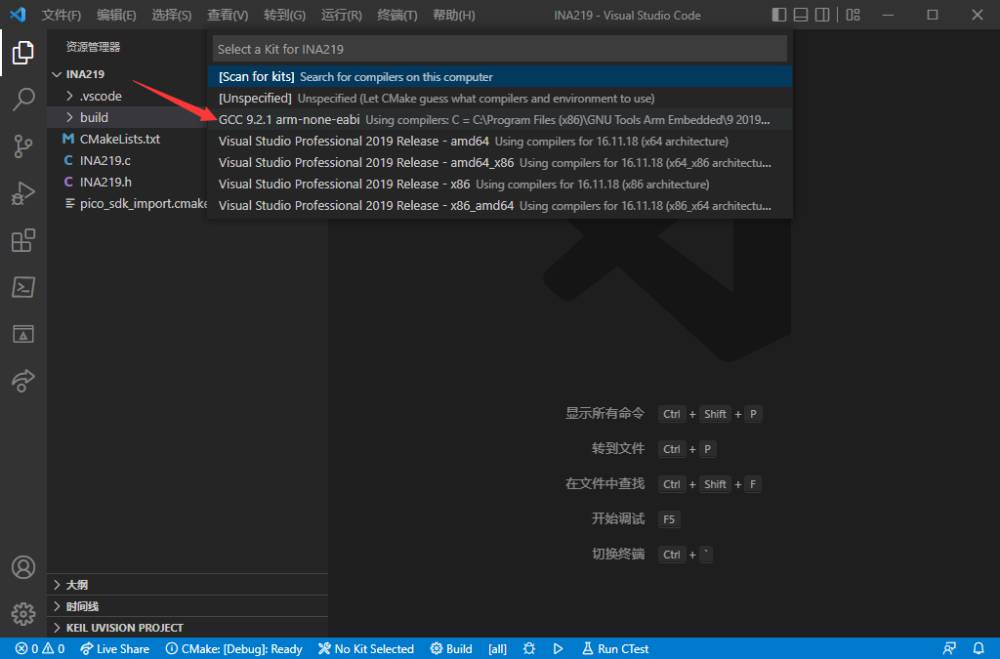
2.Use the method mentioned in step 10.(7) to open Visual Studio Code (VSCode). Open the project directory in VSCode: code\c\INA219 folder. Choose the INA219 project for compilation and select GCC 9.2.1 arm-none-eabi from the presented options. Refer to the image below.
After completing the above steps, the selected compiler is indicated by ① in the following image. Click on ② labeled "Build" to start the compilation.
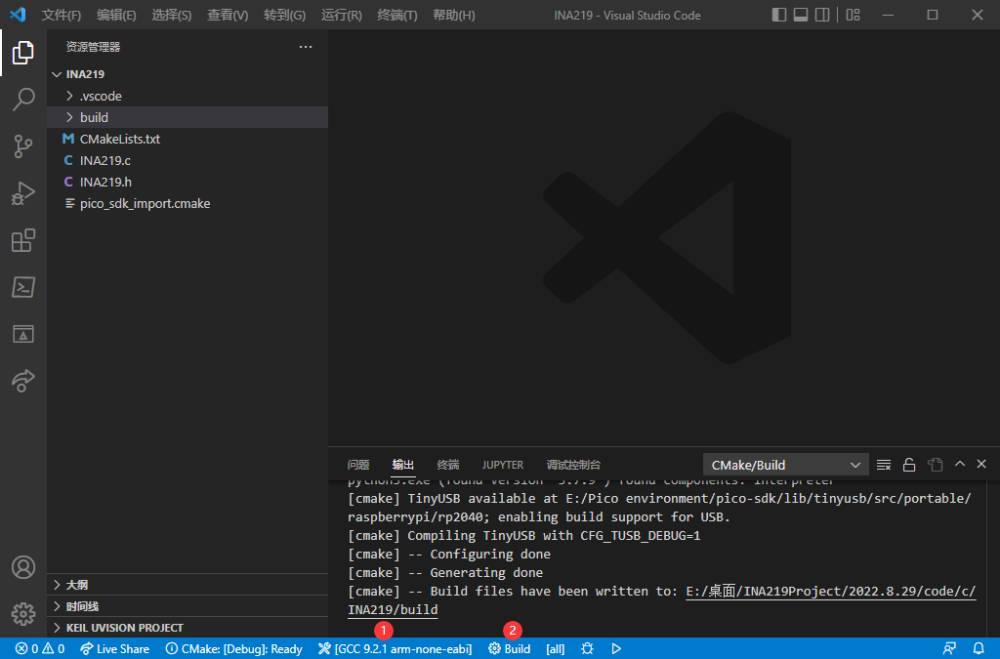
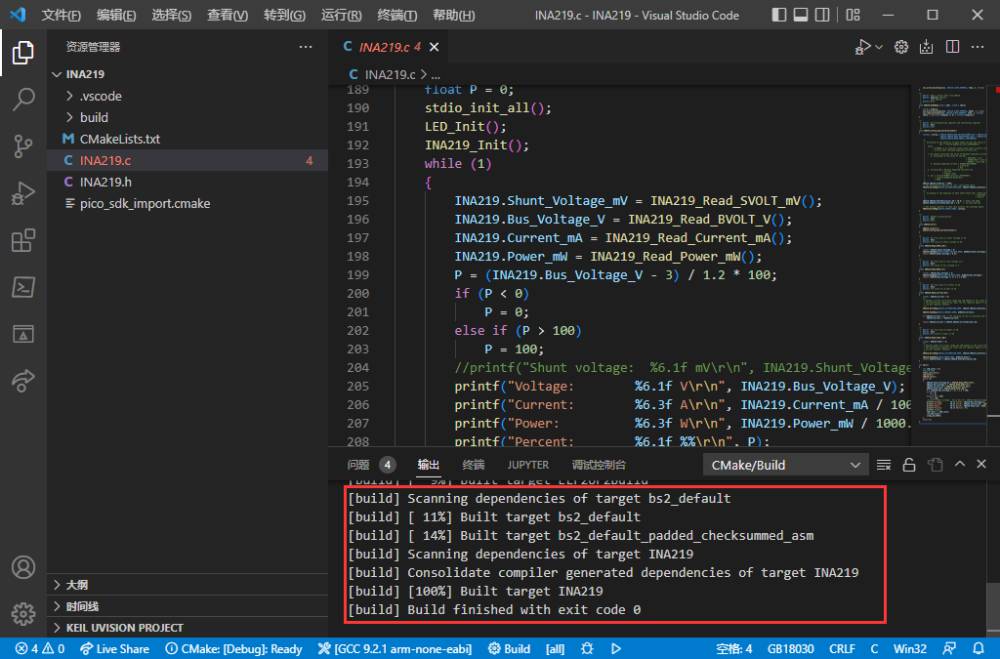
Compilation is done.
3.Open the demo codes\INA219\c\build Directory and Locate INA219.uf2
4.With the Pico powered off, hold down the BOOTSEL button on the Pico. While holding the button, connect the Pico to your computer using a USB cable. After connecting, release the BOOTSEL button. This will create a new "RPI-RP2" disk directory that appears on your computer. Drag and drop the "INA219.uf2" file into the "RPI-RP2" disk directory. This will complete the flashing process.
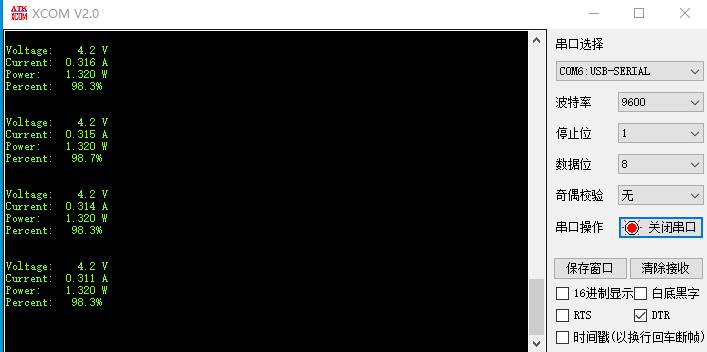
5.Open a serial terminal program and set the baud rate to 9600. Observe the data output in the terminal.
Python Program
1.Install Thonny
Thonny download website:https://thonny.org
2.After installing Thonny, press and hold the BOOTSEL button on Pico when the Pico is powered off, connect the computer with a USB cable, and release the button. At this time, an RPI-RP2 disk directory pops up, and drag rp2-pico-20210418-v1.15.uf2 under the demo codes\INA219\python directory into the RPI-RP2 disk.
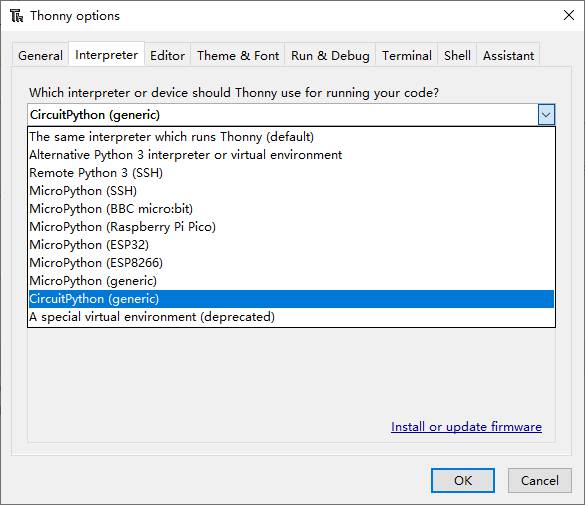
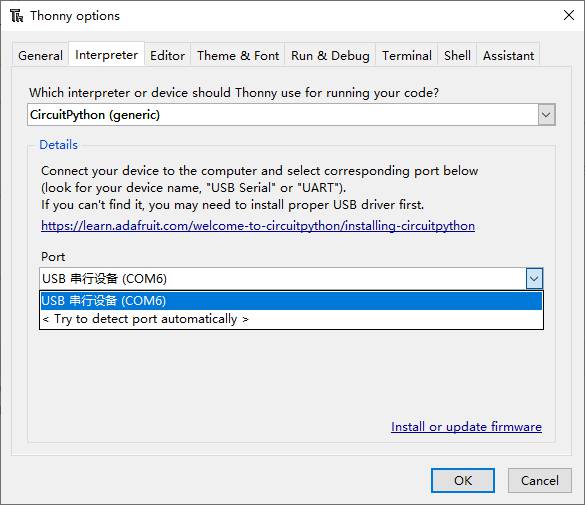
3.Right click INA219.py in the demo codes\INA219\python directory to open it with Thonny, click Tools - Settings, select the interpreter as CiruitPython (general) in the interpreter column, and set the port (COMx: the port number x of different computers may be different), then click OK.
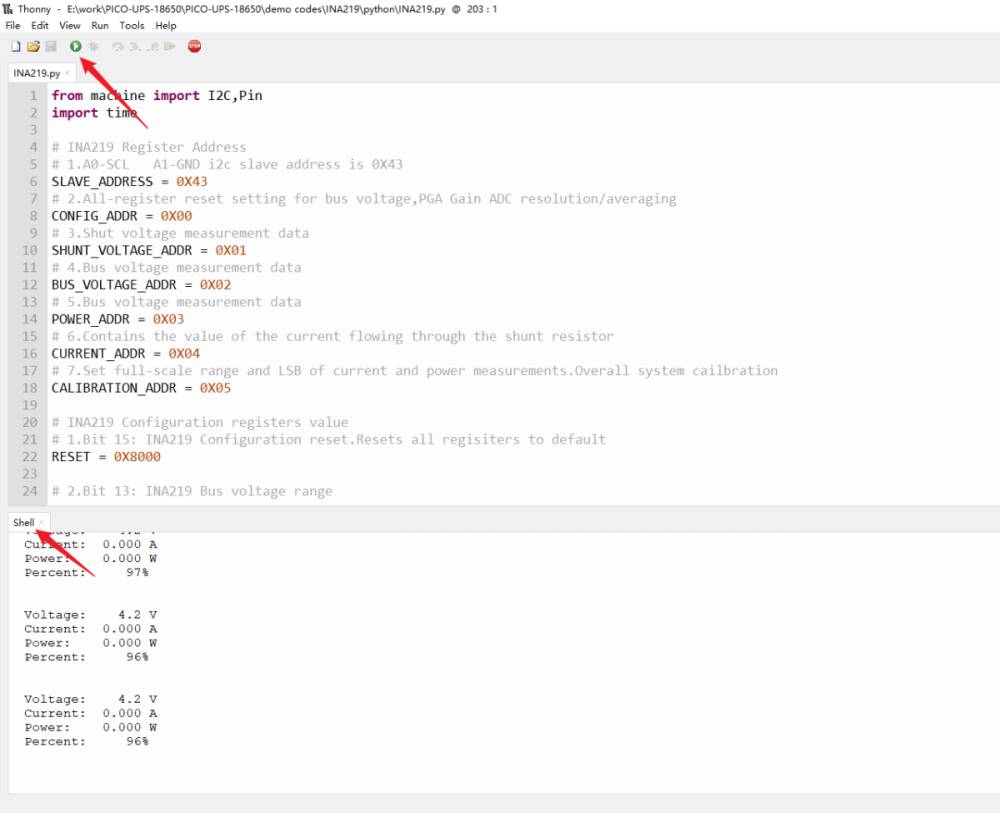
4.Click the "Run current script" button or press the F5 key to execute the current script. Observe the data output in the shell window within the Thonny application.
Resources
Data Sheet