
I. Introduction
1.1 Product Overview
Raspberry Pi Zero expansion board, expands 3 USB 2.0 ports and 1 RJ45 10/100M Ethernet port.
This USB HUB ETH expansion board is specially designed for the Raspberry Pi Zero series. It provides powerful expansion capability and perfectly fits the Raspberry Pi Zero in an extremely small size. It includes three USB 2.0 Type-A ports and one RJ45 Ethernet port, making it easy to connect various peripherals and network devices. Through simple installation, it not only expands the Raspberry Pi's USB ports but also provides adaptive 10/100M network connection, making it ideal for scenarios requiring multiple USB devices and network connectivity.
1.2 Product Features
- Transparent working status LEDs: onboard 1 power indicator and 3 USB expansion port indicators.
- Onboard 3 USB 2.0 expansion ports and a 10/100M RJ45 Ethernet port.
- Efficient USB and network transmission: provides stable USB 2.0 transmission speed and a 10/100M Ethernet port, suitable for most daily applications and network device connection needs.
II. Resource Overview
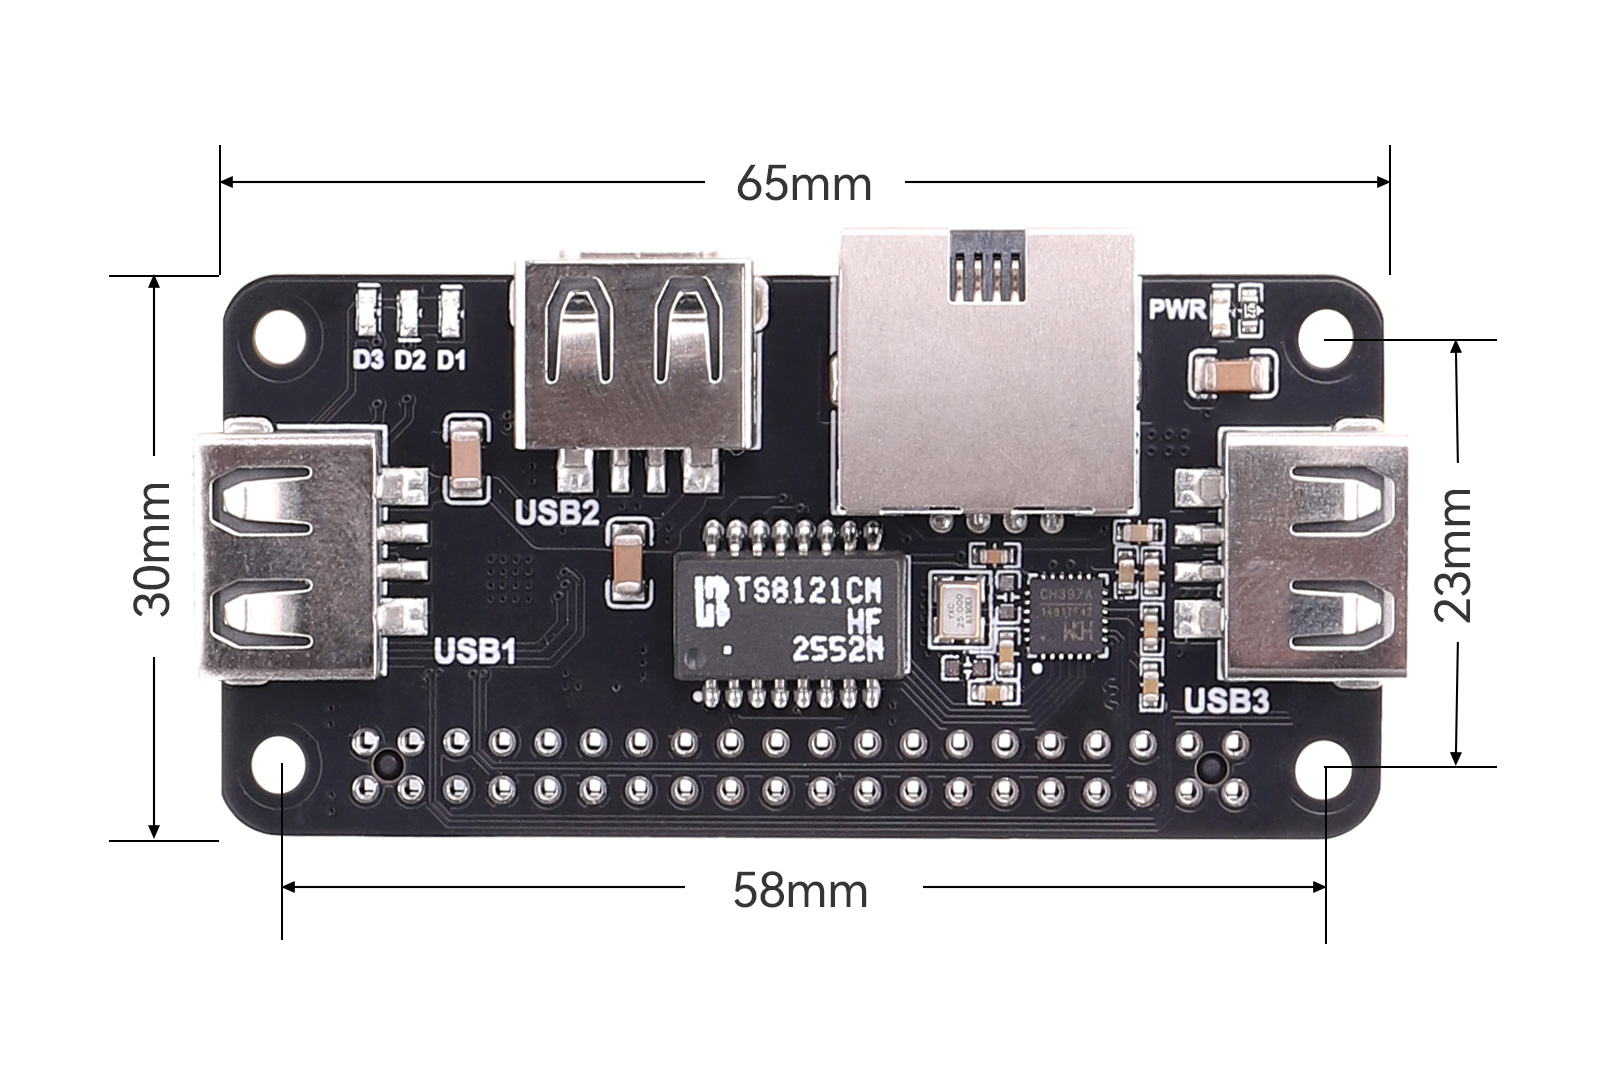
| Item | Specification |
|---|---|
| Model | USB HUB ETH HAT(U3E100) B |
| Power Supply Voltage | 5V |
| USB Interface | USB 2.0 |
| Ethernet Connector | RJ45 |
| Ethernet Speed | 10/100 Mbps |
| Through-hole Diameter | 2.5mm |
| Dimensions | 65 mm × 30 mm |
Ⅲ. Resource Overview
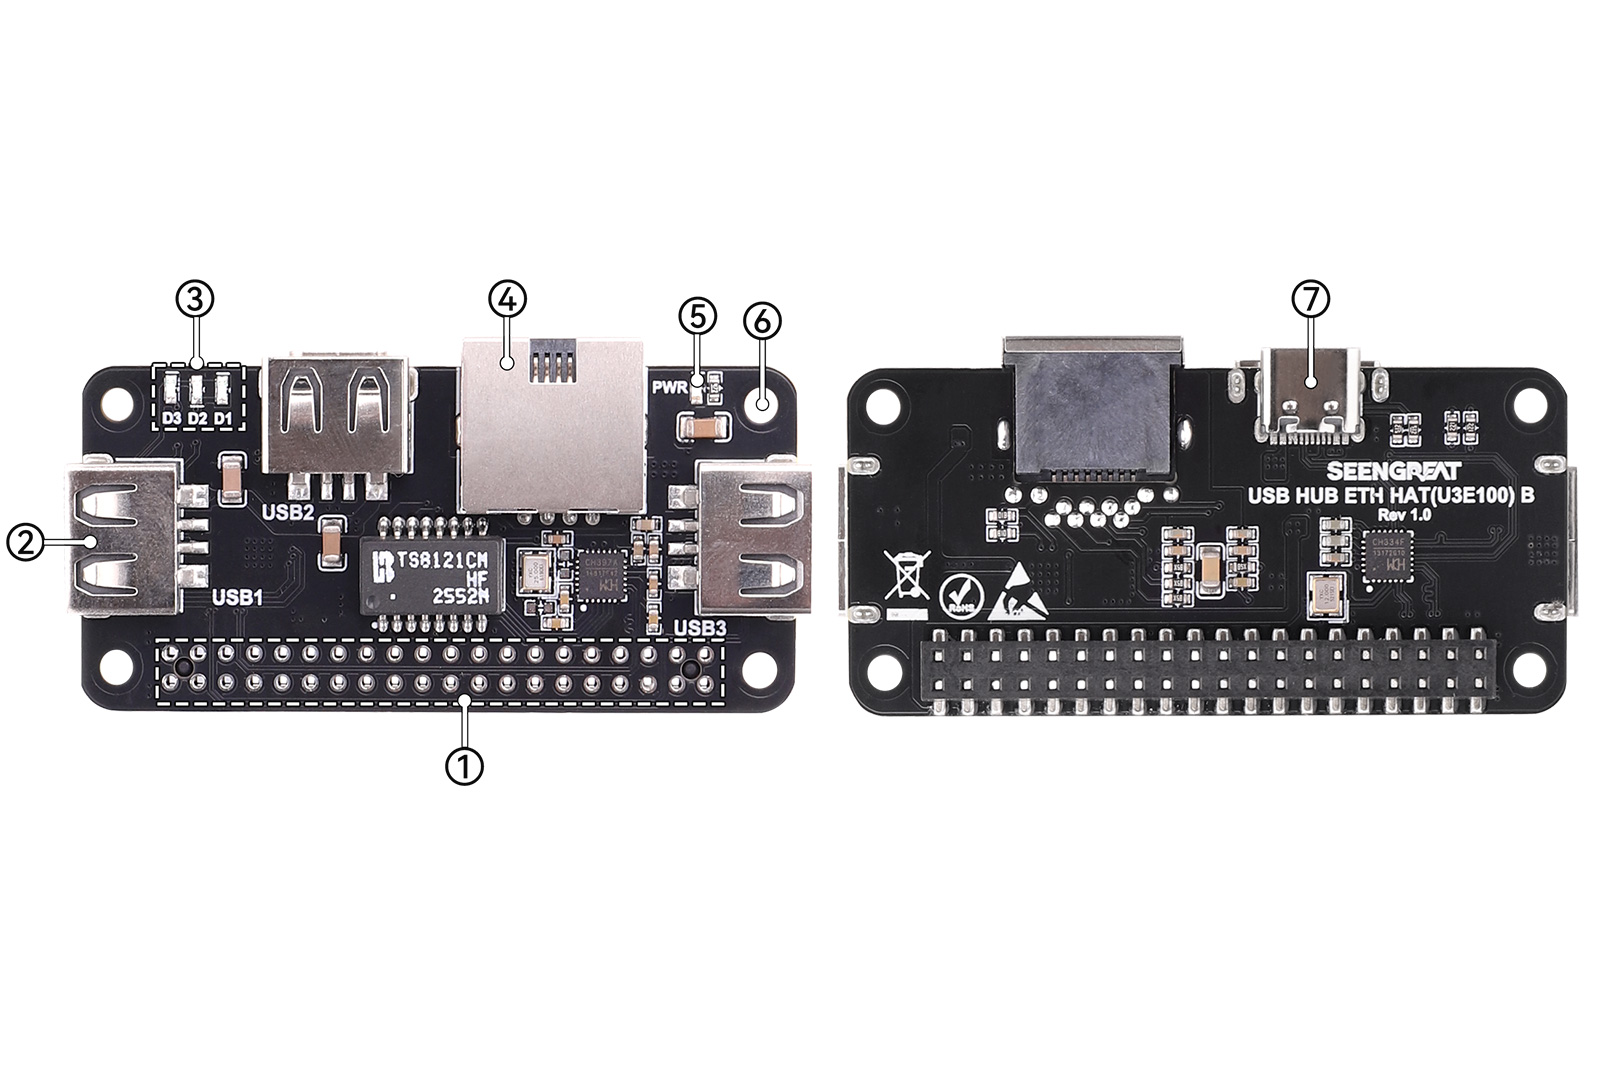 ①Raspberry Pi 40-pin female header.
②3 USB 2.0 ports.
③USB port working status indicators.
④RJ45 Ethernet connector.
⑤Power indicator.
⑥M2.5 mounting holes.
⑦Type-C connector: USB HUB interface.
IV. Usage
4.1 Instructions
4.1.1 Hardware Description
- Onboard RJ45 Ethernet port, supports 10/100M adaptive network connection, suitable for wired network transmission. Please ensure the Ethernet cable is compatible with the device and that it is correctly inserted into the port. You can observe the port indicator to determine the current network status.
- Onboard 3 USB 2.0 ports, equipped with USB 2.0 port status indicators. When a device is properly mounted on a USB 2.0 port, the corresponding status indicator will light up.
4.1.2 Precautions
- When connecting a USB device, observe whether the corresponding indicator lights up to determine whether the USB device connection is normal.
- Do not assemble while powered on.
4.2 Testing
4.2.1 Using on Raspberry Pi OS
Open the Raspberry Pi terminal.Enter the directory to be tested.
lsblk # View USB drive devices
df -h # Check the mount path; assume it is mounted at /media/pi/UDISK
cd /media/pi/UDISKsudo sh -c "sync && echo 3 > /proc/sys/vm/drop_caches"sudo dd if=/dev/zero of=/mount/path/testfile bs=1M count=1024 oflag=direct status=progresssudo dd if=/mount/path/testfile of=/dev/null bs=1M count=1024 iflag=direct status=progresssudo rm /mount/path/testfile4.2.2 Testing Network Speed on Raspberry Pi OS
Use the iperf3 tool. Run the following command on the Raspberry Pi to install the tool:
sudo apt install iperf3On the Raspberry Pi, run the command to start a server on port 5100. # The port can be set according to actual conditions.
sudo apt install iperf3Press Win+R, type cmd in the Run dialog to open the Command Prompt.
Go to the software directory and run the following command:
.\iperf3.exe -c 192.168.0.** -p 5100You will then see the relevant network transmission data printed in the window.