
I. Introduction
1.1 Product Overview
Raspberry Pi DA7212 Audio Codec Expansion Board – I2S Audio Sound Card with Rich Audio Interfaces
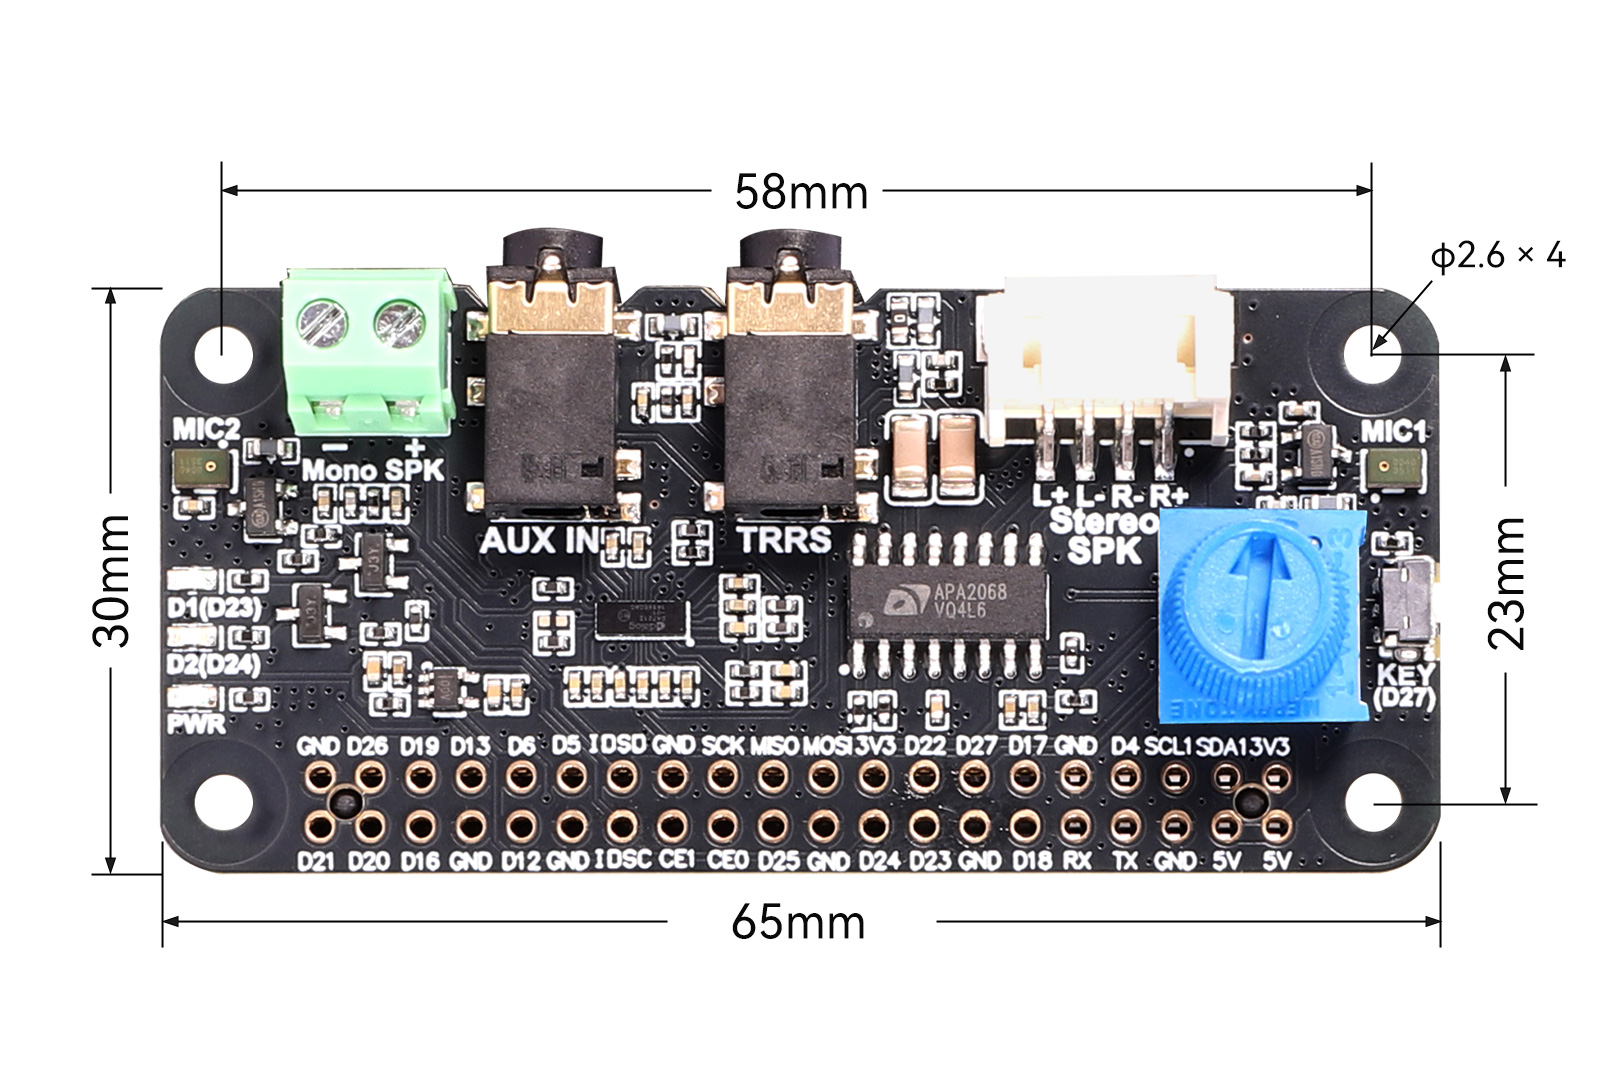
The DA7212 Audio Codec HAT is an audio expansion board for the Raspberry Pi, connecting via the 40-pin GPIO interface. It features the DA7212 as its core audio codec. The board is equipped with dual onboard microphones, a 3.5mm AUX recording input, a 3.5mm TRRS headphone jack, mono speaker output, stereo speaker output, a volume adjustment knob, a user button, status LEDs, and HAT EEPROM. It is designed for audio playback, recording, headphone/speaker switching, AUX input capture, and basic human-machine interaction.
1.2 Product Features
- Utilizes the DA7212 stereo codec chip with I2S audio transmission and I2C control interfaces.
- Rich audio input options: Dual onboard microphones, CTIA headset microphone input, and 3.5mm AUX analog audio input.
- Multiple audio outputs: Supports 3.5mm TRRS headphone output, mono speaker output, and stereo speaker output.
- Onboard volume adjustment knob for easy hardware-level volume control of TRRS headphone and stereo speaker outputs.
- Onboard user-configurable LEDs and button for easy human-machine interaction.
- Designed with 40-pin GPIO expansion header for compatibility with Raspberry Pi series boards.
1.3 Product Specifications
| Core Audio Codec | DA7212-01UM2 |
| Supply Voltage | 5V (via 40-pin header) |
| ADC SNR | 90dB |
| DAC SNR | 100dB |
| Stereo Speaker Amplifier | APA2068 |
| Audio Interface | I2S |
| Control Interface | I2C |
| Onboard Microphones | 2 |
| User Button | GPIO27 |
| Green LED D1 | GPIO23 |
| Blue LED D2 | GPIO24 |
| Board Dimensions | 65mm (L) x 30mm (W) |
II. Usage
2.1 Resource Overview
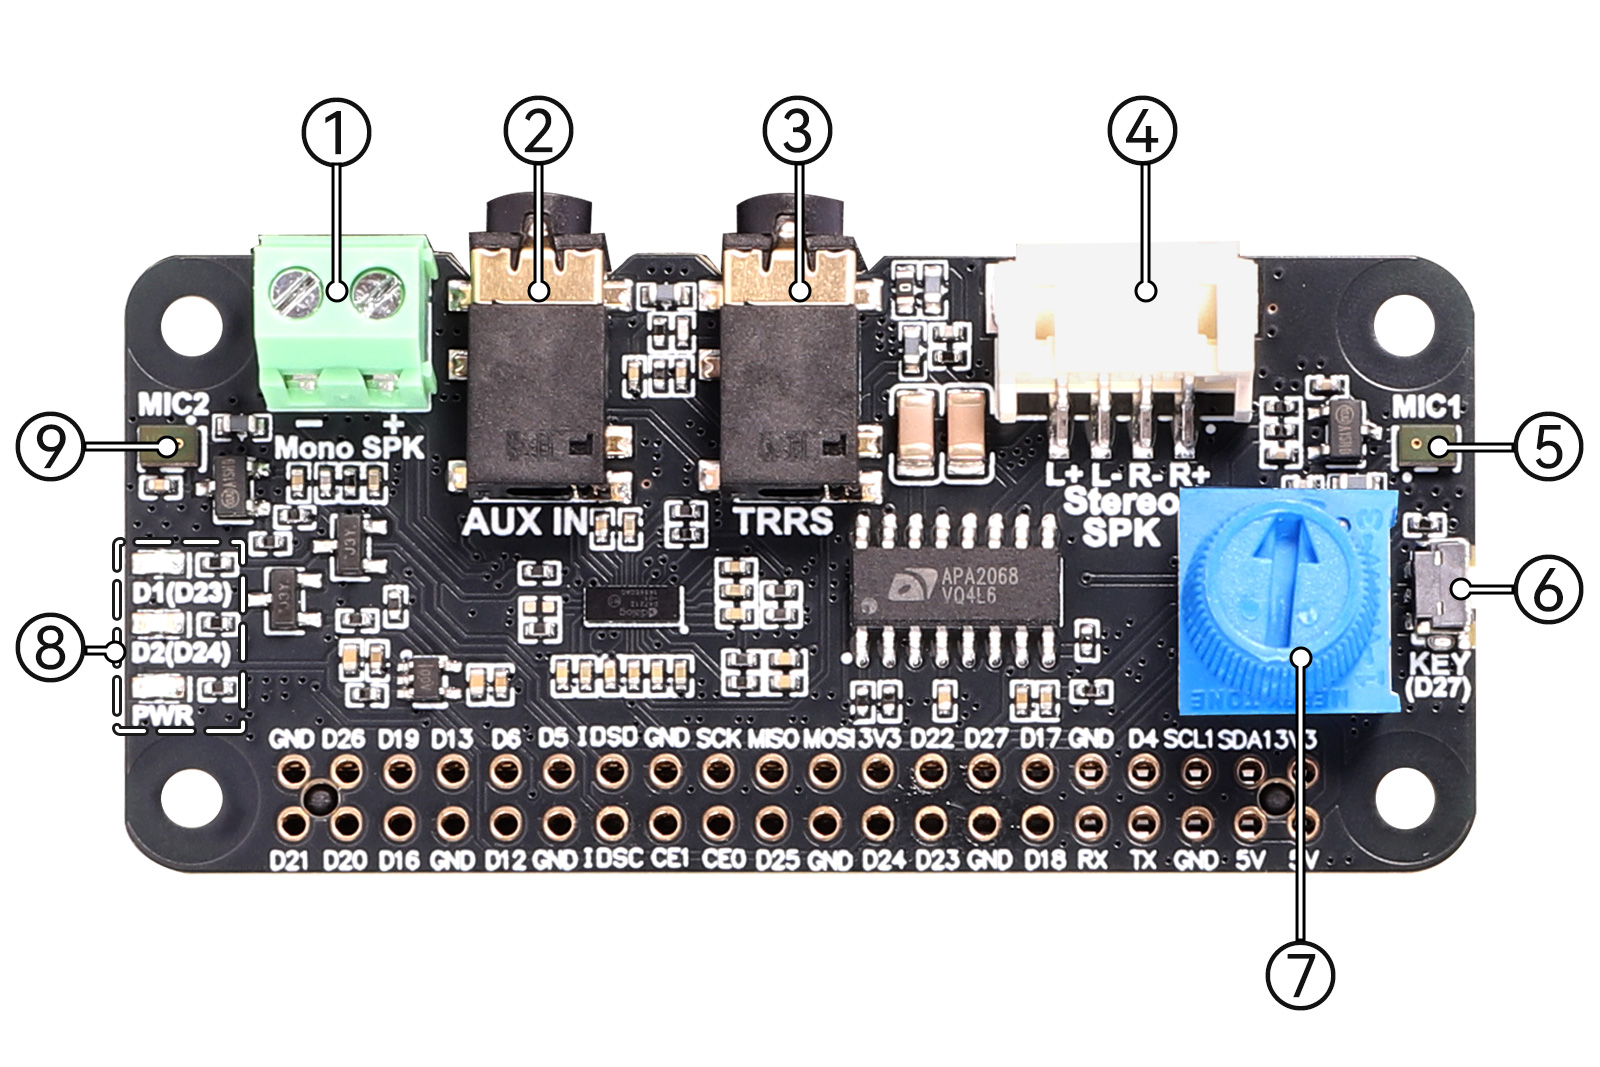
- Mono Speaker Output
- 3.5mm AUX Recording Input Jack
- 3.5mm TRRS Headphone Output Jack
- Stereo Speaker Output (PH2.0 4P)
- Onboard Microphone 1
- User Button (Connected to GPIO27)
- Volume Adjustment Knob (for TRRS headphone and stereo speaker outputs)
- Onboard Status LEDs: PWR (3.3V power indicator), D2 (Blue LED, connected to GPIO24), D1 (Green LED, connected to GPIO23)
- Onboard Microphone 2
2.2. Usage Instructions
IMPORTANT NOTES:
- This board occupies I2C address 0x1A on the I2C1 bus.
- The TRRS headphone jack supports CTIA standard headsets. When a headset is connected:
- The onboard PH2.0 4P stereo speaker output is automatically muted, and audio is routed to the headphone.
- The onboard microphones are disabled, and the recording input automatically switches to the headset's microphone.
2.2.1. Driver Installation
- Download the audio test driver file from the "Test Driver" section of this WIKI.
- Unzip the file using the command:
unzip da7212-drv.zip - Navigate to the extracted folder:
cd da7212-drv/driver - Install the driver by running:
sudo ./install.sh
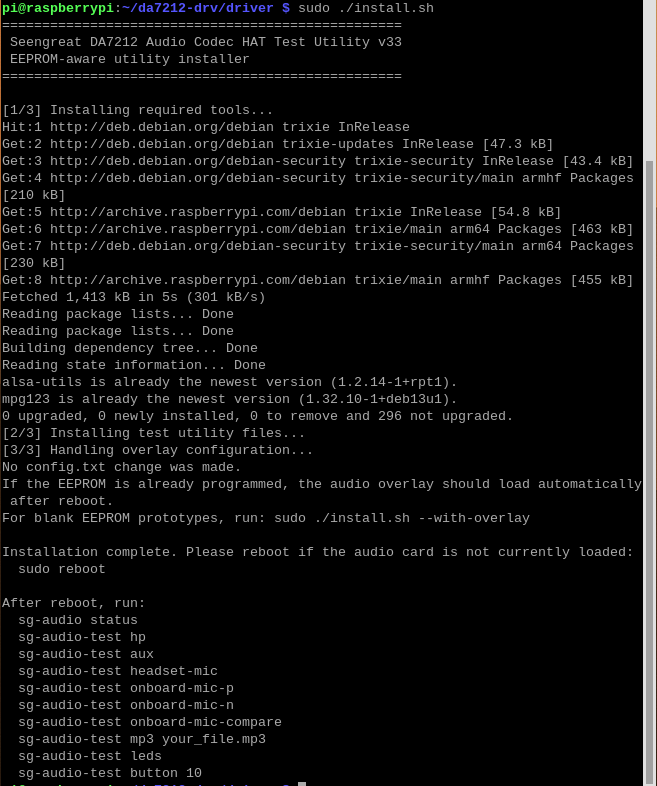 5. After the installation completes, reboot your Raspberry Pi.6. Run the command
 aplay -l in the terminal. You should see the sound card "SG DA7212 HAT" listed.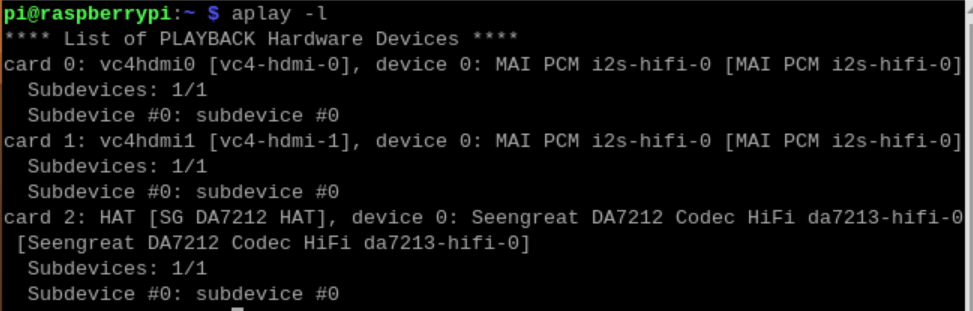
2.2.2. Audio Playback Test
Note:When the "spk" parameter is used in the command, audio is output through the mono speaker.
Connect mono and stereo speakers to the board, then run the following command in the terminal to play an MP3 file:
sg-audio-test mp3 apologize.mp3
The apologize.mp3 in the command is the MP3 file name. You can replace it with any other audio file as needed. For example, to play aaa.mp3, use the command:
sg-audio-test mp3 aaa.mp3
To play a WAV file, you can use:
sg-audio-test hp ruyuan.wav
During playback, you can adjust the output volume using the onboard volume knob. If you plug headphones into the TRRS headphone jack, the stereo speakers will be automatically muted, and audio will be routed to the headphones.
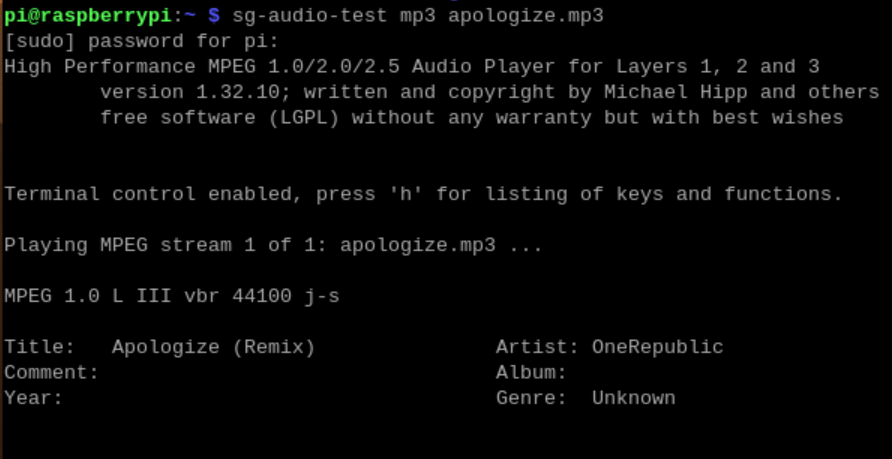
You can also use the following command to play a WAV file through the mono speaker:
sg-audio-test spk ruyuan.wav
(You can replace it with any other WAV file.)
To adjust the mono speaker volume, open another terminal and use the command:
sg-audio volume spk 55
The volume range is 0 to 63.

2.2.3. Recording Test
Note: The onboard microphones are disabled when a headset with a microphone is plugged into the TRRS jack. The recording input will automatically switch to the headset's microphone.
Headset Microphone Recording:
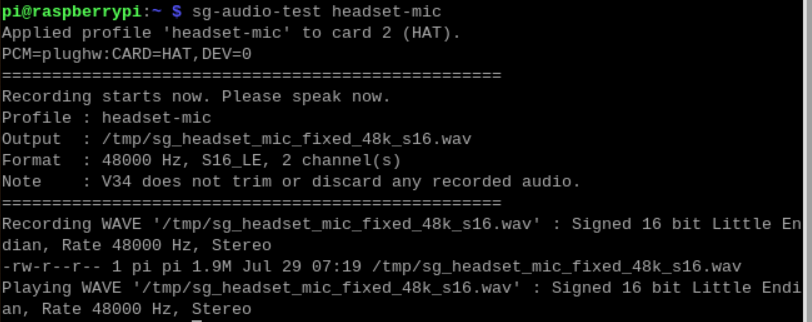
Plug in a CTIA-compatible headset with a microphone, then run the following command to test headset microphone recording:
sg-audio-test headset-mic
This command will record audio for 10 seconds, then automatically play back the recorded audio.
- Onboard Microphone Recording:
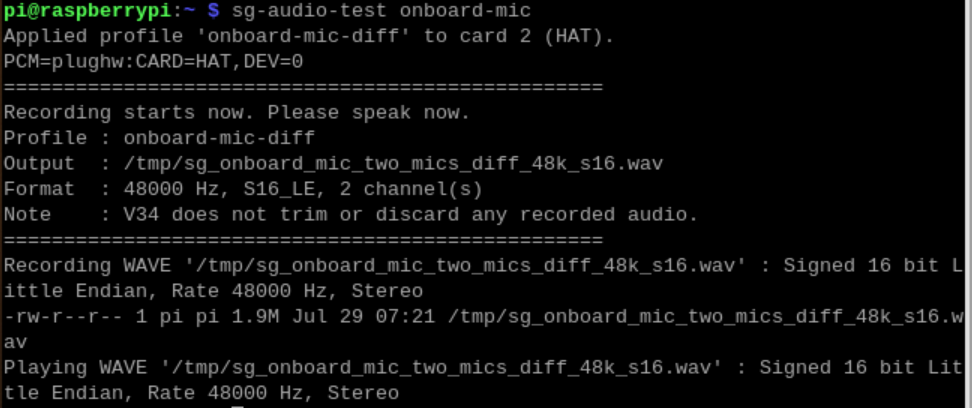
Unplug any headset from the TRRS jack, then run the following command to test onboard microphone recording:
sg-audio-test onboard-mic
This command will record audio for 10 seconds using the onboard microphones, then automatically play back the recorded audio.
- AUX Input Recording:
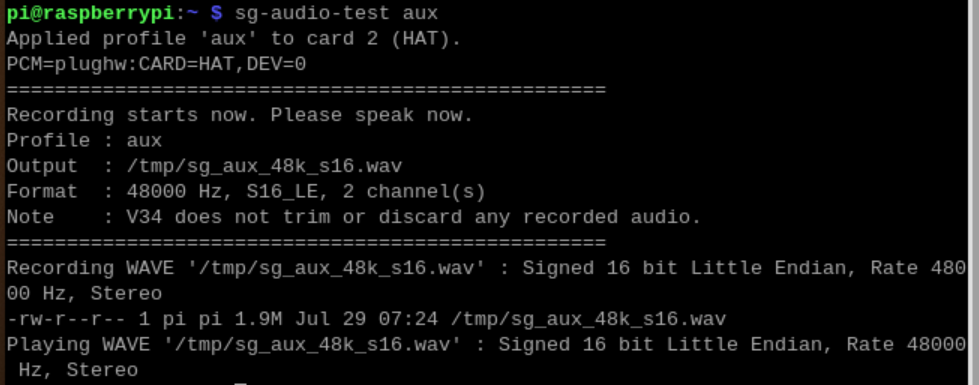
Connect an AUX audio cable to the AUX IN jack, and play audio from the other end (e.g., from a computer or smartphone). On the Raspberry Pi side, run the following command:
sg-audio-test aux
This command will record the AUX input for 10 seconds, then automatically play back the recorded audio.
- Extended Duration Recording:
If you need to record for a different duration, you can set the SG_AUDIO_RECORD_SECONDS environment variable before running the command. For example, to set the recording time to 36000 seconds (10 hours):
Onboard Mic Recording:SG_AUDIO_RECORD_SECONDS=36000 sg-audio-test onboard-mic
AUX Recording:SG_AUDIO_RECORD_SECONDS=36000 sg-audio-test aux
Headset Mic Recording:SG_AUDIO_RECORD_SECONDS=36000 sg-audio-test headset-mic
During the recording process, press Ctrl+C to stop recording early. The recorded audio files will be saved in the /tmp/ directory:
- Onboard Mic:
/tmp/sg_onboard_mic_two_mics_diff_48k_s16.wav - AUX:
/tmp/sg_aux_48k_s16.wav - Headset Mic:
/tmp/sg_headset_mic_fixed_48k_s16.wav
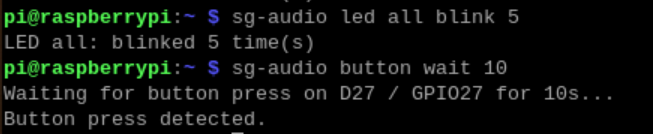
2.2.4. LED and Button Test
- LED Test:
Run the following command to test the two onboard LEDs (D1 - Green, D2 - Blue):
sg-audio led all blink 5
During the command execution, both LEDs will blink simultaneously 5 times and then turn off.
- Button Test:
Run the following command to test the user button on the right side of the board:
sg-audio button wait 10
During the 10-second wait period, pressing the button will display a confirmation message indicating that the button has been pressed.
2.2.5. Test Commands
For more test commands, please refer to Table 2-1 and Table 2-2 below.
| Command | Function | Output / Notes |
| sg-audio-test hp [file.wav] | Headphone Playback Test | Plays a built-in test WAV if no file is specified. |
| sg-audio-test spk <file.wav> | DA7212 Direct SPK WAV Playback Test | Automatically switches to SPK profile and plays the specified WAV file. |
| sg-audio-test play [file.wav] | Playback Test Alias | Same logic as hp/play. |
| sg-audio-test mp3 <file.mp3> | MP3 Playback Test | Requires mpg123. |
| sg-audio-test aux | AUX Recording and Playback | /tmp/sg_aux_48k_s16.wav |
| sg-audio-test headset-mic | Headset MIC Recording and Playback | /tmp/sg_headset_mic_fixed_48k_s16.wav |
| sg-audio-test headset-compare | Continuous Recording (2 Headset MIC Modes) | Generates fixed/ref two files. |
| sg-audio-test onboard-mic | Dual Onboard MIC Recording and Playback | /tmp/sg_onboard_mic_two_mics_diff_48k_s16.wav |
| sg-audio-test leds | LED Blink Test | Tests Green, Blue, and All LEDs. |
| sg-audio-test button [seconds] | Button Wait Test | Default wait is 10 seconds. |
| sg-audio-test capture-info | Capture Debug Information | Shows sound card, devices, hw_params, asound.conf. |
sg-audio command
| Command | Function |
| sg-audio status | Show sound card, devices, GPIO, overlay, and default ALSA configuration. |
| sg-audio card | Output the DA7212 digital sound card number. |
| sg-audio card-id | Output the DA7212 ALSA card ID. |
| sg-audio pcm | Output plughw:CARD=<id>,DEV=0. |
| sg-audio hp | Apply headphone playback profile. |
| sg-audio headset-mic | Apply headset MIC correction profile. |
| sg-audio aux | Apply AUX input profile. |
| sg-audio onboard-mic | Apply dual onboard MIC differential/summing profile. |
| sg-audio spk | Apply mono speaker / DA7212 SPK direct output profile. |
| sg-audio speakers | Apply stereo speaker (external amplifier) profile. |
| sg-audio all | Apply all input and output profiles. |
| sg-audio controls | List mixer controls. |
| sg-audio volume hp|spk|dac|mic1|mic2|aux|adc <value> | Adjust common playback volume, SPK direct volume, or recording gain. |
| sg-audio volume spk <0-63> | Adjust DA7212 direct SPK / Lineout Volume. |
| sg-audio set-default | Set DA7212 as the default ALSA device. |
| sg-audio unset-default | Remove DA7212 as the default ALSA device configuration. |
| sg-audio led <green|blue|all> <on|off|blink|toggle> [count] | LED control. |
| sg-audio button [status|wait <seconds>] | Read button status or wait for button press. |
Ⅲ. Resources
3.1. Schematic Diagram
3.2. Test Driver