I. Description
1.1 Product Overview
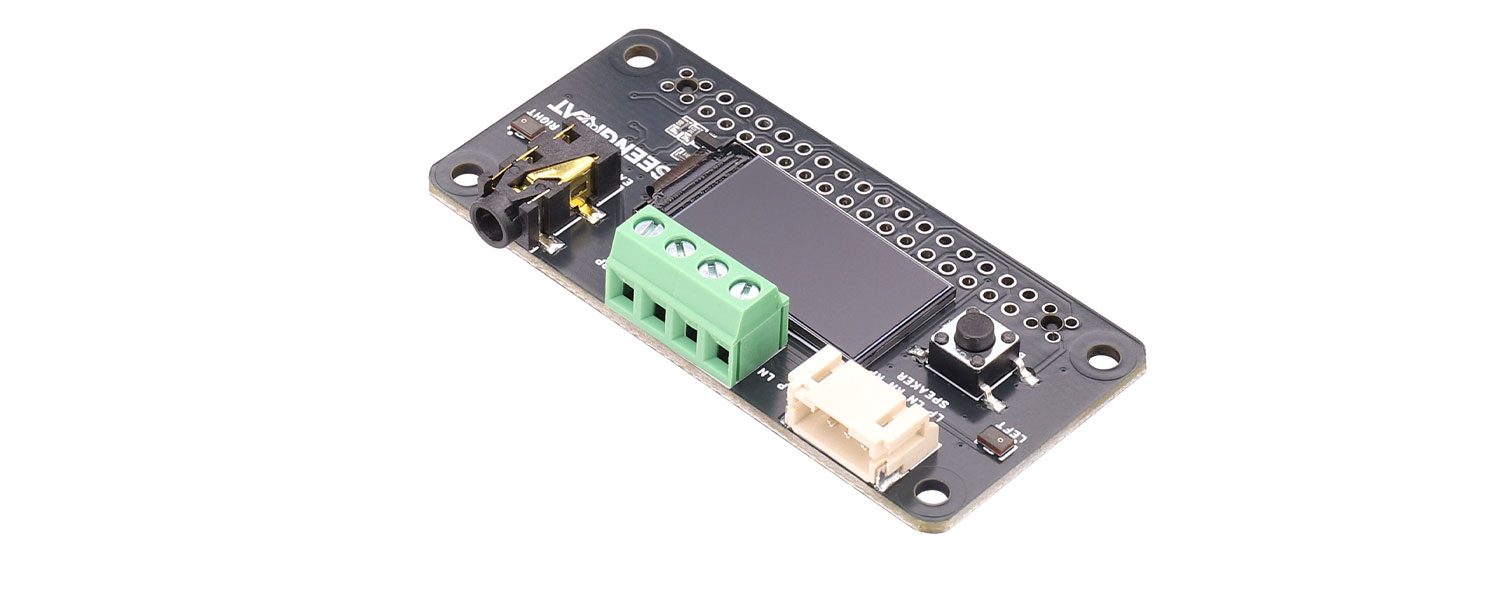
The WM8960 Stereo Audio Codec LCD HAT is a stereo codec expansion board developed for the Raspberry Pi series. Powered by the high‑performance WM8960 codec, it supports bidirectional audio functions including playback and recording. It can directly drive speakers to play music with clear, transparent stereo sound, making it suitable for a wide range of scenarios such as audio playback and audio acquisition. The board integrates a highly compatible 3.5 mm headphone jack and onboard microphones, enabling plug‑and‑play operation without extra peripherals. In addition, a 0.96‑inch OLED display provides visual status feedback for intuitive use. With a 40‑pin female header fully compatible with Raspberry Pi boards, it expands audio functionality without complex wiring. It is suitable for maker projects, smart hardware prototypes, teaching experiments, and audio device modifications—providing a stable and reliable audio solution.
1.2 Product Features
· High‑Performance Codec Core: Equipped with the professional WM8960 audio chip, supporting stereo ADC/DAC with excellent sampling and sound quality. Supports stereo and 3D surround effects, and meets bidirectional requirements for both playback and recording in multi‑scenario audio processing.
· Fully Integrated Audio Interfaces: Onboard standard 3.5 mm headphone output, two high‑quality MEMS silicon microphones, and dual‑channel speaker connectors. Speakers can be driven directly without additional peripherals, simplifying wiring and enabling out‑of‑box capture and playback.
· Intuitive Visual Display: A 0.96‑inch OLED shows real‑time operating status with clear feedback.
· 40‑Pin Raspberry Pi Header: Onboard 40‑pin female header matches the Raspberry Pi GPIO header for plug‑and‑play installation without complex soldering or jumpers, enabling fast audio expansion.
· Multi‑Scenario Compatibility: Suitable for smart voice assistants, audio recorders, portable players, maker experiments, and teaching demonstrations, balancing stability and flexibility.
1.3 Specifications
Item | Specification |
Model | WM8960 Audio Codec LCD HAT |
Supply Voltage | 5V |
Logic Voltage | 3.3V |
Display Control Interface | SPI |
WM8960 Control Interface | I2C |
Audio Interface | I2S |
Headphone Driver | 40 mW (16Ω @ 3.3V) |
Speaker Driver | Up to 1 W per channel (8Ω BTL) |
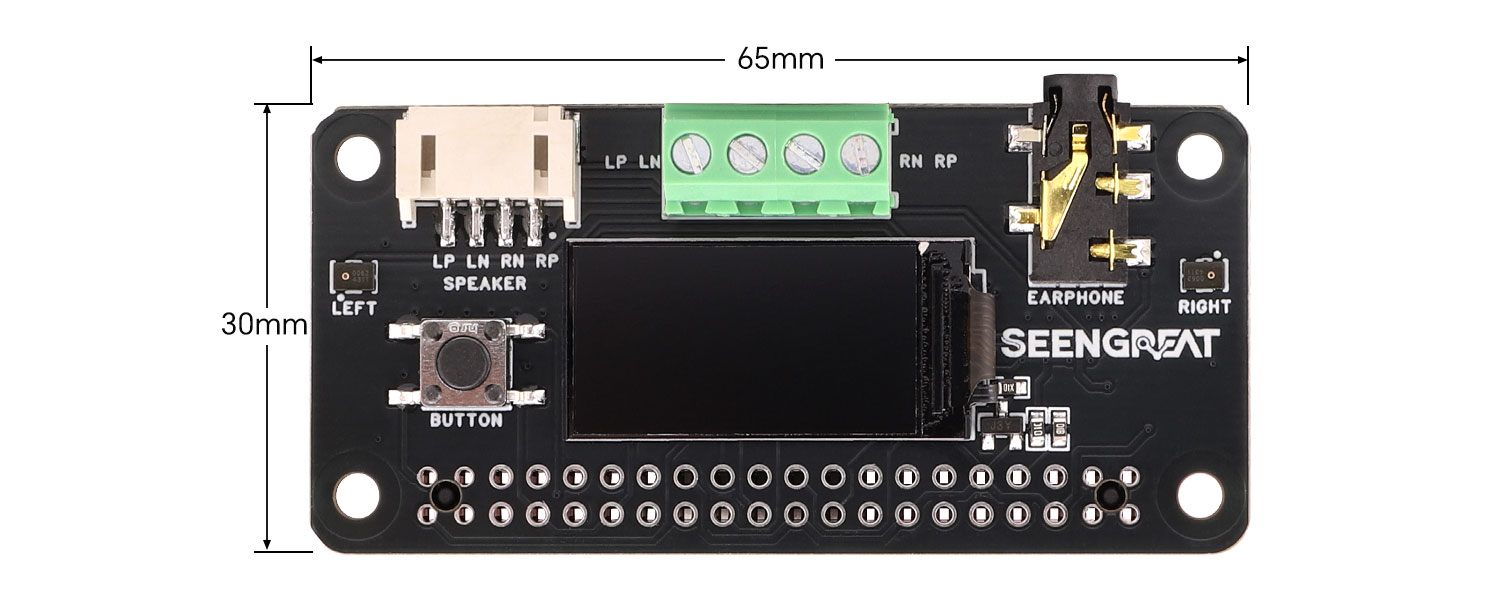
Dimensions | 65 mm × 30 mm |
II. Usage
2.1 Resource Overview
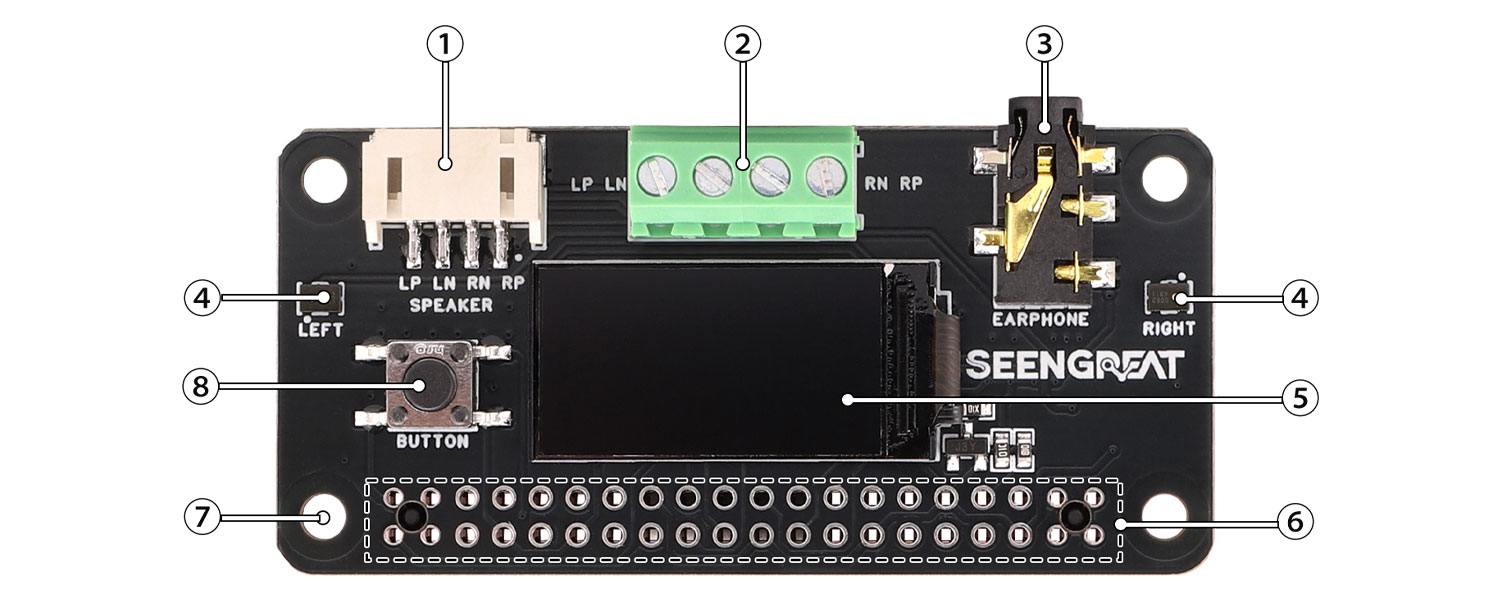
①&② Dual-channel speaker connectors: each channel can drive a 1W (8Ω BTL) speaker.
③ 3.5 mm headphone jack.
④ High-quality MEMS microphones: support stereo recording with better sound quality.
⑤ 0.96-inch OLED display.
⑥ Raspberry Pi 40-pin female header (through-hole).
⑦ M2.5 mounting holes.
⑧ User button.
Notes
· To use the audio functions of the expansion board, you need to disable/mask the Raspberry Pi's default audio.
· The board supports recording and playback simultaneously. After running the program, you will hear the microphone-captured sound through headphones or speakers. Do not place/operate the speaker too close to the microphone, otherwise acoustic feedback may occur and cause howling/squealing.
2.2 Usage Notes
Taking Raspberry Pi as an example, the demo programs provided for this product are intended for the official Raspberry Pi OS. The test platform used in this document is Raspberry Pi 4B.
The system version used for testing is:
Linux raspberrypi 6.12.20+rpt-rpi-v8 #1 SMP PREEMPT Debian 1:6.12.20-1+rpt1~bpo12+1 (2025-03-19) aarch64 GNU/Linux
Note: This kernel version may be uncommon; please ensure compatibility. After booting, run `uname -a` to confirm the system version matches.
2.3 Hardware Resources (Pin Mapping)
Function Pin | Raspberry Pi Pin (BCM) | Description |
5V | 5V | 5V power input |
GND | GND | Power ground |
SDA | D2/SDA | I2C data |
SCL | D3/SCL | I2C clock |
CLK | D18 | I2S bit clock input |
I2S_BCLK | D19 | I2S frame clock input |
DAC | D21 | I2S serial data output |
ADC | D20 | I2S serial data input |
BUTTON | D17 | User button (custom) |
TFT_RS | D24 | Display register select/control |
TFT_CS | D8 | Display chip select |
TFT_RST | D25 | Display reset |
TFT_BLK | D4 | Display backlight control |
SPI_MOSI | D10 | SPI MOSI (data) |
SPI_CLK | D11 | SPI clock |

2.4 Driver Installation
2.4.1 Update Package Sources
sudo apt update && sudo apt upgrade
sudo reboot
2.4.2 Disable Raspberry Pi Default Audio
To use the HAT audio functions, you need to disable the Raspberry Pi's default audio. Open the configuration file:
sudo nano /boot/firmware/config.txtFind the line `dtparam=audio=on` and comment it out by adding `#` at the beginning, i.e. change it to `#dtparam=audio=on`.
After editing, press Ctrl+X, then input Y to save and exit.
2.4.3 Download the Driver
Run the following command to download the driver:
wget https://seengreat.com/upload/file/137WM8960/wm8960-driver.zip2.4.4 Install the Driver
Enter the directory containing `install.sh`, grant execute permission, and run the script:
chmod 777 install.sh
sudo ./install.sh
2.4.5 Reboot and Verify Driver Loading
sudo reboot
# Wait for the system to boot
sudo dkms status
If you see output similar to the following, the driver has been loaded successfully:
wm8960-soundcard, 1.0, 4.19.58-v7l+, armv7l: installed
2.5 Recording and Playback
2.5.1 Sound Card Detection
Use the following commands to check sound card information:
cat /proc/asound/cards      # list sound cards
ls /dev/snd/ -lh            # list sound device files
`controlC0` is the control interface; `pcmC0D0P` indicates Card0 Device0 playback; `pcmC2D0C` indicates Card2 Device0 capture. One sound card can include multiple devices, each of which may have playback and capture streams.
You can also list playback and capture devices separately:
aplay -l   # playback devices
arecord -l # capture devices
2.5.2 Loopback Test (Record While Playing)
sudo arecord -f cd -D hw:2 | aplay -D hw:2 # replace with the correct card index as neededAfter running the command, you will hear the microphone audio through headphones or speakers. Do not place speakers too close to the microphones, otherwise acoustic feedback may occur (howling/squealing).
2.5.3 Recording and Playback
sudo arecord -D hw:2,0 -f S32_LE -r 16000 -c 2 test_file.wav
# test_file.wav is the recorded output filename
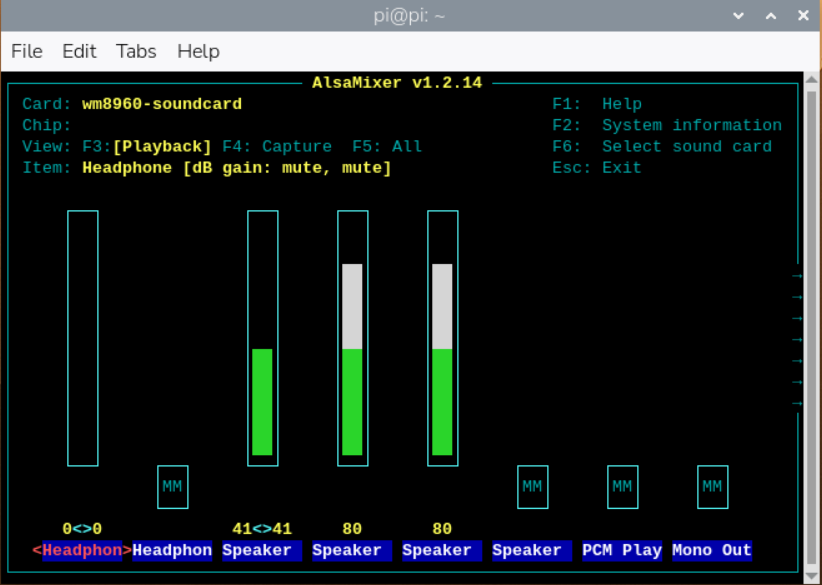
sudo aplay -D hw:2 test_file.wav # play the recorded file2.5.4 Adjust Volume
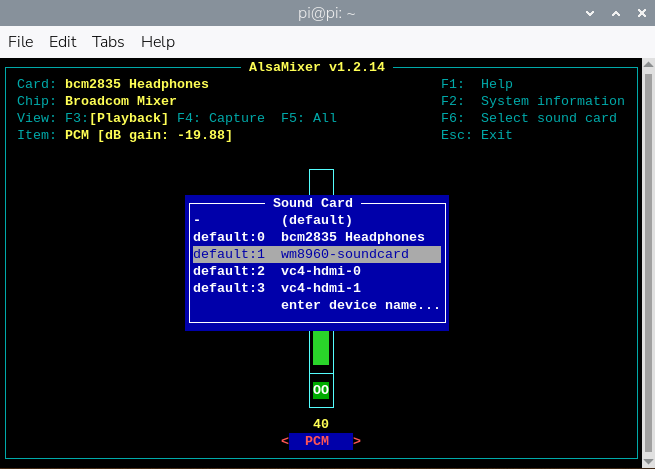
sudo alsamixerf the WM8960 sound card is not the default device, press F6 in alsamixer to select the target card. You can adjust volume and channel parameters there.
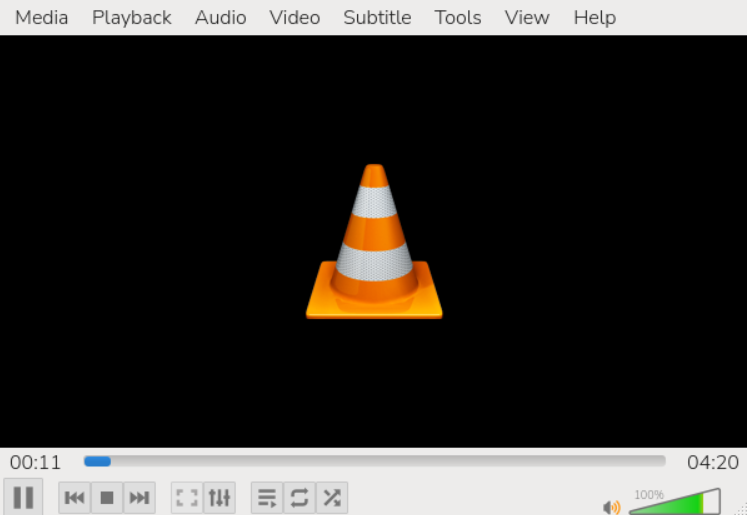
2.5.5 Install mpg123 (Optional)
Install mpg123 to support more audio playback formats:
sudo apt-get install mpg123
sudo mpg123 music.mp3   # replace music.mp3 with your file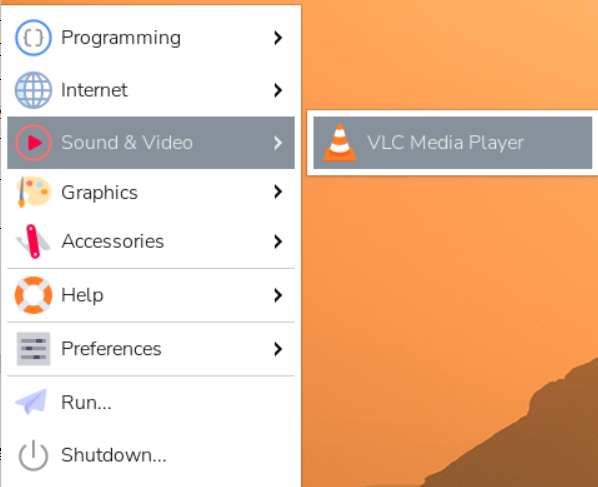
2.6 LCD Driver
2.6.1 Enable SPI on Raspberry Pi
sudo raspi-configIn the menu, select: Interfacing Options → SPI → Yes, then reboot:
sudo rebootTwo demo versions are provided: one based on the WiringPi library and one based on the lgpio library. Bullseye uses WiringPi; Bookworm uses lgpio.
2.6.2 Install WiringPi
sudo raspi-config
sudo apt-get install wiringpi
wget https://project-downloads.drogon.net/wiringpi-latest.deb
sudo dpkg -i wiringpi-latest.deb
gpio -v   # if version 2.52 appears, installation is successful
For Raspberry Pi OS Bullseye, you can also build WiringPi from source:
git clone https://github.com/WiringPi/WiringPi
cd WiringPi
./build
gpio -v
# Running gpio -v will show version 2.70; if it does not appear, it means the installation is incorrect.If you get the error 'ImportError: No module named "wiringpi"' when running the Python version example program, please run the following command.# Applicable to Python 2.x version
pip install wiringpi# Applicable to Python 3.x version
pip3 install wiringpiIf installation fails, you may try compiling WiringPi-Python:
git clone --recursive http://github.com/WitingPi/WiringPi-Python.git Note: The --recursive option can automatically pull submodules; otherwise, you need to download them manually. Enter the WiringPi Python folder you just downloaded and enter the following command to compile and install:# For Python 2.x versions
sudo python setup.py installsudo python3 setup.py installIf the following error occurs:
At this point, enter the command 'sudo apt install swig' to install swig, then compile and install with 'sudo python3 setup.py install'. If messages like the following appear, the installation was successful.

2.6.3 Install lgpio
For Raspberry Pi OS Bookworm, the demo uses the lgpio library:
wget https://github.com/joan2937/lg/archive/master.zip
unzip master.zip
cd lg-master
make
sudo make install
2.6.4 Python Demo
Enter the Python demo directory and run:
cd /home/pi/8960/lcd/lgpio/python
# or
cd /home/pi/8960/lcd/wiringpi/python
sudo python3 lcd.py
2.6.5 C Demo
Enter the C demo directory and build/run:
cd /home/pi/8960/lcd/lgpio/c
# or
cd /home/pi/8960/lcd/wiringpi/c
sudo make clean
sudo make
sudo ./main
V. Resources
• Product