ⅠInstrductions
1.1 Product Overview
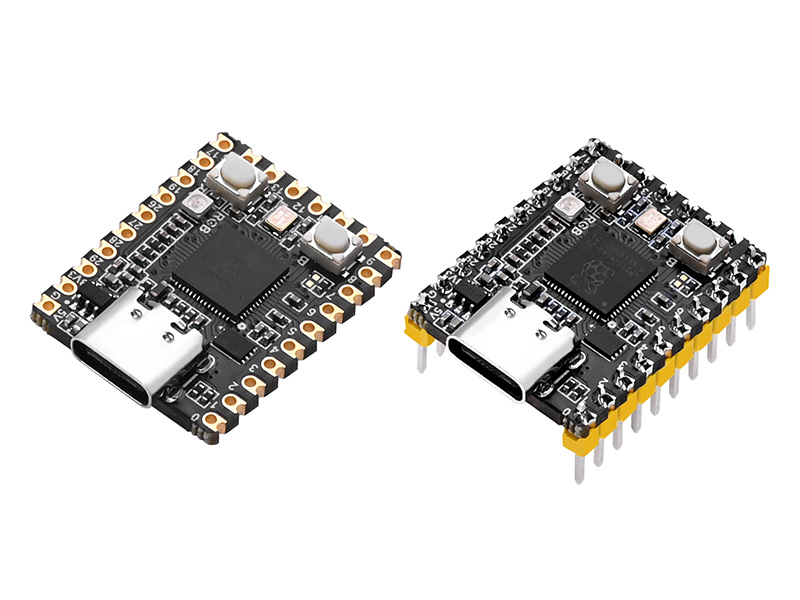
The RP2350-MINI development board is built with the RP2350A dual-core microcontroller based on the Raspberry Pi architecture. The board features a single-sided surface-mount and through-hole design, with a compact PCB size, making it highly convenient for users to directly solder and integrate into custom-designed baseboards. It also supports 2.54mm pitch header pins for easy connection to custom baseboards. The board includes a Type-C port, RGB LED, reset button, and BOOT button, providing excellent flexibility for development and debugging. This development board is ideal for maker projects, embedded system development, and DIY electronic products.
1.2 Product Features
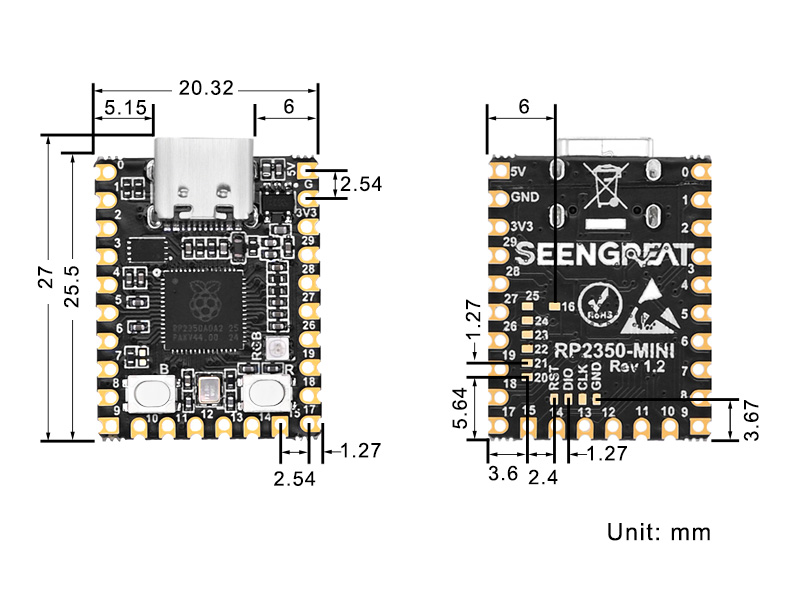
Parameter Specification Supply Voltage 5V (via Type-C port or 5V pad on the stamp hole) Dimensions 27mm (L) × 20.32mm (W) Weight 2.5g / 4.2g (with header pins soldered)
Ⅱ Usage
2.1 Resource Introduction
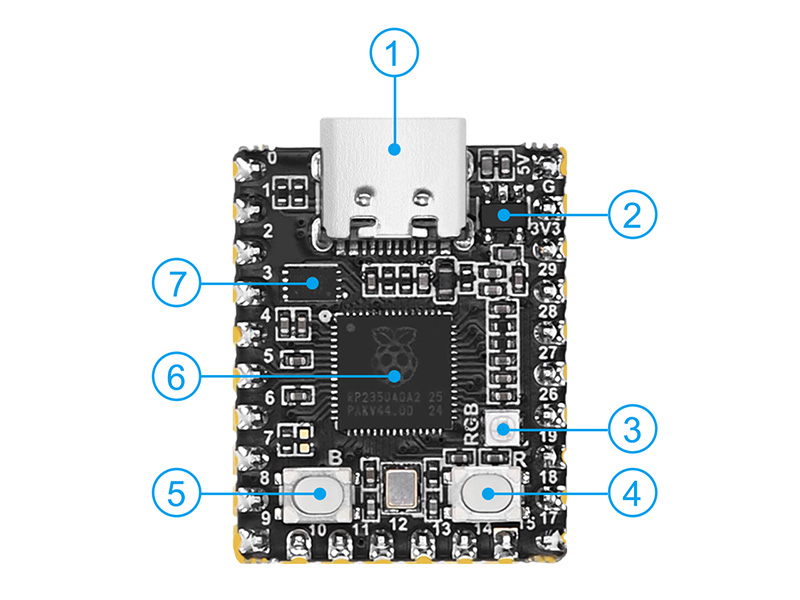
- Type-C Connector: Supports USB 1.1 host and device, can be used for program downloading.
- Linear Regulator ME6211C33M5G: Provides a 3.3V output with a maximum current output of 500mA.
- WS2812: Full-color RGB LED for visual indication.
- RUN Reset Button: Used to reset the board.
- BOOT Button: Press and hold this button while powering on to enter download mode.
- RP2350A: Dual-core Arm Cortex-M33 or dual-core Hazard3 RISC-V processor running at 150MHz.
- W25Q32RVXHJQ: 4MB Nor-Flash for storage.
2.2 Multi-function GPIO Pins
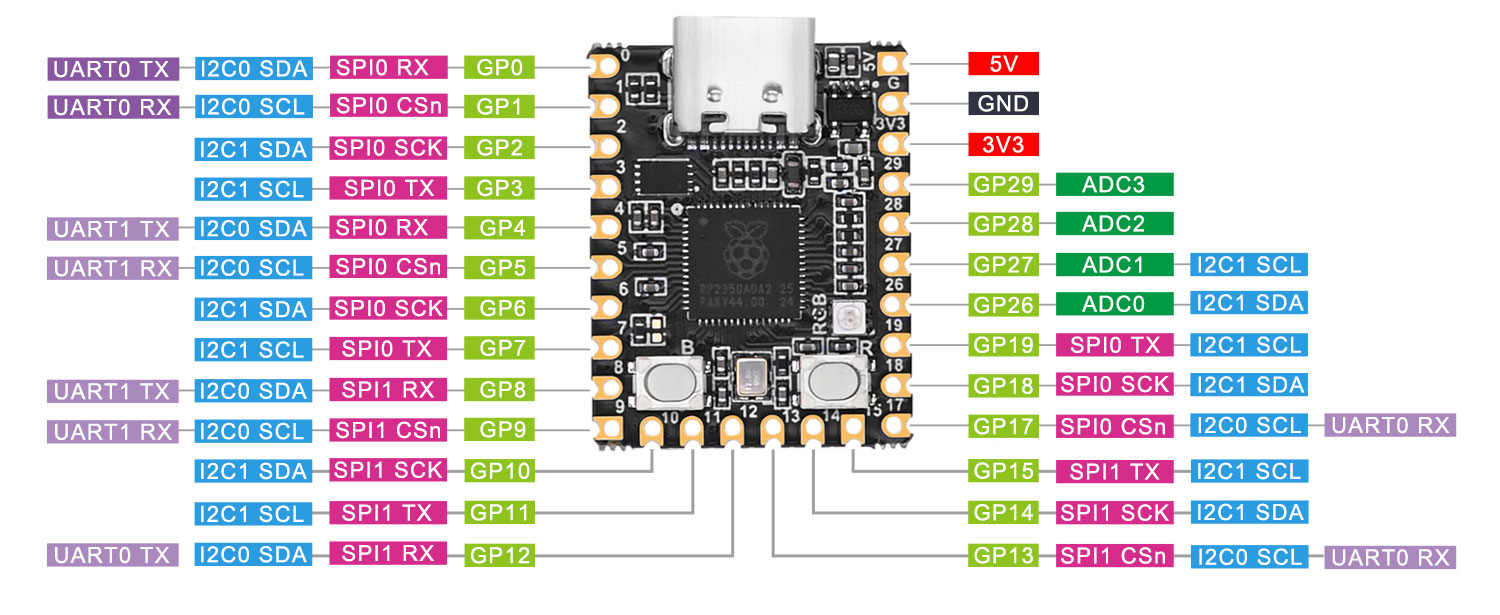
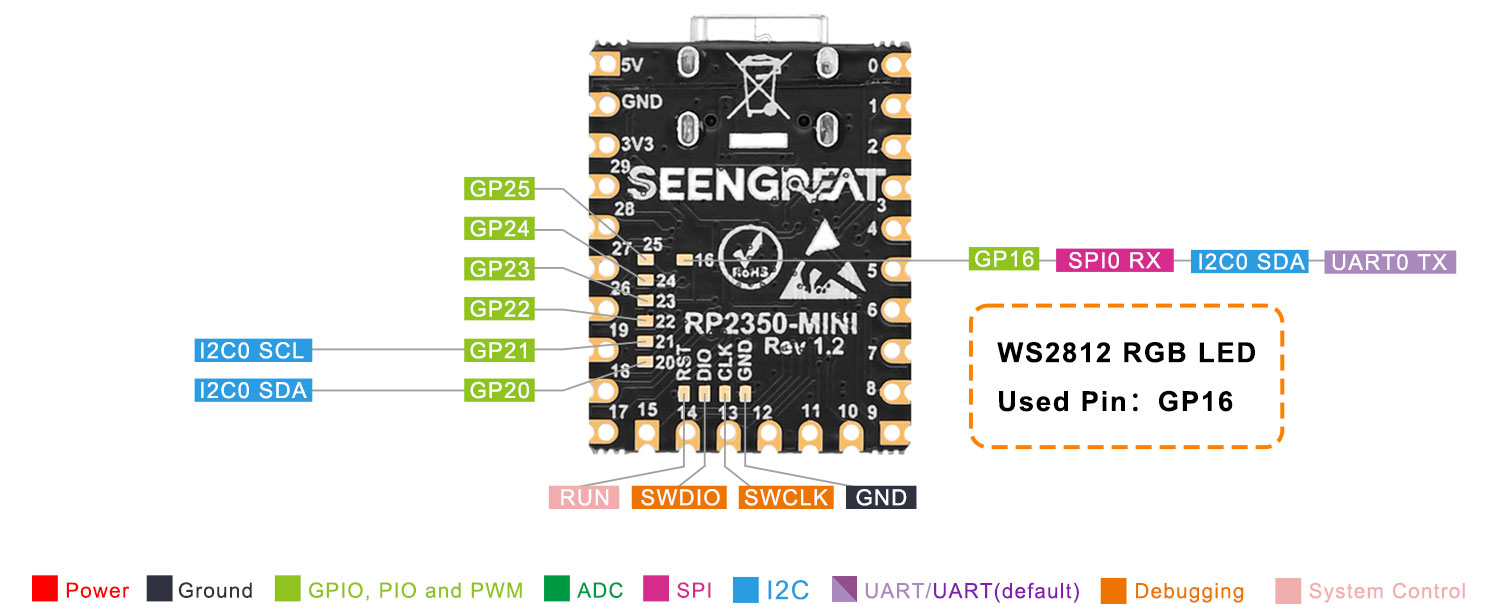
2.3 Python Example Usage
2.3.1 Install
ThonnyDownload Thonny from: https://thonny.org
2.3.2 Upload UF2 Firmware
- After installing Thonny, disconnect power from the RP2350-MINI board.
- While holding the BOOT button (refer to Figure 2-1, position ⑤) on the RP2350-MINI, connect the board to your computer via a USB cable.
- Release the BOOT button after the connection is made.
- A removable storage device labeled RP2350 will appear on your computer.
- Drag and drop the file RPI_PICO2-20241025-v1.24.0.uf2 from the demo codes directory into the RP2350 disk.If you need the latest firmware,please visit the web:https://micropython.org/download/RPI_PICO2/ to download the latest version firmware
2.3.3 Open and Run Python Script
- Right-click on ws2812.py from the demo codes directory and select Open with Thonny.
- In Thonny, go to Tools > Options > Interpreter.
- In the Interpreter field, select MicroPython (Raspberry Pi Pico).
- Set the port (COMx, where x depends on your computer's USB port number).
- Click OK to confirm the settings.
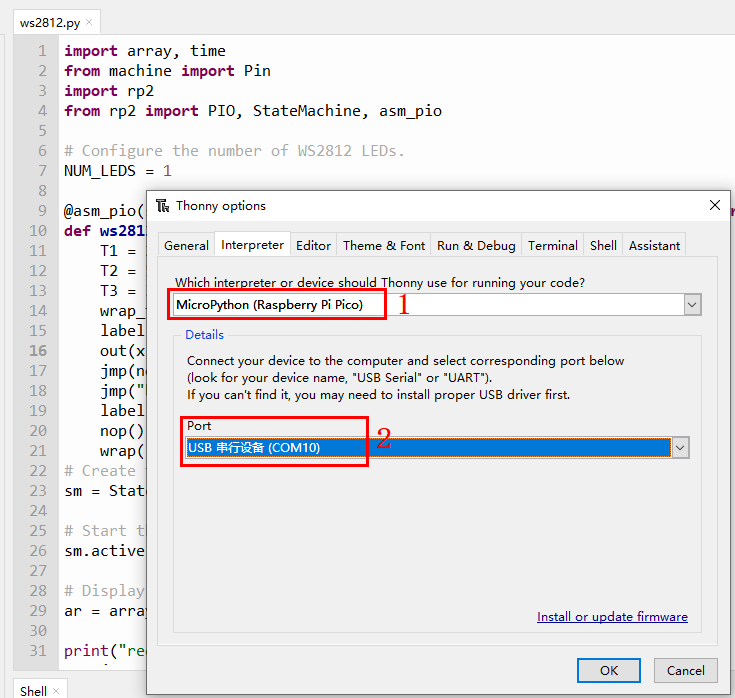
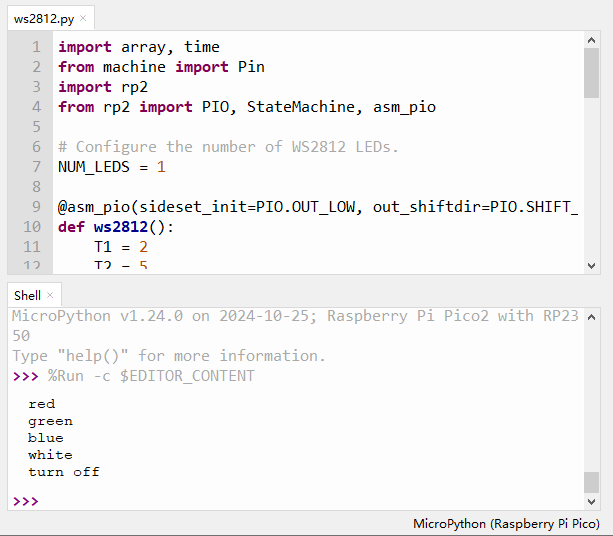
Click the "Run current script" button or press the F5 key to run the current script and view the display of WS2812.
2.4 C/C++ environment
For C/C++, it is recommended to use Pico VS Code for development. Please refer to the official tutorial provided by Raspberry Pi for the development environment https://www.raspberrypi.com/news/pico-vscode-extension/.
2.5 Arduino
1. Arduino IDE installation
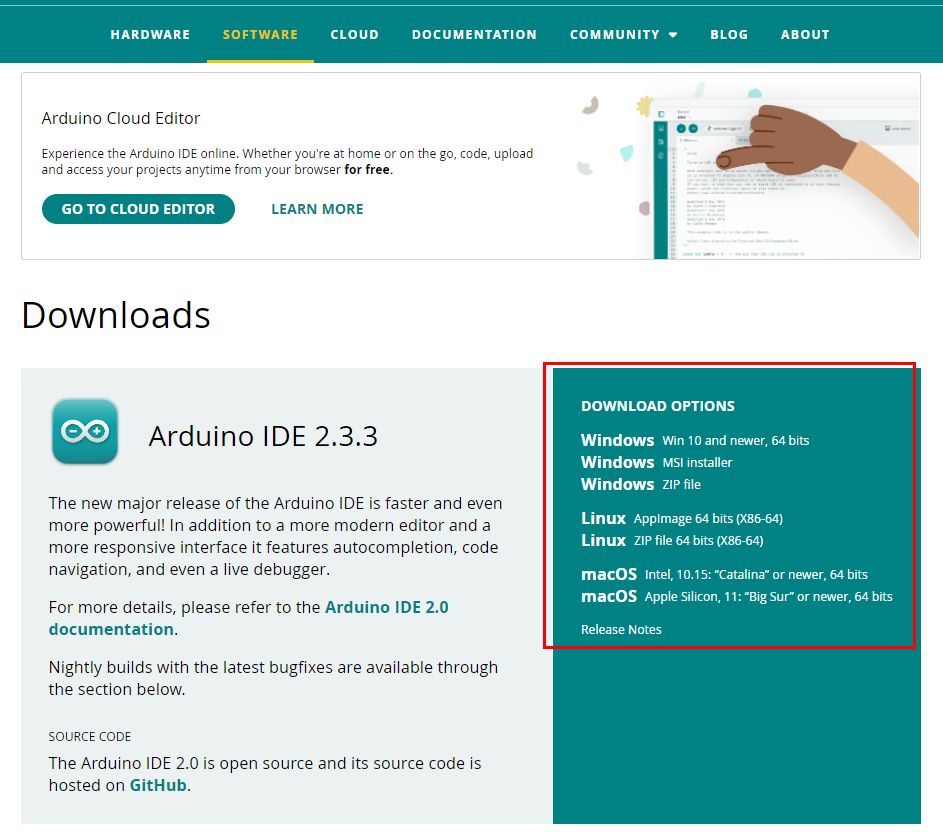
Please go to the Arduino official website to download the Arduino IDE installation package: https://www.arduino.cc/en/software, as shown in the red box in the lower right corner of Figure 2-4 below. Select the type of your computer system and click to download the corresponding installation package.
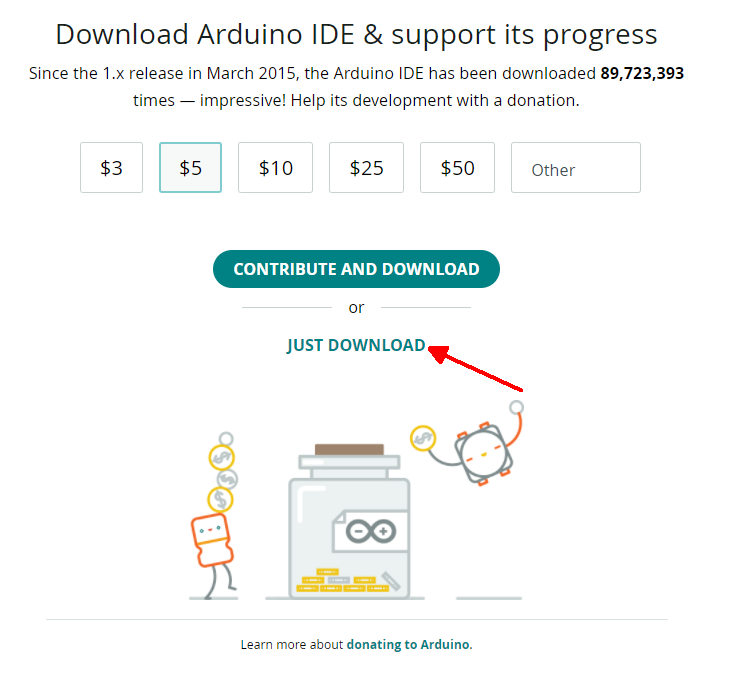
After the installation package is downloaded, install it. If there is a prompt to install the driver during the installation process, just click to install.
2. Arduino IDE configures Pico environment
Open Arduino IDE, select File->Preferences, and then click the lower right corner of the pop-up window (as shown by the red arrow in Figure 2-6 below).
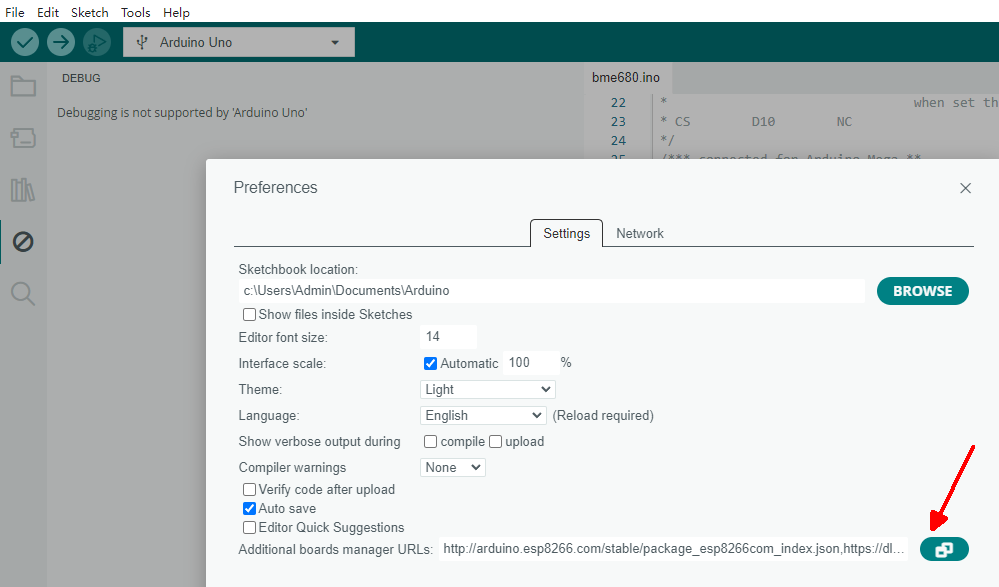
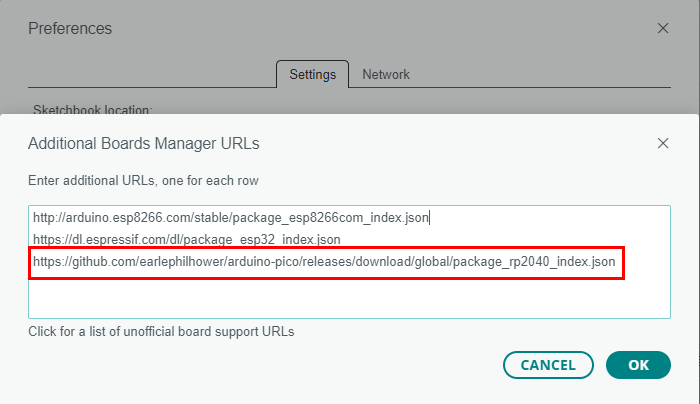
In the pop-up window, add the following content: https://github.com/earlephilhower/arduino-pico/releases/download/global/package_rp2040_index.json, as shown in the red box in Figure 2-7:
Click Tools->Board:->Boards Manager... and enter "pico". In the results that appear, find the content shown in the red box in Figure 2-8, then click the "INSTALL" button and wait for the installation to complete.
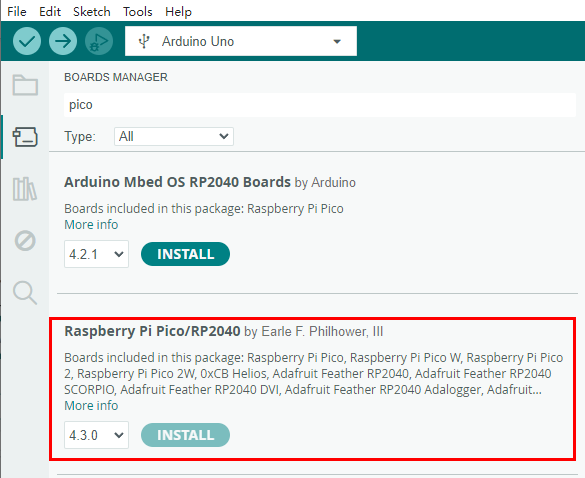
If the installation fails, you need to download the compressed package of RP2040 and copy the unzipped rp2040 folder to the following path: \Users\[username]\AppData\Local\Arduino15\packages, where [username] is the user name of the computer you are using. You can replace it according to the actual situation.
3. Download the program for the first time
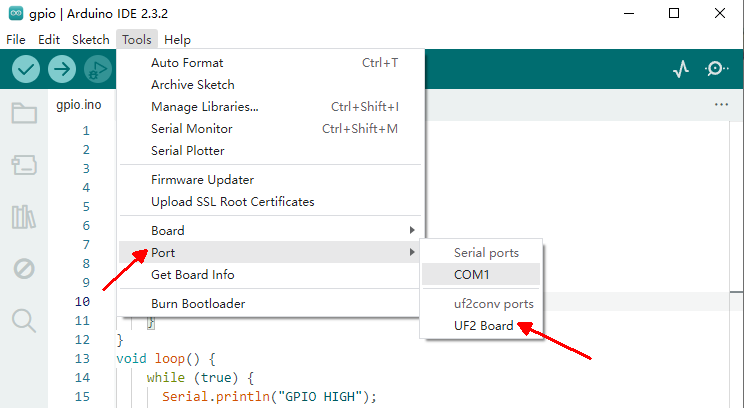
When the board is powered off, press and hold the BOOT button on the RP2350-MINI (see ⑤ in Figure 2-1), connect the computer with a USB cable and release the button. At this time, the computer pops up a disk directory of RP2350.After downloading the demo codes, double-click to open the gpio.ino file in \Arduino\gpio\, and then click Tools->Port->UF2 Board, as shown in Figure 2-9:
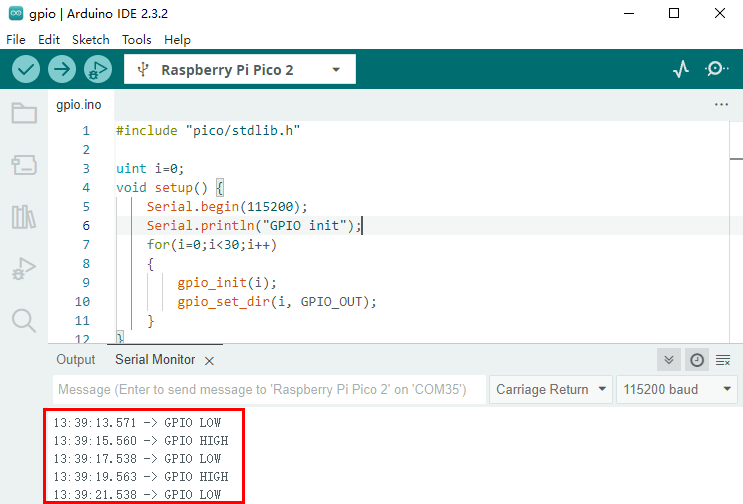
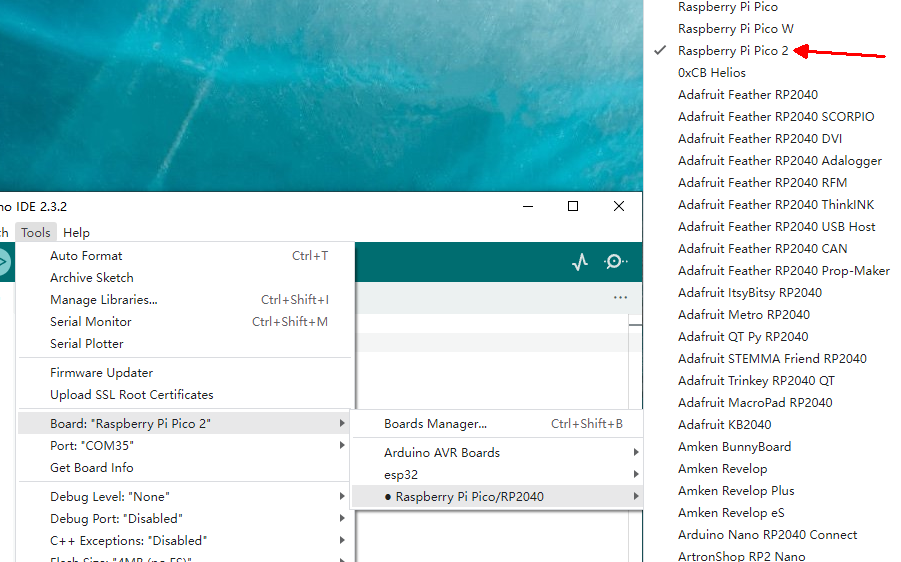
Click Tools->Board->Raspberry Pi Pico/RP2040->Raspberry Pi Pico 2, as shown in Figure 2-10, and then click the "Upload" button to upload. After the upload is completed, it will be shown in Figure 2-11.
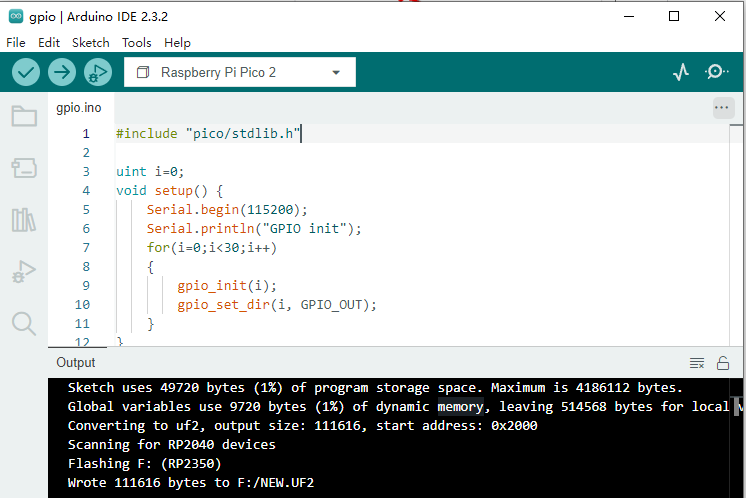
4. Run the demo codes
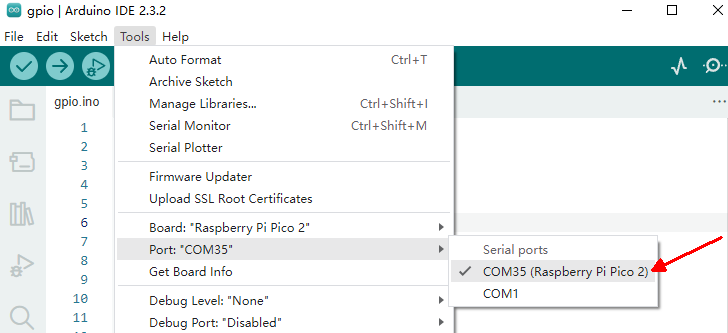
① In Thonny, go to Tools > Port > COM35 (Raspberry Pi Pico), as shown in Figure 2-12 with "COM35".
②Note that the port number (COM35) may vary depending on the board.
③If the port is not detected, try power cycling the RP2350-MINI to ensure it is properly recognized.
